Table of Contents
Advertisement
Quick Links
Advertisement
Table of Contents

Summary of Contents for 969.Coffee Globus Series
- Page 1 Serie Globus...
- Page 2 1. Introduction The espresso makers described in this manual were specifically designed to fit in rooms with any type of décor and were created for users who have special requirements as regards space. They ensure an excellent coffee yield thanks to one of the most tested dispenser units, which permits excellent quality from the first to the last coffee, thanks to its thermosyphonic circulation.
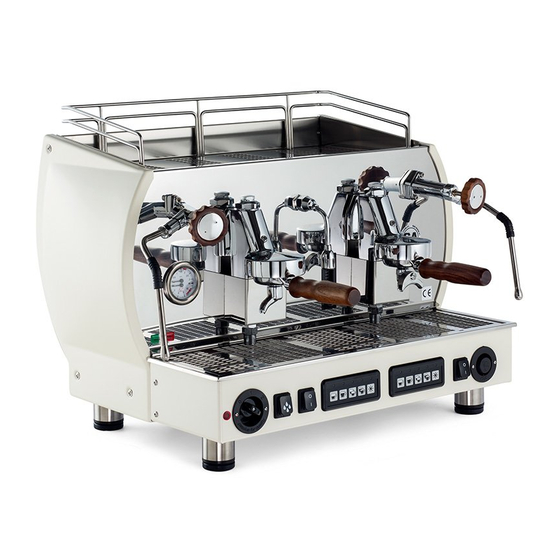
- Page 3 3. Description 1 Coffee switch 8 Group 2 Height-adjustable foot 9 Filter holder 3 Level indicator 10 Touch button panel (only electronic version) 4 Water tap 11 Pressure gauge 5 Cup tray 12 0/1 switch 6 Steam Knob 13 Hot water switch 7 Steam Wand 14 Manual filling 4.
- Page 4 Hydraulic circuit Electrical features The pump is controlled by a relay with a 10-Amp contact, whereas the solenoid valve is controlled by a relay with an 8 amp contact. The high/voltage connections of the volumetric meters and the level probe are made with 6.38mm faston connectors, whereas the connections to the push button panels and the serial transmission are made with model II AMP connectors.
- Page 5 Installation After removing the machine from its package and before the authorized technician arrives to install it: • Place it in a safe and stable position in its chosen location, making sure that: orktop is suita le for supporti g the a hi e’s eight a d is le eled a i u...
- Page 6 Electrical connections connect the cable supplied together with the espresso maker to the mains, after fitting a safety circuit breaker with suitable protection fuses in between. Hydraulic connections Make sure the water pressure does not exceed 4 atm (44 psi). If it does, install a pressure reducer which limits it to the same value or lower.
- Page 7 Hot water dispensing (to prepare hot drinks such as tea, chamomile, etc.) Check the level indicator to make sure there is enough water in the boiler. In case there is not, contact the after-sales service center. Make sure the water is hot, checking that the boiler pressure gauge indicates a pressure of approximately 0.8 to 1 bar Place the empty container under the hot water wand and press the button Warning! The steam wands, which rotate thanks to a ball joint, are located at the sides of the brew groups.
- Page 8 Periodic controls On a regular basis, i.e. every 15/20 Kg of coffee, remember to clean the water softener system in order to remove any calcium salts deposited inside (see the related manual) Cleaning To ensure both trouble-free operation of this machine and great-tasting coffee, the machine must be cleaned properly We recommend repeating the operations below at least once a day and/or after long idle periods! WARNING! Turn off the machine and unplug it before carrying out any cleaning operations!


Need help?
Do you have a question about the Globus Series and is the answer not in the manual?
Questions and answers