Table of Contents
Advertisement
Available languages
Available languages
Quick Links
Advertisement
Table of Contents

Related Manuals for 969.Coffee On Demand 50


Summary of Contents for 969.Coffee On Demand 50
- Page 1 969 - 50 ON DEMAND...
- Page 2 INDICE Premessa e avvertenze generali pag. 02 Norme per installazione pag. 02 Caratteristiche ambientali per l’utilizzo della macchina pag. 03 Norme particolari per uso e manutenzione pag. 03 Dati tecnici pag. 03 Installazione pag. 04 Messa in funzione pag. 04 Manutenzione pag.
- Page 3 sopportare, oltre ai carichi già esistenti, l’assorbimento dovuto alla macchina stessa. Dopo aver installato l’interruttore di linea con fusibili, collegare i fili del cavo della macchina all’interruttore di linea secondo gli schemi allegati. È sconsigliabile l’uso d’adattatori, prese multiple e prolunghe. Qualora fosse indispensabile, utilizzare solo adattatori semplici o multipli e, prolunghe conformi alle vigenti norme di sicurezza, prestando attenzione a non superare il limite di corrente, indicato sull’adattatore semplice e sulle prolunghe, e quello di massima potenza, indicato sull’adattatore multiplo.
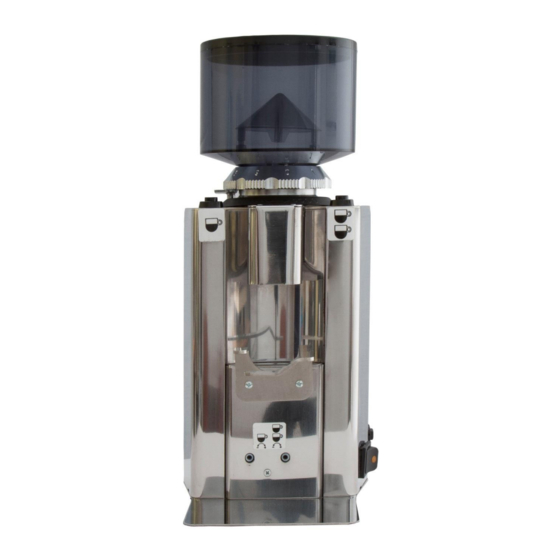
- Page 4 LEGENDA Interruttore generale Pulsante per macinatura continua Ghiera regolazione macinatura Perno bloccaggio regolazione macinatura Targhetta dati tecnici Pulsante una dose Pulsante due dosi Vite regolazione tempo di macinatura 1 porzione Vite regolazione tempo di macinatura 2 porzioni Supporto portafiltro Campana Beccuccio erogatore macinato INSTALLAZIONE Il dispositivo deve essere installato come segue da personale qualificato.
- Page 5 ATTENZIONE: Prima di effettuare qualsiasi intervento di manutenzione, assicurarsi di disconnettere dalla rete elettrica il macinadosatore. Sostituire sempre entrambe le macine. Procedura di sostituzione delle macine : Svuotare la tramoggia dal caffè presente Azionare il macinino fino all’esaurimento dei chicchi di caffè all’interno del corpo macinadosatore. Spegnere e scollegare dalla rete elettrica il macinadosatore.
-
Page 6: Table Of Contents
CONTENTS Foreword and general advice page 06 Installation rules page 06 Rules on use and maintenance page 07 Technical data page 07 Installation page 08 Use of the coffee grinder page 08 Maintenance page 08 Troubleshooting page 08 Instructions on disposal page 09 FOREWORD AND GENERAL ADVICE Read carefully the advice in this handbook as it provides important indications regarding safety during installation, use and... -
Page 7: Rules On Use And Maintenance
The Manufacturer advise against using adaptors, multiple sockets and cord extensions. If necessary, use simple or multiple adaptors only and extensions in compliance to the safety laws and regulations, making sure not to exceed power loads, indicated on simple adaptors or cord extensions, and maximum load indicated on multiple adaptors. The electrical safety of this appliance is guaranteed only if it is properly connected to an earth socket, as per the most up to date electrical safety laws and regulations. -
Page 8: Installation
INDEX Main switch Button for continuous grinding Grinding adjustment gear Grinding adjustment locking pin Technical data Button for 1 portion Button for 2 portions Adjusting screw for 1 portion Adjusting screw for 2 portions Filterholder support Hopper Ground coffee spout INSTALLATION THE APPLIANCE HAS TO BE INSTALLED BY QUALIFIED PERSONNEL IN ACCORDANCE TO THE INSTRUCTIONS HERE BELOW: Make sure that the power supply is adequate to the appliance’s power rating and voltage. -
Page 9: Troubleshooting
WARNING: Before performing any maintenance operations, make sure that the coffee grinder is unplugged. Always replace both burrs. BURRS REPLACEMENT: Set in the hopper closure; Activate the grinder until no more powder will be dispensed; Turn off and unplug the grinder; Remove the hopper by unscrewing it;... -
Page 10: Einführung Und Allgemeine Informationen
INHALTSVERZEICHNIS Einführung und Allgemeine Informationen Seite 10 Inbetriebnahme Seite 10 Eigenschaften für den Einsatz der Maschine Seite 11 Besondere Anforderungen für Nutzung und Wartung Seite 11 Technische Daten Seite 11 Installation Seite 12 Verwendung von Mahlwerk Seite 12 Wartung Seite 12 Fehlerbehebung Seite 12 EINFÜHRUNG UND ALLGEMEINE INFORMATIONEN... -
Page 11: Eigenschaften Für Den Einsatz Der Maschine
Kontrolle. Der Hersteller haftet nicht für Schäden, die durch den Mangel an Erdung des Gerätes entstehen. Um eine Überhitzung und Kabelbrand zu vermeiden, empfiehlt es sich, das Netzkabel in voller Länge auszulegen. Das Netzkabel des Gerätes darf nicht vom Benutzer ersetzt werden. Kontaktieren Sie im Fall einer Beschädigung des Kabels oder für dessen Ersetzung ausschließlich ein technisches Service-Center des Herstellers. -
Page 12: Installation
LEGENDA Hauptschalter Taste für Dauerlauf Mahlgrad Einstellungsring Mahlgrad Einstellungsring Rastbolzen Technicsche Dateien Taste für 1 Portion Taste für 2 Portionen Einstellungsschraube für 1 Portion Einstellungsschraube für 2 Portionen Siebträger Halter Trichter Gemahlenen Kaffee Auslauf INSTALLATION Das Gerät muss von qualifiziertem Personal installiert werden. ... -
Page 13: Fehlerbehebung
Mahlscheiben Ersetzung: Schritte Trichter lehren Mühle betätigen bis die Maschine frei von Bohnen ist Mühle ausschalten und vom Netz trennen Trichter ausschrauben Mit einer Hand den Rastbolzen drücken und mit der anderen Hand den Mahlgrad-Einstellungsring gegen den Uhrzeigersinn heraus schrauben.
Need help?
Do you have a question about the On Demand 50 and is the answer not in the manual?
Questions and answers