Table of Contents
Advertisement
Thank you for purchasing a Galanz product please read this manual carefully for correct usage and safety,
and keep for future reference.For service,support and warranty information,call 800-562-0738.
REFRIGERATOR INSTRUCTION MANUAL
©2019 Galanz Americas Limited Company
Model# GLR12B**D16 GLR12B**K16
@2019 Galanz Americas Limited Company .
nce,
using
rom
ted
ore
e
e
n it is
at
e for
cturing
ng.
moke
Advertisement
Table of Contents

Related Manuals for Galanz GLR12B Series


Summary of Contents for Galanz GLR12B Series
- Page 1 Thank you for purchasing a Galanz product please read this manual carefully for correct usage and safety, and keep for future reference.For service,support and warranty information,call 800-562-0738. ©2019 Galanz Americas Limited Company @2019 Galanz Americas Limited Company .
-
Page 2: Table Of Contents
CONTENT Safety Warnings ....................2 Name And Usage Of Parts ................6 Reverse and install the doors ................7 Product Introduction ..................9 Handling And Placement ..................9 Instruction For Usage ..................10 Maintenance And Cleaning ................12 Door Handle Installation ................13 How to install and remove door bin ..............14 Connect Water Supply ...................15 Usage ......................16 Ice Maker ......................16... -
Page 3: Safety Warnings
SAFETY WARNINGS 1. Children should be supervised to ensure that they do not play 9. This appliance is intended to be used in household and with the appliance. similar applications such as – staff kitchen areas in shops, offices and other working 2. - Page 4 SAFETY WARNINGS SAFETY WARNINGS To avoid contamination of food, please adhere to the following This marking indicates that this product should not be disposed instructions: of with other household waste. To prevent possible harm to – Opening the door for long periods can cause a significant the environment or human health from uncontrolled waste increase of the temperature in the compartments of the disposal, recycle it responsibly to promote the sustainable...
- Page 5 SAFETY WARNINGS It is recommended that electrical The refrigerator you purchased uses a appliances such as power outlets, power supply voltage of 120V single- regulators, microwave ovens and phase AC, with a frequency of 60HZ. It unstable items (heavy objects, must be operated with a dedicated containers containing water) socket (above 10A) and reliably...
- Page 6 SAFETY WARNINGS Strictly prohibit self dismantling Watch out for children USE METHOD AND PRECAUTIONS OF and transforming the refrigerator and make sure they don't DIFFERENT COMPARTMENTS as well as damaging the refrigerant play in the refrigerator. line of refrigerator. When it is found Besides, do not let TIPS FOR USE OF REFRIGERATOR COMPARTMENT that the refrigerant line is damaged...
-
Page 7: Name And Usage Of Parts
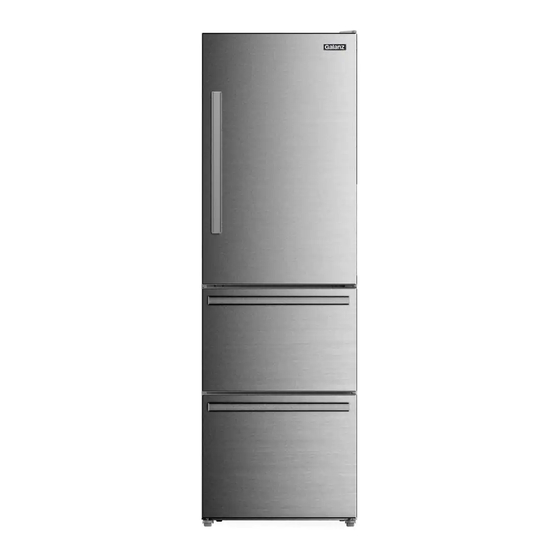
NAME AND USAGE OF PARTS The picture is for reference only. Please refer to the actual product for details. Some features and devices may not be consistent with the product you purchased. The specific structures and configuration should be based on the actual product. -
Page 8: Reverse And Install The Doors
4. Take off the 3 shelf-tapping screws, and save them. 5. Push the top hinge forward, remove the door and set it aside. and keep for future reference. For service, support and warranty i rmation, call 800-562-0738. ?2019 Galanz Americas Limited C... - Page 9 For service, support and warranty i rmation, call 800-562-0738. ?2019 Galanz Americas Limited C...
-
Page 10: Product Introduction
PRODUCT INTRODUCTION HANDLING AND PLACEMENT Refrigerator should be placed in a >10 inch dry, well ventilated place. The The refrigerator should be placed on a sides and back of the refrigerator >4 inch flat and solid surface. should be retained more than 4 inch Do not use the foam pad of the of space, and the top to retain refrigerator to make it higher. -
Page 11: Instruction For Usage
PRODUCT INTRODUCTION DANGER. Risk of child entrapment: When discarding Note: Refrigerators cannot be transported upside a refrigerator, make sure to take off the door and the down or laying flat. If they are transported incorrectly, spring action or bolt catch. Leave the shelves in refrigerators must be placed upright for 2 hours before place so that children cannot easily climb in, get they can be plugged in. - Page 12 PRODUCT INTRODUCTION Please do not rush to connect the power supply after the The amount of fresh food placed in the freezer should not stable placement and cleanness of the refrigerator. It exceed the freezing capacity listed in the technical should be stand for at least 2 hours, and then switch on the parameters of the refrigerator.
-
Page 13: Maintenance And Cleaning
PRODUCT INTRODUCTION INSTRUCTION FOR USAGE Cleaning The refrigerator should be cleaned often to avoid When the refrigerator is not in use, please open the door to unpleasant smells. prevent the bad smell from the residue of the food in the refrigerator. -
Page 14: Door Handle Installation
PRODUCT INTRODUCTION DOOR HANDLE INSTALLATION 1. Before the refrigerator door handle is installed (note: 2. Screw the locating bolt into the bolt the anchor bolts of the handle are in the accessory hole of the door body and secure it bag, and all steps should be performed at the right and left two mounting positions simultaneously. -
Page 15: How To Install And Remove Door Bin
PRODUCT INTRODUCTION HOW TO INSTALL AND REMOVE DOOR BIN Remove door bin: ← 5. Repeat the previous steps for the 2nd 1. Apply force along the arrow 2. Maintain the first step push up freezer drawer, finish installing the handle. direction to deform the right at the same time, disengage the side of the tray. -
Page 16: Connect Water Supply
CONNECT WATER SUPPLY(GLR12B**K16) What you need: 1. Basic tools:adjustable wrench,flat blade screwdriver,and water supply line Plastic water tubing Phillips TM screwdriver. to ice maker fill tube 2. Access to a household cold water line with water pressure between 20 and 120 psi. 3. -
Page 17: Usage
USAGE The ice maker is not producing ice or not Ice Maker (on some models) enough ice. After turning on your refrigerator, the ice will start to be made between 12 and 24 hours. - If it is new installation. Wait 12 to 24 hours after Power Button icemaker installation for ice production to begin. -
Page 18: Button Instruction Of Display
USAGE BUTTON INSTRUCTION OF DISPLAY THE SETTING OF THE COOLING ROOM The LED display turns bright when the door is open. Push the The below picture is a schematic diagram of an electronic 'refrigeration' button. The buzzer rings. Then the refrigerating display. -
Page 19: The Setting Of The Functions
USAGE The setting of the functions Note: In the smart mode, the temperature of cooling room and freezer room change as the change of the The LED display turns bright when the door is open. Push environmental temperature and regulate the the “function”... -
Page 20: Non-Fault Phenomenon
USAGE Long-term operation of compressor: When the refrigerator is first used, it takes a long time to work to reduce the temperature to a set value, and the compressor will run intermittently after the stable operation of refrigerator. 1.Please move the lampshade and the thermostat out 3-5mm Surface heating when the compressor is running: When the in the direction of the arrow. -
Page 21: Faults And Analysis
FAULTS AND NALYSIS ANALYSIS AND ELIMINATION OF SPECIAL Note: If detected by the above method, your PHENOMENA refrigerator is still abnormal, please contact our The refrigerator doesn't work. after-sales service department or local authorized maintenance department in time. Is the refrigerator power connected (plugs, Lighting doesn't work. -
Page 22: Technical Parameters
TECHNICAL PARAMETERS TECHNICAL PARAMETERS Model GLR12B**D16 GLR12B**K16 Anti-electric shock protection type 7.91 7.91 Fridge compartment volume (CU.FT) Freezer compartment volume (CU.FT) 4.45 4.27 Star level mark Rated voltage (V) Rated frequency (Hz) Rated current (A) < Noise [dB (A)] Refrigerant type/ Refrigerant charge R600a/1.94oz Net weight (Ibs) Temperature of fridge compartment (°F) -
Page 23: Packing List
PACKING LIST PACKING LIST Model GLR12B**K16 GLR12B**D16 Number Parts Glass shelf of refrigerating room Vegetable crisper Accessori Transparent door shelf es inside package Transparent bottle shelf Frozen door handle Freeze drawer freeze tray Ice tray Printing 1 copy 1 copy Instruction attachment We reserve the right to change parts of different models... -
Page 24: Warranty
LIMITED WARRANTY... - Page 25 WARRANTY REGISTRATION...
- Page 26 ©2019 Galanz Americas Limited Company...
Need help?
Do you have a question about the GLR12B Series and is the answer not in the manual?
Questions and answers