
Related Manuals for AEG HGB95522SM


Summary of Contents for AEG HGB95522SM
- Page 1 HGB95522SM User Manual Istruzioni per l’uso Piano cottura USER MANUAL...
-
Page 2: Table Of Contents
10. ENERGY EFFICIENCY..................18 FOR PERFECT RESULTS Thank you for choosing this AEG product. We have created it to give you impeccable performance for many years, with innovative technologies that help make life simpler – features you might not find on ordinary appliances. Please spend a few minutes reading to get the very best from it. - Page 3 ENGLISH instructions in a safe and accessible location for future reference. 1.1 Children and vulnerable people safety This appliance can be used by children aged from 8 • years and above and persons with reduced physical, sensory or mental capabilities or lack of experience and knowledge if they have been given supervision or instruction concerning the use of the appliance in a safe way and understand the hazards involved.
- Page 4 CAUTION: The appliance must not be supplied • through an external switching device, such as a timer, or connected to a circuit that is regularly switched on and off by a utility. CAUTION: The cooking process has to be supervised.
-
Page 5: Safety Instructions
ENGLISH 2. SAFETY INSTRUCTIONS • Before carrying out any operation This appliance is suitable for the make sure that the appliance is following markets: IT disconnected from the power supply. • Make sure that the parameters on the 2.1 Installation rating plate are compatible with the electrical ratings of the mains power supply. - Page 6 The isolation WARNING! device must have a contact opening Risk of fire and explosion width of minimum 3 mm. • Fats and oil when heated can release 2.3 Gas connection flammable vapours. Keep flames or heated objects away from fats and •...
-
Page 7: Installation
ENGLISH window, or more effective ventilation, • Do not use water spray and steam to for example increasing the level of clean the appliance. mechanical ventilation where present. • Clean the appliance with a moist soft • This appliance is for cooking cloth. - Page 8 Also be 2. Remove the caps and crowns of the careful when the hob is put together with burner. an oven. 3. With a screwdriver remove the iron plate from the High Power burner.
- Page 9 ENGLISH WARNING! WARNING! Pay attention not to damage Make sure to place the the gasket. Do not use sharp gasket exactly in the original tool to remove it. position. 4. With a thin screwdriver, adjust the WARNING! bypass screw position (A). Make sure the flame does not go out when you quickly turn the knob from the...
- Page 10 3.7 Assembly To prevent contact between the cable and the appliance below the hob use the clamps which are on the side of the cabinet. A. Rigid copper pipe or flexible pipe of stainless steel 3.6 Connection cable To replace the connection cable use only the special cable or its equivalent.
- Page 11 ENGLISH 3.8 Installing hob under the hood If you install the hob under a hood, please see the installation instructions of the hood for the minimum distance between the appliances. 3.9 Possibilities for insertion The panel installed below the hob must be easy to remove and let an easy access in case a technical assistance intervention is necessary.
-
Page 12: Product Description
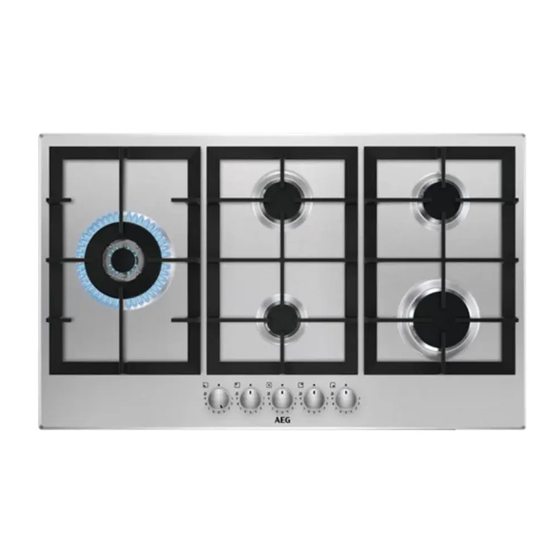
4. PRODUCT DESCRIPTION 4.1 Cooking surface layout High Power burner Semi-rapid burner Rapid burner Auxiliary burner Control knobs 4.2 Control knob Symbol Description Symbol Description minimum gas supply no gas supply / off posi‐ 1 - 9 power levels tion ignition position / maxi‐... -
Page 13: Hints And Tips
ENGLISH WARNING! If the burner accidentally Be very careful when you goes out, turn the control use open fire in the kitchen knob to the off position and environment. The try to light the burner again manufacturer declines any after minimum 1 minute. responsibility in case of the flame misuse. -
Page 14: Care And Cleaning
6.1 Cookware CAUTION! Make sure that the pots are CAUTION! placed centrally on the Do not use cast iron pans, burner in order to get the clay or earthenware pots, maximum stability and a grilling accessories or lower gas consumption. -
Page 15: Troubleshooting
ENGLISH 7.3 Cleaning the hob 2. The enamel coating occasionally can have rough edges, so be careful • Remove immediately: melted plastic, when you wash the pan supports by plastic foil, sugar and food with sugar, hand and dry them. If necessary, otherwise, the dirt can cause damage remove stubborn stains with a paste to the hob. - Page 16 Problem Possible cause Remedy Burner cap and crown are Place the burner cap and placed incorrectly. crown correctly. The flame extinguishes im‐ Thermocouple is not heated After lightning the flame, mediately after ignition. up sufficiently. keep the knob pushed for equal or less than 10 sec‐...
-
Page 17: Technical Data
ENGLISH 9. TECHNICAL DATA 9.1 Hob dimensions Width 857 mm Depth 520 mm 9.2 Bypass diameters BURNER Ø BYPASS 1/100 mm High Power burner Rapid Semi-rapid Auxiliary 9.3 Other technical data Gas original: G20 (2H) 20 mbar 13,85 kW TOTAL POWER: Gas replace‐... -
Page 18: Energy Efficiency
Rapid 0,75 Semi-rapid Auxiliary 0,33 10. ENERGY EFFICIENCY 10.1 Product information according to EU 66/2014 Model identification HGB95522SM Type of hob Built-in hob Number of gas burners Left - High Power burner 52.1% Middle rear - Semi-rapid 60,2% Energy efficiency per gas burner... - Page 19 ENGLISH product to your local recycling facility or appliances marked with the symbol contact your municipal office. with the household waste. Return the...
-
Page 20: Informazioni Di Sicurezza
10. EFFICIENZA ENERGETICA................38 PER RISULTATI PERFETTI Grazie per aver scelto di acquistare questo prodotto AEG. Lo abbiamo creato per fornirvi prestazioni impeccabili per molti anni, grazie a tecnologie innovative che vi semplificheranno la vita - funzioni che non troverete sulle normali apparecchiature. - Page 21 ITALIANO sempre le istruzioni in un luogo sicuro e accessibile per poterle consultare in futuro. 1.1 Sicurezza dei bambini e delle persone vulnerabili Questa apparecchiatura può essere usata da bambini • a partire dagli 8 anni e da adulti con limitate capacità fisiche, sensoriali o mentali o con scarsa esperienza o conoscenza sull'uso dell'apparecchiatura, solamente se sorvegliati o se istruiti relativamente all'uso...
- Page 22 AVVERTENZA: Non lasciare mai il piano di cottura • incustodito durante la preparazione di cibi in quanto olio e grassi potrebbero provocare un incendio. Non tentare MAI di spegnere un incendio con • dell'acqua; spegnere l'apparecchiatura e coprire le fiamme ad es.
-
Page 23: Istruzioni Di Sicurezza
ITALIANO AVVERTENZA: Servirsi unicamente di protezioni per il • piano cottura progettate dal produttore dell'apparecchiatura o indicate dallo stesso nelle istruzioni d'uso, ad esempio accessori idonei o le protezioni del piano cottura incorporate nell'apparecchiatura. L'uso inadeguato delle protezioni può causare incidenti. 2. - Page 24 • Assicurarsi che la protezione da • Adottare le misure necessarie per scosse elettriche sia installata. garantire una corretta circolazione • Utilizzare il morsetto fermacavo sul d'aria intorno all'apparecchiatura. cavo. • Le informazioni relative • Assicurarsi che il cavo di...
- Page 25 ITALIANO • I vapori rilasciati da un olio molto aerazione, per esempio l’apertura di caldo possono provocare una una finestra o un sistema più efficace, combustione spontanea. come l’aumento del livello di • L'olio usato, che può contenere ventilazione meccanica, ove presente. residui di cibo, può...
-
Page 26: Installazione
2.7 Smaltimento • Staccare la spina dall'alimentazione elettrica. AVVERTENZA! • Tagliare il cavo elettrico Rischio di lesioni o dell'apparecchiatura e smaltirlo. soffocamento. • Appiattire i tubi del gas esterni. • Rivolgersi all'autorità municipale per informazioni su come smaltire correttamente l'elettrodomestico. - Page 27 ITALIANO Se la pressione del gas di alimentazione AVVERTENZA! è variabile o differente da quella prevista, Al termine dell'installazione, montare un adattatore di pressione verificare la tenuta di adeguato nel tubo di alimentazione del ciascun raccordo dei tubi. gas. Usare una soluzione saponata, non una fiamma! 3.4 Regolazione del livello minimo...
- Page 28 1/4 di giro (1/2 • Collegando l'apparecchiatura a una giro per un bruciatore ad alta prolunga, adattatore o presa multipla potenza). esiste il rischio di incendio. Accertarsi 6. Rimontare la guarnizione e la che il collegamento di messa a terra manopola.
- Page 29 ITALIANO 2. Collegare il filo di colore blu (neutro) al morsetto contrassegnato dalla lettera 'N' o colorato di blu. 3. Collegare il cavo di fase marrone (tensione) al terminale contrassegnato con la lettera "L". Questo deve sempre essere collegato alla fase di rete. 3.7 Montaggio 40 mm 30 mm...
-
Page 30: Descrizione Del Prodotto
Unità da cucina con porta ATTENZIONE! Installare l'apparecchiatura min 6 mm esclusivamente su un piano di lavoro dalla superficie piatta. min 30 mm 3.8 Installazione del piano di cottura sotto la cappa da cucina min 5 mm (max 150 mm) -
Page 31: Utilizzo Quotidiano
ITALIANO 4.2 Manette de commande Simbolo Description Simbolo Description alimentazione minima del alimentazione gas assen‐ te/posizione di spento 1 - 9 livelli di potenza posizione di accensione/ alimentazione massima del gas 5. UTILIZZO QUOTIDIANO 5.2 Accensione del bruciatore AVVERTENZA! Fare riferimento ai capitoli Accendere sempre il sulla sicurezza. -
Page 32: Consigli E Suggerimenti Utili
5.3 Spegnimento del AVVERTENZA! bruciatore Non tenere la manopola di regolazione premuta per Per spegnere la fiamma, ruotare la oltre 15 secondi. Se il manopola in posizione di spento bruciatore non si accende dopo 15 secondi, rilasciare AVVERTENZA! la manopola di regolazione,... -
Page 33: Pulizia E Cura
ITALIANO 6.1 Pentole ATTENZIONE! Assicurarsi che le pentole ATTENZIONE! siano ben centrate sul Non usare pentole in ghisa, bruciatore per ottenere la teglie in terracotta o coccio, massima stabilità e per un accessori per il grill o piastre consumo ridotto di gas. tostapane. - Page 34 7.2 Supporti pentole 7.3 Pulizia del piano di cottura I supporti pentole non possono essere lavati in • Togliere immediatamente: plastica lavastoviglie. Devono essere sciolta, pellicola in plastica, zucchero lavati a mano. e alimenti con zucchero, in caso contrario la sporcizia potrebbe 1.
-
Page 35: Risoluzione Dei Problemi
ITALIANO 8. RISOLUZIONE DEI PROBLEMI AVVERTENZA! Fare riferimento ai capitoli sulla sicurezza. 8.1 Cosa fare se... Problema Causa possibile Rimedio Il gas non si accende quan‐ Il piano di cottura non è col‐ Accertarsi che il piano di cot‐ do si preme il pulsante di ac‐ legato a una fonte di alimen‐... -
Page 36: Dati Tecnici
8.3 Etichette fornite con il sacchetto degli accessori Attaccare le etichette adesive come indicato di seguito: MOD. MOD. MOD. TYPE PROD.NO. IP20 PROD.NO. PROD.NO. SER.NO. 0049 SER.NO SER.NO 03 IT DATA DATA MADE IN ITALY A. Attaccarla sul Foglietto di garanzia C. - Page 37 ITALIANO 9.3 Altri dati tecnici Gas - Origina‐ G20 (2H) 20 mbar 13,85 kW POTENZA TO‐ TALE: Gas - sostitu‐ G30 (3+) 28-30 mbar 945 g/h zione: G31 (3+) 37 mbar 929 g/h Alimentazione 220-240 V ~ 50-60 Hz elettrica: Categoria del‐...
-
Page 38: Efficienza Energetica
10. EFFICIENZA ENERGETICA 10.1 Informazioni prodotto conformi alla norma UE 66/2014 Identificativo modello HGB95522SM Tipo di piano di cottura Piano cottura a in‐ casso Numero di bruciatori a gas Sinistra - Bruciatore ad alta po‐ 52,1% tenza Posteriore centrale - Semirapido 60,2%... - Page 40 www.aeg.com/shop...
Need help?
Do you have a question about the HGB95522SM and is the answer not in the manual?
Questions and answers