Table of Contents
Advertisement
Quick Links
Advertisement
Table of Contents

Related Manuals for NEFF B47FS26G0


Summary of Contents for NEFF B47FS26G0
- Page 1 Oven [en] User manual and installation instructions B47FS26G0...
-
Page 2: Table Of Contents
en Safety ¡ Keep the instruction manual and the Table of contents product information safe for future refer- ence or for the next owner. ¡ Do not connect the appliance if it has been USER MANUAL damaged in transit. Safety .............. 2 1.2 Intended use Preventing material damage ....... -
Page 3: Safety
Safety en on the oven door, as they may scratch the Loose food remnants, fat and meat juices surface. may catch fire. The hinges on the appliance door move when ▶ Before using the appliance, remove the the door is opened and closed, which could worst of the food residues and remnants trap your fingers. -
Page 4: Preventing Material Damage
en Preventing material damage Hot liquid may spill over the sides of the ac- WARNING ‒ Risk of suffocation! cessory when it is removed from the cooking Children may put packaging material over compartment. their heads or wrap themselves up in it and ▶... -
Page 5: Environmental Protection And Saving En- Ergy
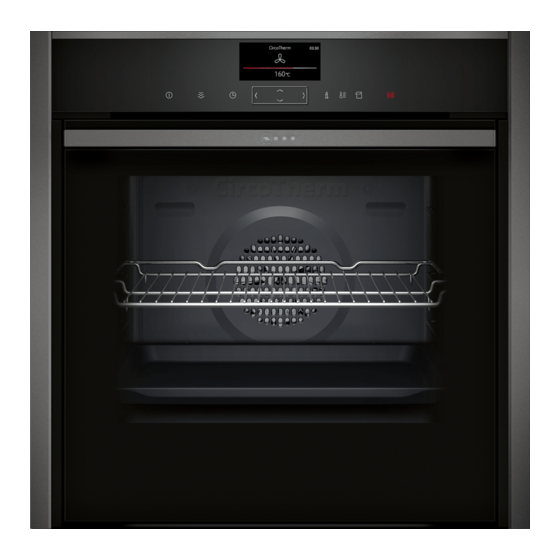
Environmental protection and saving energy en Never operate the appliance if the seal is damaged Dripping liquids make the cooking compartment floor ▶ or missing. dirty. Sitting or placing objects on the appliance door may When steaming with a perforated cooking container, ▶... - Page 6 en Familiarising yourself with your appliance 4 Familiarising yourself with your appliance 4.1 Control panel You can use the control panel to configure all functions of your appliance and to obtain information about the operat- ing status. Display Buttons Control element 4.2 Buttons The buttons are touch-sensitive areas.
-
Page 7: Familiarising Yourself With Your Appliance
Familiarising yourself with your appliance en Button Name Left Navigate to the left on the display Right Navigate to the right on the display Navigate upwards on the display Down Navigate downwards on the display 4.4 Main menu The main menu provides an overview of your appliance's functions. Press the button to open the main menu. - Page 8 en Familiarising yourself with your appliance Symbol Heating function Temperature Dough proving 2 settings For proving dough and culturing yoghurt. Dough will prove more quickly than at room temperature. The surface of the dough will not dry out. Sous-vide 50 - 95 °C For cooking meat, fish, vegetables and desserts in a vacuum at low temperatures.
-
Page 9: Accessories
Accessories en Appliance door Tank cover If you open the appliance door during operation, the Opening for filling and emptying operation stops. When you close the appliance door, the operation continues automatically. Handle for removing and inserting Water tank You need the water tank for the types of steam heating. The water tank is behind the control panel. - Page 10 en Accessories Accessories Perforated steam container, ¡ Steaming vegetables. size S ¡ Juicing berries. ¡ Defrosting. Place the steam container on the wire rack. Perforated steam container, Steaming large quantities of food. size XL Meat thermometer High-precision roasting or cooking. → "Meat probe", Page 18 5.1 Information on accessories Wire rack Insert the wire rack with the open...
-
Page 11: Before Using For The First Time
6 Before using for the first time Implement the settings for the initial configuration. Calibrate the appliance. Clean the appliance and accessories. -
Page 12: Basic Operation
en Basic operation Use the or button to select the water hardness ATTENTION! range. If there is water on the cooking compartment floor → "Before using for the first time", Page 11 when operating the appliance at temperatures Use the button to navigate back to the top row. above 120 °C, this will damage the enamel. - Page 13 Steam en 7.3 Residual heat indicator 7.6 Changing the type of heating After you have switched off the appliance, the residual If you switch to a different heating function, the appli- heat indicator will appear on the display. ance will reset all the settings. Press to pause operation.
-
Page 14: Steam
en Steam Lift the water tank and remove it from the water tank 8.3 Steam heating functions recess . Your appliance has several steam heating functions: ¡ Steam ¡ Dough proving ¡ Sous-vide ¡ Defrost ¡ Reheat Steam With the "Steam" heating function, the food is envel- oped by hot steam, which helps to retain the nutrients. - Page 15 Steam en Press any button to end the audible signal. Use the or button to set "Defrost" . Empty the water tank and dry the cooking compart- Use the button to navigate to the next row. ment. Use the or button to select the required temperat- → "After every steam operation", Page 16 ure.
- Page 16 en Steam ¡ "Keep warm" Empty the water tank, clean it with detergent and then rinse it thoroughly with clean water. Switching on steam assistance Dry all parts with a soft cloth. Fill the water tank. Rub the seal on the lid until dry. → "Filling the water tank", Page 13 Leave the water tank to dry with the lid open.
-
Page 17: Time-Setting Options
Time-setting options en Requirement: The cooking compartment must have Leave the cooking compartment to dry with the ap- cooled down. pliance door open for 1 hour. Remove limescale marks with a cloth soaked in vin- Remove any food remnants from the cooking com- egar, then wipe with clean water and dry with a soft partment. -
Page 18: Meat Probe
en Meat probe Use the or button to select the required cooking Changing the Ready at time for delayed starts time. Press . Use the button to navigate to "Ready at" . Use the button to select "Ready at" . a The time at which your food will be ready will ap- Use the or button to change the end time. - Page 19 Meat probe en Place the food with the meat probe into the cooking Other Core temperature compartment. in °C Plug the meat probe into the socket on the left-hand Meat loaf, all kinds of meat 80–90 side of the cooking compartment. (Re)heating food 65–75 Notes...
- Page 20 en Baking and roasting assistant 11 Baking and roasting assistant The baking and roasting assistant helps you to use Press . your appliance to cook various dishes by suggesting Use the or button to select the "Baking and roast- the optimal settings. ing assistant" ...
- Page 21 Childproof lock en ¡ Plaited loaf, unfilled/plaited ring 12.4 Configuring the steam program ¡ Sponge cake ¡ Joint of pork with crackling WARNING ‒ Risk of scalding! ¡ Boned pork neck joint Hot steam may escape when you open the appliance ¡ Smoked pork, boned/rolled joint door.
- Page 22 en Rapid heat-up Use the button to save your settings. Use the button to set the lock to "Deactivated". Press . a When you switch off the appliance, will appear Use the button to save your settings. on the display. 13.5 Activating the one-time childproof lock 13.3 Interrupting the automatic childproof lock...
-
Page 23: Baking And Roasting Assistant
Sabbath mode en 15 Sabbath mode You can set a cooking time of up to 74 hours using to navigate to the next row. Sabbath mode. You can use top/bottom heating to Use or to select the temperature. keep food warm between 85 °C and 140 °C during to navigate to the next row. - Page 24 en Home Connect To discard your settings, use the button to se- Use the or button to select "Favourites". ‒ lect "Discard". Use the button to select "Set favourites". Use the or button to select the required heating function. 16.3 Changing your favourites Use the button to navigate to the next row.
- Page 25 Home Connect en Basic setting Possible settings Explanation Network Connect to network If you disconnect the appliance from the network, all network Disconnect from network information will be deleted. This setting is useful if you have new login details for the router. Connect to app This setting initiates the connection between the Home Con- nect app and the appliance.
-
Page 26: Cleaning And Servicing
A detailed RED Declaration of Conformity can be found 17.7 Declaration of Conformity online at www.neff-international.com among the addi- Constructa Neff Vertriebs-GmbH hereby declares that tional documents on the product page for your appli- the appliance with Home Connect functionality meets ance. - Page 27 Cleaning and servicing en Area Suitable cleaning agents Information Door cover ¡ Made of stainless Do not use glass cleaner or a glass scraper. steel: Do not use stainless steel care products. Stainless steel cleaner Tip: Remove the door cover for thorough cleaning. ¡...
-
Page 28: Cleaning Function
en Cleaning function Requirement: Read the information on cleaning faces no longer clean themselves adequately during products. operation, heat up the cooking compartment specific- → "Cleaning products", Page 26 ally to the right temperature. Clean the appliance using hot soapy water and a ATTENTION! dish cloth. - Page 29 Cleaning function en ¡ Second rinse cycle (approx. 9–12 minutes) ATTENTION! Distilled water in the cooking compartment leads to For reasons of hygiene, the descaling programme must corrosion. be run in full. Do not use distilled water. ▶ If descaling is interrupted, you can no longer set any Mix 0.4 litres water with a drop of washing-up liquid operation.
-
Page 30: Appliance Door
en Rails a The rinse cycle will start. The duration will count a Once the rinse cycle has run through to the end, an down on the display. audible signal will sound. Empty and dry the water tank. → "Emptying the water tank", Page 16 20 ... - Page 31 Appliance door en Hold the screwdriver horizontally and use it to Insert the coin in the gap in the lock and rotate as push the door lock (black component) on each side far as it will go . of the door upwards as far as it will go ...
- Page 32 en Appliance door Rotate the door handle upwards slightly . WARNING ‒ Risk of injury! The appliance door has a weight of 7–10 kg and may fall if it is not handled carefully. Handle the appliance door carefully. ▶ The door handle is not suitable for carrying the ap- pliance door.
- Page 33 Appliance door en 21.3 Removing the door panes WARNING ‒ Risk of injury! Scratched glass in the appliance door may develop To facilitate cleaning, you can remove the door pane. into a crack. WARNING ‒ Risk of injury! Do not use any harsh or abrasive cleaners or ▶...
-
Page 34: Troubleshooting
en Troubleshooting Push down lightly on the first intermediate pane Insert the inner pane into the fixing rail at an angle around , slide the retainer in at an angle and towards the back push down until it clicks into place. Push the inner pane from above until it locks into place ... - Page 35 Troubleshooting en Fault Cause and troubleshooting Appliance will not start or cuts Malfunction out during operation. Call the after-sales service. ▶ → "Customer Service", Page 37 The appliance is not heating; Demo mode is activated in the basic settings. appears on the display. Briefly disconnect the appliance from the power supply by switching the cir- cuit breaker in the fuse box off and then on again.
-
Page 36: Disposal
Next time, set lower or higher values. ▶ Tip: A lot of information about the food preparation and corresponding set- ting values can be found on our website www.neff-international.com. 23 Disposal Find out here how to dispose of old appliances cor- This appliance is labelled in accord- rectly. -
Page 37: Customer Service
Customer Service en 24 Customer Service If you have any queries on use, are unable to rectify 24.1 Product number (E-Nr.) and production faults on the appliance yourself or if your appliance number (FD) needs to be repaired, contact Customer Service. You can find the product number (E-Nr.) and the pro- Detailed information on the warranty period and terms duction number (FD) on the appliance's rating plate. - Page 38 en How it works ¡ Place the food to be grilled directly onto the wire 25.3 Roasting, braising and grilling tips rack. ¡ The recommended settings are for fridge-temperat- ¡ To catch any liquids that drip down, place the uni- ure food and unstuffed, oven-ready poultry. versal pan into the cooking compartment at least ¡...
- Page 39 How it works en 25.7 List of foods Recommended settings for a variety of foods, sorted into food categories. Recommended settings for various types of food Food Accessories/cook- Shelf pos- Heating Temperature in Steam in- Cooking time ware ition function °C tensity in mins → Page 7 Sponge cake, 2 levels...
- Page 40 en How it works Food Accessories/cook- Shelf pos- Heating Temperature in Steam in- Cooking time ware ition function °C tensity in mins → Page 7 Bread, free-form, 1500 g Universal pan 1. 210 - 220 Added 1. 10 - 15 2. 180 - 190 steam, 2.
- Page 41 How it works en Food Accessories/cook- Shelf pos- Heating Temperature in Steam in- Cooking time ware ition function °C tensity in mins → Page 7 Joint of pork with rind, Uncovered cook- 1. 100 1. 25 - 30 e.g. shoulder, 2 kg ware ...
- Page 42 en How it works Pour the mixture into small containers, e.g. cups or Making yoghurt small jars. Remove the accessories and shelves from the Cover the containers with film, e.g. cling film. cooking compartment. Place the containers on the cooking compartment Heat 1 litre of whole milk (3.5% fat) to 90 °C on the floor.
- Page 43 How it works en Sous-vide To fill the vacuum-sealing bag, fold over the edge of the bag 3 - 4 cm from the top and place the bag Sous-vide cooking is a method of cooking in a vacuum into a receptacle such as a measuring jug. at low temperatures between 50 and 95 C and in When you fill the vacuum-sealing bag, make sure 100% steam.
- Page 44 en How it works Use scissors to open the vacuum-sealing bag. Pour ATTENTION! Risk of damage to kitchen units all the food and liquid out into the container. Do not fill the water tank a second time for the You can use the stock or marinade to make a ▶...
- Page 45 How it works en Food Accessory/cookware Heating Temperat- Cooking Tips for sous-vide cooking function ure in °C time in mins Potatoes, peeled, Wire rack 35–45 Recipe tip: Vacuum-seal quartered, 800 g along with some butter and Universal pan salt. Can easily be used for making dishes such as salad.
- Page 46 en How it works Recommended settings for proving dough Food Accessory/cookware Shelf posi- Heating Temperature in °C Cooking time tion function in mins → Page 7 Rich dough, e.g. panettone Bowl on wire rack 1. 2 1. 2 1. 40–90 Tin/dish on the wire 2.
- Page 47 How it works en 25.9 Test dishes The information in this section is provided for test institutes to facilitate testing of the appliance in accordance with EN 60350‑1. Baking ¡ The setting values apply to food that is placed into a Baking tray: Shelf position 1 cold cooking compartment.
-
Page 48: Installation Instructions
en Installation instructions Steaming ¡ Perforated steaming tray, size XL: Shelf position 2 Slide the universal pan into the cooking compartment Shelf positions when steaming on 2 levels: one level below the perforated steaming tray (size XL) if ¡ Use a maximum of 1.8 kg per level. instructed to do so in the recommended settings table. - Page 49 Installation instructions en ▶ If the power cord is too short, contact Cus- ¡ Cut-out work on the units should be carried tomer Service. out before installing the appliance. Remove ▶ Only use adapters approved by the manu- any shavings. Otherwise, the correct opera- facturer.
- Page 50 en Installation instructions 26.4 Installation underneath a hob If the appliance is installed under a hob, the following minimum dimensions must be adhered to (including substructure, if applicable). The minimum worktop thickness a is based on the required minimum clearance . Hob type a raised in mm a flush in mm...
- Page 51 Installation instructions en ¡ The appliance must only be connected using the If required, you can adjust the gap between the ap- power cable provided. pliance door and the panels using the adjustment ¡ The power cable must be plugged in at the rear of screws on the left and right.
- Page 52 en Installation instructions If required, you can adjust the height of the appli- ance door using the adjustment screws on the left and right. Turning the screws clockwise makes the gap smal- Turning the screws anti-clockwise makes the gap larger Screw the appliance into place. Open the appliance door slightly, then refit the pan- els and screw them in place, first at the top and then at the bottom.
- Page 56 Valid within Great Britain: Imported to Great Britain by BSH Home Appliances Ltd. Grand Union House Old Wolverton Road Wolverton, Milton Keynes MK12 5PT United Kingdom *9001613300* 9001613300 Constructa-Neff Vertriebs-GmbH Carl-Wery-Straße 34 010415 81739 München GERMANY...
Need help?
Do you have a question about the B47FS26G0 and is the answer not in the manual?
Questions and answers