Table of Contents
Advertisement
Quick Links
Advertisement
Table of Contents

Related Manuals for NEFF B47FS34.0B


Summary of Contents for NEFF B47FS34.0B
- Page 1 Built-in oven [en] INSTRUCTION MANUAL B47FS34.0B...
-
Page 3: Table Of Contents
Table of contents [ e n ] I N S T R U C T I O N M A N U A L Intended use ......4 Time-setting options . -
Page 4: Intended Use
Additional information on products, accessories, the age of 8 years old and by persons with replacement parts and services can be found at www.neff-international.com and in the online shop reduced physical, sensory or mental www.neff-eshop.com capabilities or by persons with a lack of... -
Page 5: Important Safety Information
Important safety information Warning – Risk of injury! (Important safety Scratched glass in the appliance door may ■ information develop into a crack. Do not use a glass scraper, sharp or abrasive cleaning aids or detergents. General information i n f o r m a t i o n I m p o r t a n t s a f e t y The hinges on the appliance door move Risk of injury! -
Page 6: Steam
Causes of damage Steam ]Causes of damage Warning – Risk of scalding! General information The water in the water tank may become ■ C a u s e s o f d a m a g e very hot if you continue to operate the Caution! appliance. -
Page 7: Steam
Environmental protection Steam 7Environmental protection Caution! Baking tins: Ovenware must be heat and steam Your new appliance is particularly energy-efficient. Here ■ resistant. Silicone baking tins are not suitable for t e c t i o n E n v i r o n m e n t a l p r o you can find tips on how to save even more energy combined operation with steam. -
Page 8: Getting To Know Your Appliance
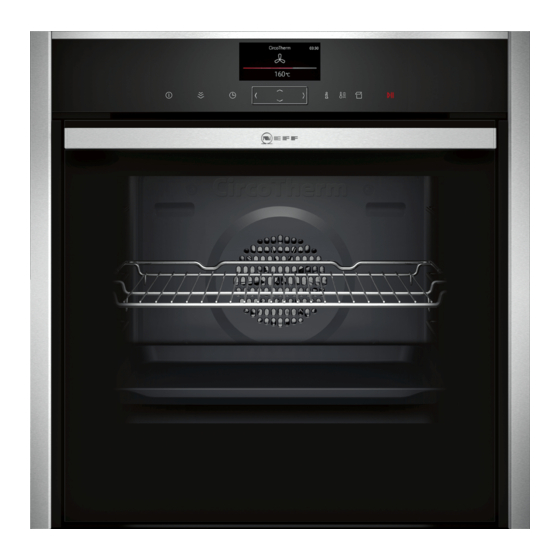
Getting to know your appliance Control panel *Getting to know your In the control panel, set the appliance's different appliance functions. The current settings are shown on the display. In this chapter, we will explain the displays and controls. y o u r a p p l i a n c e G e t t i n g t o k n o w You will also find out about the various functions of your appliance. -
Page 9: Main Menu
Getting to know your appliance Note: You can also scroll through the settings values Steam programmes ² quickly by pressing and holding a button. As soon as Preparing dishes with steam ~ "Programmes" you release the button, you stop scrolling through the on page 24 values quickly. -
Page 10: Cooking Compartment Functions
Getting to know your appliance Keeping warm * 60 - 100 °C For keeping cooked food warm. « Top/bottom heating eco 50 - 250 °C For energy-optimised cooking of selected dishes. ‘ Heat is emitted evenly from the top and bottom. CircoTherm eco 40 - 200 °C For energy-optimised cooking of selected dishes on one level without preheating. -
Page 11: Accessories
Accessories Inserting accessories _Accessories The cooking compartment has four shelf positions. The shelf positions are counted from the bottom up. Your appliance is accompanied by a range of A c c e s s o r i e s accessories. Here, you can find an overview of the Warning –... -
Page 12: Combining Accessories
Accessories Optional accessories Locking function The accessories can be pulled out approximately You can purchase optional accessories from the after- halfway until they lock in place. The locking function sales service and specialist retailers, or on the Internet. prevents the accessories from tilting when they are You will find a comprehensive range of products for pulled out. -
Page 13: Before Using For The First Time
Before using for the first time Setting the date KBefore using for the first Use the & button to navigate to the bottom line. time Use the ( or ) button to select the current day. Use the & button to navigate to the next line. Use the ( or ) button to select the current month. -
Page 14: Cleaning The Accessories
Operating the appliance After calibration, allow the appliance to heat up. 1Operating the appliance Caution! Enamel damage Do not start an operation if water is on the cooking You have already learnt about the controls and how p l i a n c e O p e r a t i n g t h e a p compartment floor. -
Page 15: Changing Or Cancelling The Appliance Operation
Operating the appliance Use the ( or ) button to select the temperature. Changing or cancelling the appliance operation Changing the appliance operation Use the # button to stop the operation. Use the & or % button to navigate to the line for the setting that should be changed. -
Page 16: Steam
Steam Activating the "Rapid heat-up" function `Steam Set top/bottom heating ƒ and the temperature. Note: Set a temperature above 100 °C to allow the Food can be cooked particularly gently using steam. appliance to preheat quickly. S t e a m With some heating modes, you can prepare food with Touch the # touch button to start the appliance steam assistance. -
Page 17: Variosteam - Steam-Assisted Cooking
Steam Finishing Cancelling steam addition Touch the # touch button to switch the appliance off. Touch the Ž touch button to cancel the addition of steam early. Menu cooking Note: The operation continues without adding steam. With steam, you can cook a whole menu at once, without the different flavours mixing. -
Page 18: Reheating
Steam Filling the water tank Starting Touch the # touch button. The water tank is located behind the control panel. Refill the water tank. Before starting an operation with steam, open the Use the ( or ) button to select "Defrost “". control panel and fill the water tank with water. -
Page 19: After Every Steam Operation
Steam Remove the cover ‚ (fig. After every steam operation Fill the water tank with cold water up to the “max.” mark (fig. Warning – Risk of scalding! When you open the appliance door, hot steam can escape. Steam may not be visible, depending on its temperature. -
Page 20: Time-Setting Options
Time-setting options Starting drying OTime-setting options During drying, the cooking compartment is heated up so that the moisture in the cooking compartment Your appliance has different time-setting options. evaporates. Then open the appliance door so that the i o n s T i m e - s e t t i n g o p t steam escapes. -
Page 21: Setting The Cooking Time
Childproof lock Setting the cooking time AChildproof lock Once the set cooking time has elapsed, the appliance switches off automatically. The function can only be Your appliance is equipped with a childproof lock so used in combination with a type of heating. C h i l d p r o o f l o c k that children cannot switch it on accidentally or change any settings. -
Page 22: One-Time Childproof Lock
Basic settings One-time childproof lock QBasic settings The control panel is locked so that the appliance cannot be switched on. To switch it on, the one-time childproof There are various settings available to you in order to lock must be deactivated. After the appliance is B a s i c s e t t i n g s help use your appliance effectively and simply. -
Page 23: Setting Favourites
Baking and roasting assistant nBaking and roasting Action after switching on Main menu Heating types assistant Steam Baking and roasting assistant The baking and roasting assistant helps you to prepare n g a s s i s t a n t B a k i n g a n d r o a s t i Steam programmes meals with ease. -
Page 24: Setting Meal
Programmes Dishes PProgrammes Baked potatoes, on two levels Lasagne, chilled You can prepare food very easily using the various P r o g r a m m e s programmes. You select a programme and enter the Roast pork weight of your food. The program then applies the most Top rump suitable settings. -
Page 25: Selecting A Dish
Programmes Selecting a dish Setting the programme The following table shows the corresponding setting You will be guided through the entire setting process for values for the listed dishes. your chosen food. Touch the # touch button to switch on the Dishes appliance. -
Page 26: Sabbath Mode
Sabbath mode FSabbath mode DCleaning agent You can set a time of up to 74 hours using Sabbath With good care and cleaning, your appliance will retain S a b b a t h m o d e C l e a n i n g a g e n t mode. -
Page 27: Surfaces In The Cooking Compartment
Cleaning agent Notes Door panels Hot soapy water: Slight differences in colour on the front of the ■ Clean with a dish cloth and then dry with a soft appliance are caused by the use of different cloth. materials, such as glass, plastic and metal. Do not use a glass scraper or a stainless steel Shadows on the door panels, which look like ■... -
Page 28: After Cleaning
Cleaning function After cleaning .Cleaning function After cleaning the door seal, check whether it is sitting correctly on the left- and right-hand side (fig. Your appliance is equipped with EcoClean, the floor C l e a n i n g f u n c t i o If the door seal is running over the spacer ‚, push the cleaning aid and a descaling function. -
Page 29: Floor Cleaning Aid
Cleaning function Starting Finishing Before setting the cleaning function, ensure that you As soon as the cleaning aid has finished, an audible have followed all instructions for preparation. signal sounds and the appliance ends the operation automatically. The duration for the cleaning function is preset to 1 hour. -
Page 30: Descaling
Cleaning function Descaling Mix 400 ml water with 200 ml liquid descaler to make a descaling solution. The appliance must be descaled regularly in order for it Touch the # touch button. to continue operating correctly. Remove the water tank and fill with descaling solution. -
Page 31: Rails
Rails Push the bar towards the back ‚ and down ƒ onto pRails the pin „ (Fig. " Ensure that the hook is hooked onto the pin „ (Fig. With good care and cleaning, your appliance will retain R a i l s its appearance and remain fully functional for a long time to come. -
Page 32: Appliance Door
Appliance door Open the appliance door a little (Fig. qAppliance door Using a coin, fully turn both the left- and right-hand locks on the inside of the appliance at the bottom (Fig. With good care and cleaning, your appliance will retain &... -
Page 33: Removing And Installing The Door Panels
Appliance door Turn the door handle upwards slightly ‚ so that the Push on the left- and right-hand side on the outside appliance door slides downwards fully ƒ (Fig. of the appliance door until the inner glass is Use a coin to release both locks on the appliance released on both sides (Fig. -
Page 34: Trouble Shooting
Trouble shooting Push the intermediate panel downwards in the ‚ 3Trouble shooting area, insert the ƒ holder at an angle and push down until it locks into place (Fig. " The holder is inserted (Fig. If a fault occurs, there is often a simple explanation. T r o u b l e s h o o t i n g Before calling the after-sales service, please refer to the fault table and attempt to correct the fault yourself. -
Page 35: Maximum Operating Time Exceeded
Trouble shooting The "Fill water tank" message The panel is open Close the panel appears even though the water tank The water tank is not clicked into place Click the water tank into place is full ~ "Steam" on page 16 Faulty sensor Call the after-sales service The water tank has fallen off. -
Page 36: Customer Service
Customer service 4Customer service JTested for you in our cooking studio Our after-sales service is there for you if your appliance C u s t o m e r s e r v i c e needs to be repaired. We will always find an Here, you can find a selection of dishes and the ideal appropriate solution, also in order to avoid after-sales u d i o... - Page 37 Tested for you in our cooking studio The baking tins must be resistant to heat and steam for Shelf positions use in steam-assisted baking. Use the indicated shelf positions. Greaseproof paper Baking on one level Only use greaseproof paper that is suitable for the When baking on one level, use the following shelf selected temperature.
- Page 38 Tested for you in our cooking studio Dish Accessories/cookware Shelf po- Type of Tempera- Steam in- Cooking sition heating ture in °C tensity time in mins. Sponge Cake (fatless), 3 eggs springform cake tin Ø26 cm 160-170* 25-35 ‚ Sponge Cake (fatless), 3 eggs springform cake tin Ø26 cm 150-160 ‚...
-
Page 39: Roasting And Braising
Tested for you in our cooking studio Dish Accessories/cookware Shelf po- Type of Tempera- Steam in- Cooking sition heating ture in °C tensity time in mins. Puff pastry slices, 2 levels 2 baking trays 170-190* 25-45 ‚ Puff pastry slices, 3 levels 3 baking trays 4+3+1 170-190*... - Page 40 Tested for you in our cooking studio Meat Braising in covered cookware Baste lean meat with fat as required or cover it with When preparing food with covered cookware, the strips of bacon. cooking compartment remains considerably cleaner. Ensure that the lid fits well and closes properly. Place Score the rind crosswise.
- Page 41 Tested for you in our cooking studio In the table, you can find specifications for poultry and Remove unused accessories from the cooking meat with default values for the weight. If you wish to compartment. This will achieve the best possible prepare heavier poultry or meat, use the lower cooking results and energy savings of up to 20 per temperature in every case.
- Page 42 Tested for you in our cooking studio Dish Accessories/cookware Shelf po- Type of Tempera- Steam in- Cooking sition heating ture in °C tensity time in mins. Duck wire rack 180-190 25+20 ‚ Duck, 2-3 kg wire rack 160-170 70-90 ‚ 170-180 30-40 Turkey, crown****...
-
Page 43: Grilling
Tested for you in our cooking studio The roast looks good but the juices Next time, use a larger roasting dish and add less liquid if necessary. are too clear and watery. The meat gets burned during brais- The roasting dish and lid must fit together well and close properly. ing. - Page 44 Tested for you in our cooking studio Steam- assisted roasting Recommended setting values Certain foodstuffs will become crispier during steam- In the table, you can find the ideal heating type for your assisted cooking. Their surface becomes glossier and poultry, meat and fish, in addition to toast. Temperature they dry out less.
- Page 45 Tested for you in our cooking studio Dish Accessories Shelf po- Type of Tempera- Steam in- Cooking time sition heating ture in °C tensity in mins. Lamb Steaks, height 2-3 cm wire rack 275* 1st side 8-10 ˆ 2nd side 4-6 Chops, height 2-3 cm wire rack 1st side 7-9...
-
Page 46: Convenience Products
Tested for you in our cooking studio Dish Accessories Shelf po- Type of Tempera- Steam in- Cooking time sition heating ture in °C tensity in mins. Turkey, thighs wire rack 180-190 35+20 ‡ Turkey, whole, 4-8 kg wire rack 140-160 12+12 ‡... - Page 47 Tested for you in our cooking studio The setting values apply to dishes placed into a cold Types of heating used: cooking compartment. By doing so, you can make ‚ CircoTherm hot air ■ energy savings of up to 20 per cent. If you preheat the ƒ...
-
Page 48: Steaming
Tested for you in our cooking studio Steaming Observe the information in the relevant paragraphs of this section: Only use original accessories. When steaming in the The heating-up time varies depending on the size ■ perforated steam container (size XL), always slide the and weight of the food universal pan in underneath as well. - Page 49 Tested for you in our cooking studio Dish Accessories/cookware Shelf po- Type of Tempera- Cooking sition heating ture in °C time in mins. Poultry Chicken breast, 150 g each steam container 15-25 ‹ Pork Pork fillet, 400 g steam container 18-20 ‹...
-
Page 50: Yogurt
Tested for you in our cooking studio Dish Accessories/cookware Shelf po- Type of Tempera- Cooking sition heating ture in °C time in mins. Cereals Couscous, 1:1 cookware, flat 6-10 ‹ Millet, whole, 1:1,25 cookware, flat 25-35 ‹ Polenta, 1:5 cookware, flat 7-10 ‹... -
Page 51: Save Energy With Eco Heating Types
Tested for you in our cooking studio Shelf positions for accessories Recommended setting values Always insert accessories in the following order: Type of heating used: Level 4: Wire rack with steam container, size S ‹ Steaming ■ ■ Level 3: Steam container, size XL ■... -
Page 52: Acrylamide In Foodstuffs
Tested for you in our cooking studio Dish Accessories/cookware Shelf po- Type of Tempera- Cooking sition heating ture in °C time in mins. Light Fruit Cake high Ø20 cm tin 150-170 70-90 ž Rich Fruit Cake high Ø23 cm tin 140-160 120-180 ž... - Page 53 Tested for you in our cooking studio Meat can be carved immediately following slow Sear the meat on the hotplate at a very high heat and cooking. No standing time is required. Due to the for a sufficiently long time on all sides, even on the special cooking method, the meat looks pink, but is not ends.
-
Page 54: Drying
Tested for you in our cooking studio Tips for slow cooking Slow-cooking duck breast. Place the cold duck breast into a pan and fry the skin side first. After slow cooking, grill for 3 to 5 minutes until crispy. The slow-cooked meat is not as hot as So that the roasted meat does not cool so quickly, warm the plates and serve the sauces very hot. -
Page 55: Sterilising Bottles And Hygiene
Tested for you in our cooking studio Vegetables: Fill the jars with the vegetables along with Then fill the perforated steam container (size XL) with hot, boiled water. the berries and insert into the oven at level 2. Slide the universal pan in underneath to collect any juice. -
Page 56: Setting
Tested for you in our cooking studio Allowing the dough to prove at dough Do not open the appliance door during the proving process, as moisture will escape. Do not cover the proving setting dough. Yeast dough will prove considerably more quickly using Final fermentation the "Dough proving"... -
Page 57: Reheating
Tested for you in our cooking studio Tip: Items which were frozen flat or portioned defrost Recommended setting values faster than those frozen in a block. The times in the table are average values. They are dependent on the quality, freezing temperature (-18 °C) Types of heating used: and composition of the food. -
Page 58: Keeping Warm
Tested for you in our cooking studio Dish Accessories/cookware Shelf posi- Type of Tempera- Cooking tion heating ture in °C time in mins. Baked goods Bread rolls, baguette, baked Wire rack 150-160* 10-20 ¨ Pastries (vol-au-vents) Wire rack 180* 4-10 ¨... - Page 59 Tested for you in our cooking studio Dish Accessory Shelf posi- Type of Tempera- Steam in- Cooking tion heating ture in °C tensity time in mins. Small cakes Baking tray 160* 20-30 ƒ Small cakes Baking tray 150* 25-35 ‚ Small cakes, 2 levels Universal pan + baking tray 150*...
- Page 60 *9000943310* 9000943310 951110...
Need help?
Do you have a question about the B47FS34.0B and is the answer not in the manual?
Questions and answers