Table of Contents
Advertisement
Quick Links
Advertisement
Table of Contents

Related Manuals for NEFF B58VT68.0B


Summary of Contents for NEFF B58VT68.0B
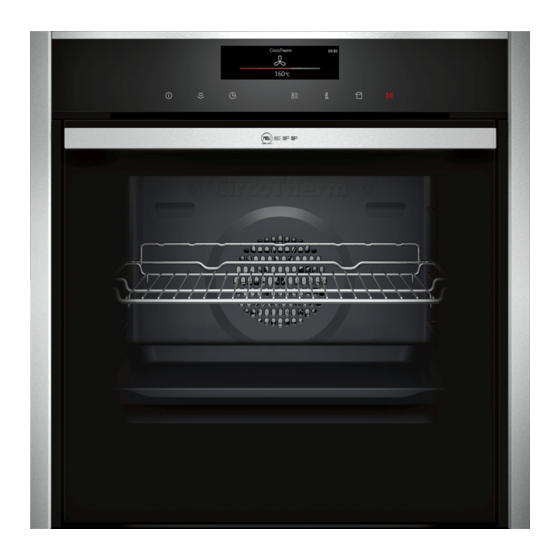
- Page 1 Oven [en] User manual and installation instructions B58VT68.0B...
-
Page 2: Table Of Contents
en Safety ¡ Keep the instruction manual and the Table of contents product information safe for future refer- ence or for the next owner. ¡ Do not connect the appliance if it has been USER MANUAL damaged in transit. Safety .............. 2 1.2 Intended use Preventing material damage ....... - Page 3 Safety en on the oven door, as they may scratch the Loose food remnants, fat and meat juices surface. may catch fire. The hinges on the appliance door move when ▶ Before using the appliance, remove the the door is opened and closed, which could worst of the food residues and remnants trap your fingers.
-
Page 4: Safety
en Safety 1.7 Cleaning function WARNING ‒ Risk of suffocation! Children may put packaging material over WARNING ‒ Risk of fire! their heads or wrap themselves up in it and Loose food remnants, fat and meat juices suffocate. may catch fire when the cleaning function is in ▶... -
Page 5: Preventing Material Damage
Preventing material damage en ▶ Keep children at a safe distance. 2 Preventing material damage If the seal is very dirty, the appliance door will no 2.1 General longer close properly during operation. This may dam- ATTENTION! age the front of adjacent kitchen units. Objects on the cooking compartment floor at over Keep the seal clean at all times. - Page 6 en Environmental protection and saving energy Use dark-coloured, black-coated or enamelled baking tins. ¡ These types of baking tin absorb the heat particu- larly well. Open the appliance door as little as possible during operation. ¡ This will maintain the temperature in the cooking compartment and eliminate the need for the appli- ance to reheat.
-
Page 7: Time-Setting Options
Familiarising yourself with your appliance en 4 Familiarising yourself with your appliance 4.1 Control panel You can use the control panel to configure all functions of your appliance and to obtain information about the operat- ing status. Display Buttons 4.2 Buttons The buttons are touch-sensitive areas. To select a function, press the corresponding button. Symbol Name On/off... - Page 8 en Familiarising yourself with your appliance 4.3 Display Direction Navigate to the left Swipe right on the display You can configure all the functions on your appliance with your finger via the display. To adjust a setting, touch the appropriate place on the Navigate to the right Swipe left on the display display with your finger.
- Page 9 Familiarising yourself with your appliance en Symbol Heating function Temperature Slow cooking 70 - 120 °C For gentle, slow cooking of seared, tender pieces of meat in ovenware without a lid. Heat is emitted evenly from above and below at a low temper- ature. Dough proving 2 settings For proving dough and culturing yoghurt.
- Page 10 en Accessories Water tank Tank cover You need the water tank for the types of steam heating. Opening for filling and emptying The water tank is behind the control panel. → "Filling the water tank", Page 14 Handle for removing and inserting 5 Accessories Use original accessories.
- Page 11 You will find a comprehensive range of products for your appliance in our brochures and online: www.neff-international.com Accessories vary from one appliance to another. When purchasing accessories, always quote the exact product number (E no.) of your appliance.
- Page 12 en Before using for the first time 6 Before using for the first time Configure the settings for initial start-up. Clean the appliance and accessories. 6.1 Before using for the first time Malfunctions may occur when using filtered or deminer- Before using the appliance for the first time, ask your alised water.
- Page 13 Basic operation en Wipe the smooth surfaces in the cooking compart- Heating up ment with a soft, damp cloth. Heating function CircoTherm hot air Press to switch the appliance on. with steam assistance → "Switching on the appliance", Page 13 , steam intensity "High" Fill the water tank.
- Page 14 en Steam a The cooling fan will continue to run until the cooking 7.10 Displaying information compartment has cooled down. Requirement: The button must be lit. Press . ▶ 7.9 Viewing the current temperature a The information will be displayed for a few seconds. You can view the current temperature while the appli- ance is heating up.
- Page 15 Steam en Swipe left or right to select the required temperat- 8.2 Refilling the water tank ure. When "Fill water tank" appears on the display, you Press to save your settings. must refill the water tank. Press to select the reheating time. Notes Swipe left or right to select the required reheating ¡...
- Page 16 en Steam Swipe right to set the steam intensity to "Off". WARNING ‒ Risk of burns! a The appliance will continue to heat but without in- The appliance becomes hot during operation. jecting steam into the cooking compartment. Allow the appliance to cool down before cleaning. ▶...
- Page 17 Time-setting options en 9 Time-setting options Your appliance has different time-setting options, with Press . which you can control its operation. Swipe left or right to select the required cooking time. Once the cooking time has been set, press 9.1 Overview of the time-setting options start.
-
Page 18: Meat Probe
en Meat probe a The end time corresponds to the current time plus a The appliance will start heating using the set cook- the set cooking time. ing time. 10 Meat probe Cook with precision by inserting the meat probe into Thick Insert the meat probe diagonally into the the food and setting a core temperature on the appli-... - Page 19 Baking and roasting assistant en 10.4 Setting the oven temperature and core WARNING ‒ Risk of burns! temperature The cooking compartment, accessories and meat probe become very hot. The meat probe measures the temperature inside the Always use oven gloves to remove hot accessor- ▶...
-
Page 20: Steam Programs
en Steam programs Press the required food. a Some food needs to be turned or stirred. An audible a The recommended settings will appear on the dis- signal will sound and a notification will appear on play. the display to let you know when it is time to turn or Note: Additional information cannot be selected for stir your food. -
Page 21: Childproof Lock
Childproof lock en a Some food needs to be turned or stirred. An audible 12.5 Extending the cooking time signal will sound and a notification will appear on Press "Extend cooking time". the display to let you know when it is time to turn or Swipe left or right to change the settings. - Page 22 en Rapid heat-up 14 Rapid heat-up You can use the "Rapid heat-up" and "PowerBoost" functions to reduce the heat-up time. Whether the appliance is preheated with the "Rapid heat-up" function or the "PowerBoost" function depends on the heating function that has been set.
-
Page 23: Basic Settings
Basic settings en 16 Basic settings You can configure the appliance to meet your needs. Basic setting Selection Fan run-on time ¡ Recommended 16.1 Overview of the basic settings ¡ Minimum Here you can find an overview of the basic settings Pull-out rail system ¡... - Page 24 en Home Connect 17 Home Connect This appliance is network-capable. Connecting your ap- 17.1 Setting up Home Connect pliance to a mobile device lets you control its functions Requirements via the Home Connect app, adjust its basic settings ¡ The appliance is connected to the power supply and and monitor its operating status.
- Page 25 17.4 Software update 17.7 Declaration of Conformity Your appliance's software can be updated using the Constructa Neff Vertriebs-GmbH hereby declares that software update function, e.g. for the purposes of op- the appliance with Home Connect functionality meets timisation, troubleshooting or security updates.
- Page 26 en Cleaning and servicing 18 Cleaning and servicing Do not use cleaning products with a high alcohol To keep your appliance working efficiently for a long ▶ content. time, it is important to clean and maintain it carefully. Do not use hard scouring pads or cleaning ▶...
- Page 27 Cleaning and servicing en Cooking compartment Area Suitable cleaning agents Information Enamel surfaces ¡ Hot soapy water Soak any heavily soiled areas and use a brush or steel wool. Leave the appliance door open to dry the cooking compartment ¡ Vinegar water after cleaning it.
-
Page 28: Cleaning Functions
en Cleaning functions 19 Cleaning functions You can use the cleaning functions to clean the appli- Note: ance. The vertical bar must be to the front of the ac- cessory supports. 19.1 Self-cleaning function The "Self-cleaning" function cleans the cooking com- partment virtually automatically. Use this cleaning function to clean the cooking com- partment every 2 to 3 months. - Page 29 Cleaning functions en Requirements Cleaning set- Cleaning Duration in hours ¡ You can only start the cleaning aid once the cooking ting level compartment is cold (room temperature) and the ap- Approx. 1:15 pliance door is closed. Medium Approx. 1:30 ¡ Do not open the appliance door while the appliance is in operation, as this will abort the cleaning aid.
- Page 30 en Cleaning functions Setting the descaling process 19.3 Descaling ATTENTION! To ensure that your appliance continues to operate cor- If descaling solution comes into contact with the control rectly, it must be descaled regularly. panel or other delicate surfaces, it will damage them. How frequently you need to run the descaling pro- Remove descaling solution immediately with water.
- Page 31 Rails en 20 Rails To thoroughly clean the rails and the cooking compart- Ensure that the hook is hooked onto the pin . ment, or to replace the rails, you can remove the rails. 20.1 Changing the shelf position for the telescopic shelf The bars and telescopic shelves can be positioned in any order.
-
Page 32: Appliance Door
en Appliance door 21 Appliance door To clean the appliance door thoroughly, you can disas- Open the appliance door approx. 45° wide. semble the appliance door. WARNING ‒ Risk of injury! If the hinges are not secured due to an incomplete lock, they can snap shut with great force. To detach or attach the appliance door, always turn ▶... - Page 33 Appliance door en ATTENTION! 21.2 Attaching the appliance door Opening and closing the appliance door when it is Tip: Ensure that the appliance door is not wedged in the lock position damages the door hinges. at an angle and that it is properly fitted in place. Never force the appliance door open or closed.
- Page 34 en Appliance door Slide the screwdriver in between the metal tab WARNING ‒ Risk of injury! and the plastic. If the door locks are unsecured, the appliance door may become detached. After attaching the appliance door, close the left- ▶ and right-hand door locks. Hold the screwdriver horizontally and use it to push the door lock (black component) on each side...
- Page 35 Appliance door en Remove the spacers and seals for cleaning, if Check the fit of the four spacers and two seals. required. Place the spacers on the centre of the lines . ‒ Secure the seals at the corners ...
-
Page 36: Troubleshooting
en Troubleshooting Push down lightly on the first intermediate pane Insert the reflector and click it into place in the around , slide the retainer in at an angle and . push down until it clicks into place. Insert the second reflector in the same way as the first. - Page 37 Troubleshooting en 22.1 Malfunctions Fault Cause and troubleshooting The appliance is not working. The circuit breaker is faulty. Check the circuit breaker in the fuse box. ▶ There has been a power cut. Check whether the lighting in your kitchen or other appliances are working. ▶...
- Page 38 en Troubleshooting Fault Cause and troubleshooting The appliance requests descaling The set water hardness range is too low. without the counter appearing in Descale the appliance. advance. → "Descaling", Page 30 Check the water hardness and set this in the basic settings. → "Basic settings", Page 23 The appliance prompts you to During the descaling, the power supply is interrupted or the appliance is rinse it.
-
Page 39: Disposal
Next time, set lower or higher values. ▶ Tip: A lot of information about the food preparation and corresponding set- ting values can be found on our website www.neff-international.com. 23 Disposal Find out here how to dispose of old appliances cor- This appliance is labelled in accord- rectly. - Page 40 en How it works 25 How it works Here, you can find the ideal settings for various types Baking on two or more levels Shelf position of food as well as the best accessories and cookware. 3 levels We have perfectly tailored these recommendations to ¡...
-
Page 41: How It Works
How it works en Roasting in cookware ¡ When grilling several food items, choose pieces that are of a similar weight and thickness. The grilled If you cover the cookware when you cook your food, food will brown evenly and will remain succulent this will keep the cooking compartment cleaner. - Page 42 en How it works Food Accessories/cook- Shelf pos- Heating Temperature in Steam in- Cooking time ware ition function °C tensity in mins → Page 8 Fruit pie Plate Ø 20 cm 160–170 55–65 Pie tin Fruit pie Plate Ø 20 cm 170–190 55–70 Pie tin Fruit pie Plate Ø 20 cm 170–190 60–75...
- Page 43 How it works en Food Accessories/cook- Shelf pos- Heating Temperature in Steam in- Cooking time ware ition function °C tensity in mins → Page 8 Complete meal with Wire rack Calculation chicken for chicken Wire rack (see table above) Complete meal with Wire rack ...
- Page 44 en How it works Recommended settings for slow cooking Food Accessory/cook- Shelf pos- Searing Heating function Temperature Cooking ware ition time in → Page 8 in °C time in mins mins Duck breast, medium Uncovered cook- 6 - 8 45 - 60 rare, 300 g each ware Fillet of pork, whole Uncovered cook-...
- Page 45 How it works en ¡ Place food that you are not reheating in cookware Tips for reheating food (e.g. bread rolls) directly onto the wire rack at ¡ Use uncovered, heat-resistant cookware that is suit- level 2. able for cooking with steam. ¡...
-
Page 46: 26.1 General Installation Instructions
en Installation instructions Food Accessories/cook- Shelf pos- Heating Temperature in Steam intens- Cooking ware ition function °C time in → Page 8 mins Small cakes, on 2 levels Universal pan 25 - 35 Baking tray Small cakes, on 3 levels x 2 4+3+1 35 - 45 Baking tray x 1 Universal pan... - Page 47 Installation instructions en ATTENTION! Carrying the appliance by the door handle could break it. The door handle cannot sup- port the weight of the appliance. ▶ Do not carry or hold the appliance by the door handle. 26.2 Appliance dimensions You will find the dimensions of the appliance here ¡...
- Page 48 en Installation instructions 26.4 Installation underneath a hob If the appliance is installed under a hob, the following minimum dimensions must be adhered to (including substructure, if applicable). The minimum worktop thickness a is based on the required minimum clearance . Hob type a raised in mm a flush in mm...
- Page 49 Installation instructions en ¡ The appliance must only be connected using the If required, you can adjust the gap between the ap- power cable provided. pliance door and the panels using the adjustment ¡ The power cable must be plugged in at the rear of screws on the left and right.
- Page 50 en Installation instructions If required, you can adjust the height of the appli- ance door using the adjustment screws on the left and right. Turning the screws clockwise makes the gap smal- Turning the screws anti-clockwise makes the gap larger Screw the appliance into place. Open the appliance door slightly, then refit the pan- els and screw them in place, first at the top and then at the bottom.
- Page 52 Valid within Great Britain: Imported to Great Britain by BSH Home Appliances Ltd. Grand Union House Old Wolverton Road Wolverton, Milton Keynes MK12 5PT United Kingdom *9001613717* 9001613717 Constructa-Neff Vertriebs-GmbH Carl-Wery-Straße 34 010421 81739 München GERMANY...
Need help?
Do you have a question about the B58VT68.0B and is the answer not in the manual?
Questions and answers