Table of Contents
Advertisement
Quick Links
Advertisement
Table of Contents

Related Manuals for NEFF B58CT68H0B


Summary of Contents for NEFF B58CT68H0B
- Page 1 BUILT-IN OVEN [en] INSTRUCTION MANUAL B58CT68H0B...
-
Page 3: Table Of Contents
Table of contents [ e n ] I N S T R U C T I O N M A N U A L Intended use ......4 Baking and roasting assistant . -
Page 4: Intended Use
Additional information on products, accessories, use this appliance indoors. replacement parts and services can be found at www.neff-international.com and in the online shop This appliance is intended for use up to a www.neff-eshop.com maximum height of 4000 metres above sea level. -
Page 5: Important Safety Information
Important safety information Water in a hot cooking compartment may Risk of scalding! (Important safety ■ create hot steam. Never pour water into the information cooking compartment when the cooking compartment is hot. G eneral information Warning – Risk of injury! I m p o r t a n t s a f e t y i n f o r m a t i o n Scratched glass in the appliance door may Warning –... -
Page 6: Cleaning Function
Causes of damage Cleaning function ]Causes of damage Warning – Risk of fire! G eneral information Loose food residues, grease and meat ■ C a u s e s o f d a m a g e juices may catch fire during the cleaning Caution! function. -
Page 7: Environmental Protection
Environmental protection Open the appliance door as infrequently as possible 7Environmental protection ■ when the appliance is in use. Y our new appliance is particularly energy-efficient. E n v i r o n m e n t a l p r o t e c t i o n Here you can find tips on how to save even more energy when using the appliance, and how to dispose of your appliance properly. -
Page 8: Getting To Know Your Appliance
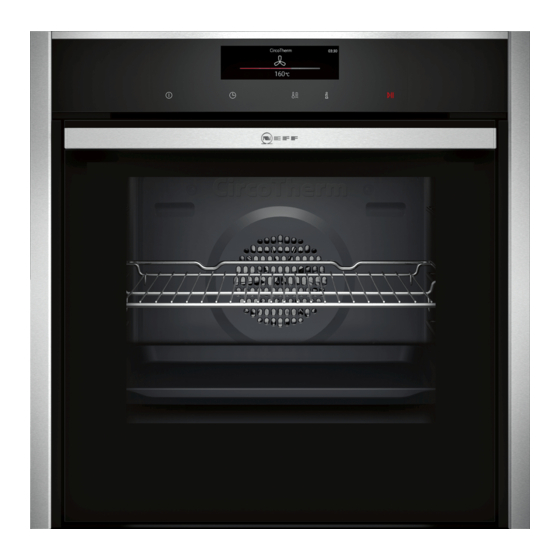
Getting to know your appliance Note: Depending on the appliance model, individual *Getting to know your details and colours may differ. appliance Control panel I n this section, we will explain the indicators and In the control panel, set your appliance's different G e t t i n g t o k n o w y o u r a p p l i a n c e controls. -
Page 9: Main Menu
Getting to know your appliance Main menu MyProfile Individually adjusting the appliance settings Touch the 0 touch button to access the main menu. ~ "Basic settings" on page 17 Menu Home Connect Assistant Types of heating ¢ Connecting your appliance to your mobile device Select the desired heating type and temperature for ~ "Basic settings"... -
Page 10: Cooking Compartment Functions
Accessories Top/bottom heating eco 50–275 °C For gently cooking selected types of food. ‘ Heat is emitted from above and below. This heating function is most effective between 150 and 250 °C. This type of heating is used to measure the energy consumption in the conven- tional mode. -
Page 11: Inserting Accessories
Accessories Inserting accessories Locking function The accessories can be pulled out approximately The cooking compartment has four shelf positions. The halfway until they lock in place. The locking function shelf positions are counted from the bottom up. prevents the accessories from tilting when they are In some appliances, the top shelf position in the pulled out. -
Page 12: Optional Accessories
Before using for the first time Optional accessories KBefore using for the first You can purchase optional accessories from the after- time sales service and specialist retailers, or on the Internet. You will find a comprehensive range of products for your appliance in our brochures and on the Internet. -
Page 13: Cleaning The Cooking Compartment
Operating the appliance Cleaning the cooking compartment 1Operating the appliance To eliminate the new-appliance smell, heat up the cooking compartment without anything in it and with the Y ou have already learnt about the controls and how oven door closed. O p e r a t i n g t h e a p p l i a n c e they work. -
Page 14: Changing Or Cancelling The Appliance Operation
Operating the appliance Touch the # touch button to start the appliance Heating up the appliance quickly operation. You can use the "Rapid heat-up" and "PowerBoost" The heat-up indicator bar and the run time appear in functions to reduce the preheat time. Whether the the display. -
Page 15: Time-Setting Options
Time-setting options Setting the cooking time OTime-setting options Once the set cooking time has elapsed, the appliance switches off automatically. The function can only be Y our appliance has different time-setting options. used in combination with a type of heating. T i m e - s e t t i n g o p t i o n s Time-setting option Touch the # touch button. -
Page 16: Childproof Lock
Childproof lock One-time childproof lock AChildproof lock The control panel is locked so that the appliance cannot be switched on. To switch it on, the one-time childproof Y our appliance is equipped with a childproof lock so lock must be deactivated. After the appliance is C h i l d p r o o f l o c k that children cannot switch it on accidentally or change switched off, the control panel is no longer locked. -
Page 17: Basic Settings
Basic settings QBasic settings Brand name logo Display Do not display T here are various settings available to you in order to Fan run-on time Recommended B a s i c s e t t i n g s help use your appliance effectively and simply. If Minimum necessary, you can change these settings in Pull-out system*... -
Page 18: Baking And Roasting Assistant
Baking and roasting assistant nBaking and roasting Dishes Lasagne, chilled assistant Roast pork Top rump T he baking and roasting assistant helps you to prepare B a k i n g a n d r o a s t i n g a s s i s t a n t Slow roasting joint meals with ease. -
Page 19: Meat Thermometer
Meat thermometer Poultry: Insert the meat probe as far as it will go into @Meat thermometer the thickest point in the breast. Insert the meat probe into the poultry crossways or lengthways depending on its structure. Then turn the poultry and place it on the T he MultiPoint meat thermometer makes precise M e a t t h e r m o m e t e r wire rack breast-side down. -
Page 20: Setting And Starting The Appliance Operation
Sabbath mode Setting and starting the appliance operation FSabbath mode Warning – Risk of burns! The cooking interior and the core temperature probe Y ou can set a time of up to 74 hours using Sabbath S a b b a t h m o d e become very hot. -
Page 21: Home Connect
Home Connect The app guides you through the entire process. Follow oHome Connect the instructions in the app. T his appliance is Wi-Fi-capable and can be remotely Remote Start H o m e C o n n e c t controlled using a mobile device. -
Page 22: Remote Diagnostics
Cleaning Appliance exterior Declaration of Conformity Stainless steel Hot soapy water: Constructa Neff Vertriebs-GmbH hereby declares that front Clean with a dish cloth and then dry with a soft the appliance with functionality meets the basic cloth. requirements and other relevant provisions of Directive Remove flecks of limescale, grease, starch and 2014/53/EU. -
Page 23: Keeping The Appliance Clean
Cleaning agent Accessories Hot soapy water: Door panels Hot soapy water: Soak and clean with a dish cloth or brush. Clean with a dish cloth and then dry with a soft cloth. If there are heavy deposits of dirt, use a stainless steel scouring pad. -
Page 24: Cleaning Function
Cleaning function The appliance will become very hot on the outside .Cleaning function ■ during the cleaning function. Never hang combustible objects, e.g. tea towels, on the door handle. Do not place anything against the front of Y our appliance is equipped with a self-cleaning C l e a n i n g f u n c t i o n the appliance. -
Page 25: Easyclean
Cleaning function Whenever you wish to use the cleaning function, Lift the accessory support up at the front and remove make sure that you never leave anything other than it. ~ "Rails" on page 26 an enamelled accessory without anti-stick coating Refit the shelf supports or pull-out rails. -
Page 26: Rails
Rails Use the # touch button to switch off the appliance. pRails Leave the appliance door ajar in the stop position (approx. 30°) for approx. one hour to allow the enamel surfaces in the cooking compartment to dry W ith good care and cleaning, your appliance will retain R a i l s thoroughly. -
Page 27: Detaching And Refitting The Rails
Appliance door Push the bar towards the back ‚ and down ƒ onto qAppliance door the pin „ (Fig. " Ensure that the hook is hooked onto the pin „ (Fig. W ith good care and cleaning, your appliance will retain A p p l i a n c e d o o r its appearance and remain fully functional for a long time to come. - Page 28 Appliance door Open the appliance door approx. 45° (fig. Warning Risk of injury! The door handle may break off. Do not carry the appliance door by the door handle. To carry or remove the appliance door, take hold of it with both hands, one on the left and one on the right.
-
Page 29: Removing And Installing The Door Panels
Appliance door Open the appliance door slightly until you hear a Slide the tip of the screwdriver in between the metal quiet click. Close the appliance door. tab ‚ and the plastic underneath it (fig. Use the tip of the screwdriver to carefully lift the Warning reflector ƒ... - Page 30 Appliance door Clean the glass door panels and reflectors on both Insert the second intermediate panel without the sides with glass cleaner and a soft cloth. seals and spacers and push it in the direction of the arrow until it is fitted in the frame. The arrow on the Warning intermediate panel must line up with the arrow on the Risk of injury!
-
Page 31: Trouble Shooting
The circuit breaker is faulty Check in the fuse box to make sure that the fuse for the appliance is OK The Neff Light reflector in the appli- This is a normal occurrence as a result of high tem- Not possible... -
Page 32: Maximum Operating Time Exceeded
Customer service "D" or "E" appears on the display, e.g. Technical problem Switch the appliance off and on again D0111 or E0111 If the message appears again, call the after-sales ser- vice. Quote the exact error message Home Connect does not work cor- Go to www.home-connect.com rectly. -
Page 33: Tested For You In Our Cooking Studio
Tested for you in our cooking studio Baking on two levels JTested for you in our Use CircoTherm. Baked items that are placed into the cooking studio oven on trays or in baking tins/dishes at the same time will not necessarily be ready at the same time. Universal pan: Level 3 ■... - Page 34 Tested for you in our cooking studio accessories into the cooking compartment until it has possible cooking results and energy savings of up to finished preheating. 20 per cent. If you wish to follow one of your own recipes when Types of heating used: baking, you should use the setting values listed for ‚...
-
Page 35: Roasting And Braising
Tested for you in our cooking studio Dish Accessories/cookware Shelf po- Type of Tempera- Cooking sition heating ture in °C time in mins. Scones, 2 levels 2 baking trays 170-190* 12-16 ‚ Biscuits, 2 levels 2 baking trays 140-160* 10-25 ‚... - Page 36 Tested for you in our cooking studio If using duck breast, score the skin. Do not turn duck Observe the manufacturer's instructions for your breasts. roasting cookware. When you turn poultry, ensure that the breast side or Roasting in uncovered cookware the skin side is underneath at first.
- Page 37 Tested for you in our cooking studio Cooking time calculation (e. g. 20+35): Cooking time range (e. g. 10-15): Please calculate the cooking time with 20 minutes per The food is done within the stated minutes. 500 g meat + 35 minutes additional time. For 1,5 kg Type of heating used: the calculated cooking time would be 95 minutes.
-
Page 38: Grilling
Tested for you in our cooking studio Tips on roasting and braising The cooking compartment becomes Prepare your food in an enclosed roasting dish with higher temperature or use the grill tray. You will achieve very dirty. the best roasting results if you use the grill tray. The grill tray can be bought later as a special accessory. The roast is too dark and the crack- Check the shelf position and temperature. - Page 39 Tested for you in our cooking studio compartment remains considerably cleaner. Ensure that Meat thermometer the lid fits well and closes properly. Place the cookware You can cook accurately using a meat thermometer. onto the wire rack. Read important notes on using the meat thermometer in The distance between the meat and the lid must be at the corresponding chapter.
- Page 40 Tested for you in our cooking studio Dish Accessories Shelf po- Type of Tempera- Time in min. sition heating ture in °C Burger, height 1-2 cm wire rack 290* 1st side 6-8 ˆ 2nd side 4-6 Top side / Top rump wire rack 150-160 30+30...
-
Page 41: Convenience Products
Tested for you in our cooking studio Dish Accessories Shelf po- Type of Tempera- Time in min. sition heating ture in °C Toast Grilling white bread** wire rack ˆ * Preheat ** Do not preheat *** Preheat 3 minutes **** Preheat 3 minutes, turn over several times ***** Preheat 5 minutes ****** Skin side down Convenience products... -
Page 42: Yogurt
Tested for you in our cooking studio Dish Accessories/cookware Shelf po- Type of Tempera- Cooking sition heating ture in °C time in mins. Pizza, chilled Pizza, chilled wire rack 190-210 10-15 „ Pizza, frozen Pizza, thin base wire rack 190-210 15-20 „... - Page 43 Tested for you in our cooking studio and browns less. Depending on the method of Baking tins and cookware preparation and the type of food, it is possible to save Dark- coloured metal baking tins are most suitable. energy. If you open the appliance door before the food These allow you to make energy savings of up to 35 has finished cooking or if you preheat the appliance, per cent.
-
Page 44: Acrylamide In Foodstuffs
Tested for you in our cooking studio Dish Accessories/cookware Shelf po- Type of Tempera- Cooking sition heating ture in °C time in mins. Casserole Diced meat (beef, pork, lamb), 500 g meat cookware, covered 100-120 ž Braising steak cookware, covered 65+60 ž... -
Page 45: Drying
Tested for you in our cooking studio Dish Cookware Shelf posi- Heating Searing time Tempera- Cooking tion function in mins ture in °C time in mins Poultry Duck breast, medium rare, 300 g each Cookware, uncovered 45-60 Š Chicken breast fillet, 200 g each, well Cookware, uncovered 120* 45-60... -
Page 46: Preserving
Tested for you in our cooking studio If you wish to dry additional foodstuffs, you should use Type of heating used: similar foodstuffs in the table as a reference. ‚ CircoTherm ■ Fruit, vegetables and herbs Accessories Type of Tempera- Cooking heating ture in °C... -
Page 47: Allowing The Dough To Prove At Dough Proving
Tested for you in our cooking studio Preserving Cookware Shelf posi- Type of Tempera- Cooking time in mins. tion heating ture in °C Vegetables, e.g. cucumbers 1-litre preserving jars 160-170 Before it starts bubbling: 30-40 ‚ Residual heat: 30 Stone fruit, e.g. cherries, damsons 1-litre preserving jars 160-170 Before it starts bubbling:30-40... -
Page 48: Keeping Warm
Tested for you in our cooking studio Leave the defrosted food to rest for another 10 to 30 Type of heating used: minutes in the appliance whilst it is switched off, so that “ Defrost setting ■ the temperature balances out. Dish Accessories Shelf posi-... - Page 49 Tested for you in our cooking studio Dish Accessory Shelf posi- Type of Tempera- Cooking tion heating ture in °C time in mins. Small cakes Baking tray 150* 25-35 ‚ Small cakes, 2 levels Universal pan + baking tray 150* 25-35 ‚...
- Page 52 *9001382585* 9001382585 980313...
Need help?
Do you have a question about the B58CT68H0B and is the answer not in the manual?
Questions and answers