
Subscribe to Our Youtube Channel
Related Manuals for Rize Tranquility II Adjustable bed MANDS02


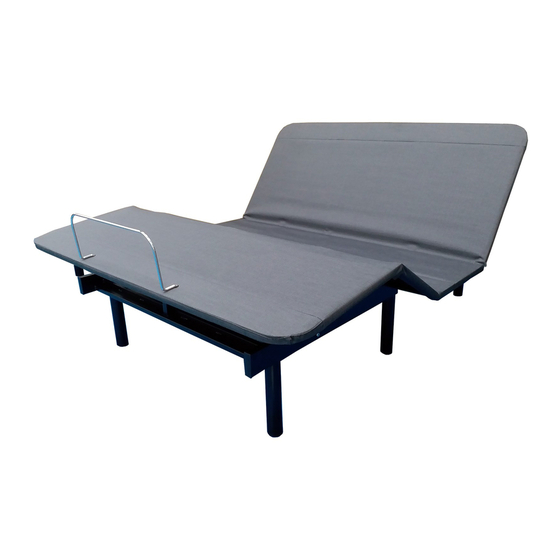
Summary of Contents for Rize Tranquility II Adjustable bed MANDS02
- Page 1 Owner’s manual Tranquility Adjustable bed SERIAL NUMBER: _____________________________ (Place your serial number here for ready reference)
- Page 2 Owner’s manual | Tranquility II adjustable bed Owner’s manual | Tranquility II adjustable bed...
-
Page 3: Table Of Contents
Table of contents Safety precautions Parts list Installation guide Remote control guide Special function Troubleshooting Warranty Registration Model Number: MANDS02 This product and all our bedding products are covered by one or more of the following issued and pending U.S. patents including Nos. 7448100, D657157, D663542, D657158, D657156, 8209801, 8209800, D663544, D663543 and other patents pending. -
Page 4: Safety Precautions
Safety precautions Attention! IMPORTANT SAFETY INSTRUCTIONS. PLEASE READ THESE INSTRUCTIONS THOROUGHLY BEFORE USING THIS PRODUCT. Electrical safety Important safety features Always unplug this adjustable bed from the electrical outlet before Weight fail safe feature: In the case that an overload of weight any cleaning of the bed. - Page 5 Safety precautions Consumers with pacemakers Lift warning It is possible that the (optional) vibrating feature of this Do not sit on the head or foot sections while in the raised adjustable bed may be misinterpreted by some pacemakers as position, or during lift or lowering cycles. movement and/or exercise.
-
Page 6: Parts List
Parts list Before discarding any packing materials, check the adjustable bed carton and verify that all items in the parts list are included. Remote control (1) AAA batteries (2) 8" post bed legs (6) 3" post bed legs (6) 2" leg extenders (6) Mattress retainer bar (1) Bed leg strap (1) * Anti-skid pads... -
Page 7: Installation Guide
Installation guide Setting up your adjustable bed Open the box. Lift the folded adjustable bed out of the box, place it on a flat floor and unfold it. NOTE: Hold the edge of the bed when unfolding it. Do not hold the metal frames to avoid potential injury. - Page 8 Installation guide Remove and extend the power cord from the frame. If you are installing your adjustable bed on a platform or slatpack bedding system, apply anti-skid pads to the frame first. See "Applying anti-skid pads for platform bed use" on page 11. Lift one side of the bed and then turn it over carefully so the top side is now facing up.
- Page 9 Installation guide Setting up the electronics Plug the power cord into a working electrical outlet. NOTE: For optimal safety, using a surge protector (not included) is highly recommended. Install batteries in the remote control. Try all functions on the remote to make sure all features are operational.
- Page 10 Installation guide Assembling the headboard bracket (optional) NOTE: Headboard bracket parts are sold separately. Turn the adjustable bed over with the top side facing downward. Remove the leg from the head section of the adjustable bed by turning the leg in a counter-clockwise direction.
- Page 11 Installation guide Applying anti-skid pads for platform bed use Your adjustable bed is also created for platform or slatpack bed systems. Before installing on a platform or slat pack bed, apply anti-skid pads under the adjustable bed to keep it in place. Turn your adjustable bed on its side and then locate the areas near the center brackets and corner brackets of the frame.
-
Page 12: Remote Control Guide
Remote control guide HEAD POSITION ADJUSTMENTS (1, 3) FLAT (6) Press this button to return the bed to a flat position. Press the Head Up or Head Down button to raise or lower the head section of your adjustable bed. NOTE: Make sure your bed is in a flat position before using it. - Page 13 Remote control guide Understanding the remote control features • The adjustable bed uses RF (radio frequency) remote control system. • The buttons are backlit when pressed to aid in the visibility of the remote control in low-light environments. • It is not necessary to face the receiver when operating the remote control. Remote signal is best transmitted within 6.5 feet (2 meters) of the bed.
- Page 14 Remote control guide Pairing your remote control to your adjustable bed—continued. On the remote control, press and hold the Head Up and Head Down buttons at the same time. If the pairing is successful, the LED light on the control box turns to green immediately and the remote backlight stops flashing.
-
Page 15: Special Function
Remote control guide Resetting your system Resetting the system is sometimes necessary to restore any customizations on the preset buttons to its factory settings. On the remote control, press and hold the ZG and FLAT button at the same time for 5 seconds until the remote backlight flashes. -
Page 16: Troubleshooting
Troubleshooting In the event the adjustable bed fails to operate, investigate the symptoms and possible solutions below. Symptom Solutions The adjustable bed does not respond when the remote is Make sure the remote control is paired with the adjustable bed. used. - Page 17 Troubleshooting In the event the adjustable bed fails to operate, investigate the symptoms and possible solutions below. Symptom Solutions Split or tandem system is out of sync. Only one of Reset the system and then sync one remote to both adjustable the two adjustable bed raises or both beds raise but beds again.
-
Page 18: Warranty
Warranty Limited Warranty LIMITED WARRANTY: Subject to the terms and conditions set forth to comply with this user Manual and/or any other user instructions issued herein, the manufacturer of this product, PPJ, LLC (“Customatic®”) by Customatic for use and maintenance, including without limitation, warrants to the original retail purchaser for the time periods stated herein weight limits and operation;... -
Page 19: Registration
Zip code ______________________________ Email address: ____________________________________________________________________________________________________________________________________________________________________ Store where purchased: ________________________________________________________________________________________________________________________________________________________ Serial no: _____________________________________________ Invoice no: ________________________________________ Model no: _____________________________________________ Survey Please mail to: Gender: Rize Customer Care Center 31050 Diamond Parkway Solon, OH 44139 Age: 18-30 31-40 41-50 51-60 61-70 71 &... - Page 20 IF YOU EXPERIENCE ANY TROUBLE WITH YOUR ADJUSTABLE BED WITHIN THE WARRANTY PERIOD, PLEASE CONSULT THE TROUBLESHOOTING GUIDE PROVIDED WITH YOUR BED AND ONLINE, IF APPLICABLE. IF PROBLEMS PERSIST, PLEASE CALL CUSTOMER SERVICE TOLL FREE NUMBER 1-843-800-8372 Please have your receipt ready and available. Thank you and enjoy your adjustable bed!
Need help?
Do you have a question about the Tranquility II Adjustable bed MANDS02 and is the answer not in the manual?
Questions and answers