Advertisement
Available languages
Available languages
Quick Links
!
• Bitte Lattenrost mit Klammern/Schrauben nach oben montieren. Erst Lattenrost auf die Lattenrost-
träger legen und dann mit Schrauben befestigen.
•
Please assemble the mattress support with the staples / screws upwards. Place the mattress support on the metallic hardware
and fix it with the screws.
•
Le sommier à lattes doit être monté avec les vis/clips vers le haut. Le sommier à lattes se pose sur les supports de sommier,
puis se fixe par vis.
•
Les rogamos montar el soporte de colchón a cápsulas/tornillos para arriba. Primeramente coloquen el soporte de colchón sobre
las escuadras metálicas y, después claven a tornillos.
•
Si prega di assemblare la rete a doghe con i punti / viti verso l'alto. Posizionare la rete a doghe sul supporto metallico e fissarla con
le viti.
•
Gelieve lattenbodem met de nietjes/ schroeven naar boven monteren. Eerst de lattenbodem op de lattebodemdrages leggen en
dan met schroeven vastmaken.
E2
F2
1 x
C
4 x
VFZ 6/60
Aufbauanleitung
Assembly plan
Instructions de montage
Instrucciones de montaje
Istruzioni di montaggio
Montagevoorschrift
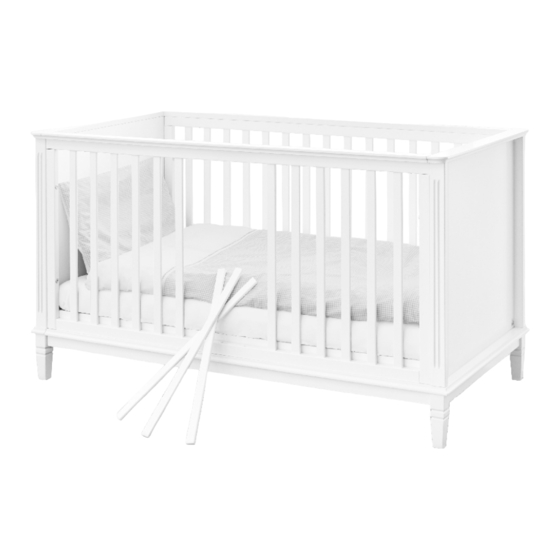
Kinderbett 'Hope'
Cot bed 'Hope' • Lit de bébé évolutif 'Hope' • Cuna 'Hope' • Lettino 'Hope' •
Babybed 'Hope'
Art.-Nr.
• Item No. • N° d´art.
Edelmatt: MDF Uni, weiß lackiert
• Classy matt: MDF, white lacquered • Semi poli fin : MDF Uni, laqué
blanc • Mate noble: MDF Uni, laqueado blanco • Metallo nobile opaco: MDF Uni, verniciato di bianco • Edelmat:
MDF Uni, wit gelakt
Serien Nr.
Serial No.
No. série
Serie No.
No. serie
Serienummer
ohne Dekoration
without decoration
sans décoration
sin decoración
senza decorazione
zonder decoratie
11 34 02
Advertisement

Related Manuals for Pinolino Kinderträume Hope 11 34 02


Summary of Contents for Pinolino Kinderträume Hope 11 34 02
- Page 1 • Bitte Lattenrost mit Klammern/Schrauben nach oben montieren. Erst Lattenrost auf die Lattenrost- träger legen und dann mit Schrauben befestigen. Aufbauanleitung • Please assemble the mattress support with the staples / screws upwards. Place the mattress support on the metallic hardware and fix it with the screws.
- Page 2 WICHTIG - SORGFÄLTIG LESEN! - FÜR SPÄTERE VERWENDUNG WE 15 AUFBEWAHREN Sehr geehrte Kunden! Wir freuen uns, dass Sie sich für diesen hochwertigen Artikel entschieden haben. Wir von Pinolino haben diesen Artikel mit großer Sorgfalt hergestellt. Die von uns verwendeten Materialien sind umweltschonend und entsprechen den strengen Auflagen der Europäischen Sicherheitsnormen.
- Page 3 Umbau zum Juniorbett Warnung: Vergewissern Sie sich, dass das Kinderbett nicht in der Nähe von offenem Feuer oder starken Hitzequellen, z. B. elektrische Conversion into junior bed Heizstrahler, Gasöfen, aufgestellt ist. Heben Sie die Aufbauanleitung und den Inbusschlüssel für eine spätere Demontage bzw. Montage gut auf. Transformation en lit junior Transformación en cama júnior Pflege:...
- Page 4 IMPORTANT - PLEASE READ • Bitte Lattenrost mit Klammern/Schrauben nach oben montieren. Erst Lattenrost auf die Lattenrost- träger legen und dann mit Schrauben befestigen. • Please assemble the mattress support with the staples / screws upwards. Place the mattress support on the metallic hardware CAREFULLY! - and fix it with the screws.
- Page 5 Warning: Make sure that the bed is not in the close proximity of open fires or strong heat sources, e.g. electric heaters, gas stoves. Keep the assembly plan and the hex key for future disassembly or assembly. WE 15 Maintenance: Wipe with a damp cloth.
- Page 6 IMPORTANT-LIRE ATTENTIVEMENT! Umbau zum Sofa Conversion into sofa A GARDER POUR CONSULTATION Transformation en sofa Transformación en canapé Transformazione in divano ULTÉRIEURE Omzetting in bank • Wenn Ihr Kind keine Gitterseitenteile mehr benötigt, können Sie das Bett zum Sofa umbauen. •...
- Page 7 Attention: Pensez aux risques liés aux feux ouverts ou à d'autres sources de fortes chaleurs, comme les radiateurs électriques, les chauffages à gaz etc. à la proximité immédiate du lit. Veuillez conserver soigneusement ces instructions de montage et la clé à six pans pour un montage ou un démontage ultérieur. Entretien: Essuyer avec un chiffon propre et très légèrement humide.
- Page 8 ¡IMPORTANTE - LEERSE ATENTAMENTE! - GUARDAR PARA UTILIZACIÓN POSTERIOR Muy estimados clientes, Nos proporciona sumo placer de haber elegido este artículo de calidad. Nosotros, el equipo Pinolino, lo hemos relizado con el más alto cuidado. Los materiales utilizados son ecológicos y corresponden con las normas estrictas de seguridad de la Unión Europea. Para evitar el esfuerzo inútil, leen primeramente las instrucciones de montaje atentamente.
- Page 9 Atención: Se aseguren que el artículo no se halla en el acercamiento de un fuego abierto o al lado de fuentes poderosas de calor ej.radiador eléctrico, estufa a gas. Guardar a cuidad las instrucciones de montaje y llave hexagonal para desmontaje, el montaje posterior respectivamente. Cuidado: Se borra con un trapo húmedo.
- Page 10 IMPORTANTE - LEGGERE ATTENTAMENTE! - CONSERVARE PER FUTURI RIFERIMENTI Gentili Clienti, WB 8/10 Complimenti per aver scelto questo prodotto di qualità. Noi, il personale della Pinolino, abbiamo creato questo prodotto con WE 15 VF 6/50 massima cura. I materiali utilizzati sono ecologici e sono conformi alle severe norme di sicurezza dell Unione Europea. Per risparmiarvi fatica inutile, prima leggere attentamente le istruzioni di assemblaggio.
- Page 11 Attenzione: Assicurarsi che il lettino non si trova nelle immediate vicinanze dei fuochi aperti o fonti di calore intenso, come ad esempio riscaldatori elettrici, stufe a gas. Conservare il libretto di istruzioni e la chiave a brugola per futuri smontaggi o montaggi. Manutenzione: Pulire con un panno umido.
-
Page 12: Montage
BELANGRIJK - ZORGVULDIG LEZEN!- Montage • Assembly • Montage • Montaje • Assemblaggio • Montage • Bitte bauen Sie den Artikel nummerisch, nach Reihenfolge auf. Bitte Dübel in das richtige Loch VOOR LATERE RAADPLEGING einstecken! Beachten Sie bitte, dass alle Dübel bis zum Anschlag zuerst in das tiefere Loch einzutreiben sind. - Page 13 Waarschuwing: Beschläge • Hardware • Ferrure • Herraje • Ferramenta • Ijzerwaren Zorg ervoor dat het ledikant niet in de nabijheid van open vuur of sterke warmtebronnen, zoals elektrisch verwarmingstoestelof gaskachel geplaatst is. De montageaanwijzing en de inbussleutel zorgvuldig bewaren voor een latere demontage, respectievelijk montage.
- Page 14 Wickelkommode Produktspezifikationen breit • Changing unit wide • Commode à langer large • Cambiador ancho • Fasciatoio largo • Commode breed • Product specifications • Spécifications du produit • Especificaciones del producto • 13 34 02 B Specificazioni del prodotto • Productspecificaties Kleiderschrank groß...
Need help?
Do you have a question about the Hope 11 34 02 and is the answer not in the manual?
Questions and answers