Table of Contents
Advertisement
Advertisement
Table of Contents

Subscribe to Our Youtube Channel
Related Manuals for Logik LI8W6D17


Summary of Contents for Logik LI8W6D17
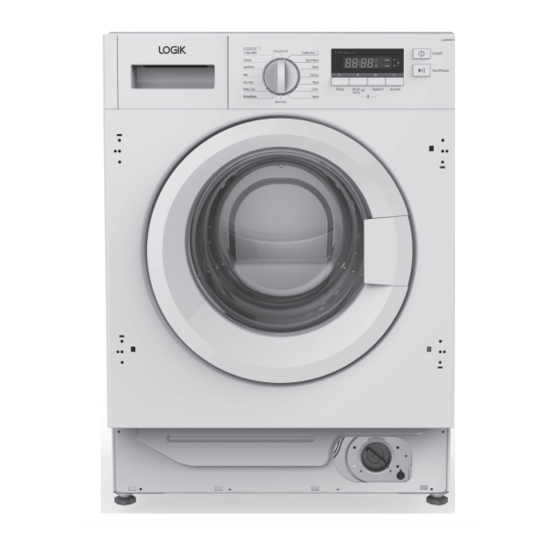
- Page 1 8kg/6kg Washer Dryer Instruction / Installation Manual LI8W6D17...
-
Page 2: Table Of Contents
Contents Safety Warnings ...........................4 Unpacking ............................8 Installing Your Washer Dryer ......................9 Choosing the Right Location for Your Washer Dryer ...................9 Moving and Installing ........................10 Removing the Transit Bolts ............................10 Removing the Polystyrene Foam ..........................10 Moving the Washer Dryer from One Location to Another ................10 Hose and Cable Lengths ............................. - Page 3 Hints and Tips ............................26 Questions and Answers ........................28 Error Codes ..................................29 Specifications .............................29 Product Fiche .............................30...
-
Page 4: Safety Warnings
Safety Warnings For your continued safety and to reduce the risk of injury or electric shock, please follow all the safety precautions listed below. WARNING! • Never stop the appliance before the end of the drying cycle unless all items are quickly removed and spread out so that the heat is dissipated. •... - Page 5 • Before you start using the machine, turn the tap on to check that the hose is properly connected. If it’s not, there may be a water leak. • Do not put too much laundry or detergent into the machine. It may cause issues with the machine or laundry.
- Page 6 is damaged, it must be replaced by the manufacturer, its service agent or similarly qualified persons in order to avoid a hazard. • Unplug from the power socket before cleaning and maintenance of the machine. • Do not touch the mains lead or mains plug with wet hands. It may cause an electric shock.
- Page 7 • This appliance can be used by children aged from 8 years and above and persons with reduced physical, sensory or mental capabilities or lack of experience and knowledge if they have been given supervision or instruction concerning use of the appliance in a safe way and understand the hazards involved.
-
Page 8: Unpacking
Thank you for purchasing your new product. We recommend that you spend some time reading this instruction manual in order that you fully understand all the operational features it offers. Read all the safety instructions carefully before use and keep this instruction manual for future reference. -
Page 9: Installing Your Washer Dryer
Installation INSTALLATION Installing Your Washer Dryer Please read and follow the instructions carefully. • In addition to the instructions mentioned here, special regulations of the relevant water and power supply companies may apply. If in doubt, have the machine connected by a qualified technician. -
Page 10: Moving And Installing
INSTALLATION Moving and Installing Removing the Transit Bolts Four transit bolts keep the interior of the machine in place while it’s being moved. They need to be removed before installation. Use a spanner (not supplied) and follow the instructions detailed below. Don’t run the machine without removing the transit bolts, as this can cause excessive vibrations and may damage your machine. -
Page 11: Hose And Cable Lengths
INSTALLATION Hose and Cable Lengths How to connect from the left side How to connect from the right side ~80cm ~130cm ~90cm ~40cm 110 -135cm Levelling the Washer Dryer There are levelling feet on the underside. They must be adjusted to make sure the machine is level. -
Page 12: Water Drain Hose
INSTALLATION Connecting the Water Supply Hose 1. To prevent leakage from the connection 3/4” 3/4” joints, ensure the rubber washer seals are fitted to each end of the water supply min. 10 mm min. 10 mm hose. Do not use without the seals in Plastic joint place. -
Page 13: Installing Into Kitchen Furniture
INSTALLATION Installing into Kitchen Furniture This appliance is designed to be built into kitchen furniture. Follow the measurement below for correct installation. 580mm 830mm 825mm 17.5mm During installation, make sure the hoses are placed out of the way. This can prevent the hoses from being kinked or trapped. - Page 14 INSTALLATION 2. Decide from which direction the cabinet door Door Drill Template Door Drill Template will open. Door open from left to right Door open from right to left 3. Depending on the direction the cabinet door will open and close, drill holes (hinge Ø 35 mm;...
-
Page 15: Connecting To The Mains Supply
INSTALLATION 7. Fix the cabinet door on the machine. Screw the hinges on the machine using screw B. 8. Close the cabinet door. Spacers on the cabinet door shall attract to the magnets on the machine. Connecting to the Mains Supply For your safety: •... -
Page 16: Product Overview
Product Overview The unit Detergent Control Panel Compartment Door Handle Window Drain Filter... -
Page 17: The Control Panel
The Control Panel Programme Dial LED Display Different wash programmes can be selected according to your • After the wash procedure begins, the remaining washing wash requirements. time will be displayed. To set your Favourite • When the child lock function is selected, CHILD LOCKED Power Button programme, turn the dial to the icon will be illuminated. -
Page 18: Preparation
Preparation Read the following to understand how best to prepare your laundry for washing. Organising Laundry • Read the washing label on each garment to help you sort your washing into different loads. • Sort the laundry by colour, type of fabric and by how soiled it is. This will help you choose the correct programme and temperature for each wash. -
Page 19: Adding Detergent And Softener
Adding Detergent and Softener • Add detergent into the appropriate dispenser. • Apply softener before you start washing. Main Wash Main wash Detergent detergent • Apply detergent and softener according to the washing amount, the soiling level, the water hardness in your area Softener Softener and the manufacturer’s instructions of these products. -
Page 20: Before First Use
Before First Use Before washing your clothes for the first time, run a full wash programme first: 1. Connect the machine to the mains power supply and the water supply. 2. Put a small amount of detergent in the detergent drawer. Close the drawer. 3. -
Page 21: Selecting The Programme
Selecting the Programme Here are the available programmes. Water temperature can be selected separately for certain programmes. Detergent Box Wash/ Default Default Time Default Dry Load Temp. (˚C) (hr) Speed (rpm) Case Case Softener (kg) Programme Case Cotton Eco 1:07 Sport Wear 1:19 Express... -
Page 22: Delay Start The Programme
Programmes with the Dry icon can apply the Dry function. • Washing times depend on programme and temperature settings selected. • Washing times may be longer if the laundry in the drum needs to be balanced. Delay Start the Programme 1. -
Page 23: Important Information
Important Information Washing Delicates (wool and silk) • Silk laundry loads: 2kg or less • Approximate Weights: - Wool sweater (400g) - Silk blouse / under garment (200g) - Trousers (400g) Adding Delicate Laundry Items to the Drum • Close zips and buttons. •... -
Page 24: Maintenance - Cleaning The Washer Dryer
Maintenance - Cleaning the Washer Dryer Always unplug the machine before cleaning. To prevent build-up of detergent residue, it is recommended to wash the appliance without any load or detergent once a month. Cleaning the Drum Any rust left inside the drum by metal articles must be removed immediately with chlorine-free detergent. -
Page 25: Cleaning The Drain Filter
Cleaning the Drain Filter Be careful not to burn yourself while cleaning the drain filter. Water draining from the filter compartment may be hot after a high temperature wash. Before cleaning the drain filter, switch off and unplug the machine. 1. -
Page 26: Hints And Tips
Hints and Tips Issues Solutions Buttons don’t work. • Child lock is activated. Deactivate the child lock function. • The machine is operating a programme. The Programme Dial was turned to a different programme. • Door doesn’t open. • Door lock may be active. •... - Page 27 There’s not much foam. • This can happen if you’ve put powder detergent directly into the drum – you must put it in the detergent drawer. • The amount of foam can vary, depending on the temperature, level and softness of your water. •...
-
Page 28: Questions And Answers
Questions and Answers Issues Reasons Solutions • Check if the door is closed tightly. • Check if power plug is inserted properly. Machine cannot • Check if water supply tap is opened. start up Check if Start/Pause button is pressed. •... -
Page 29: Error Codes
Check if the clothes are pinned by the door. Others • Please call the service line if there is any other problem. Specifications Model LI8W6D17 Rated voltage 220 - 240 V~ 50 Hz Maximum current 10 A Rated power input... -
Page 30: Product Fiche
Product Fiche Brand: Logik Model: LI8W6D17 Energy efficiency class [on a scale of A (more efficient) to G (less efficient)]: A Energy consumption per kg (washing, spinning & drying): 0.68 EU Eco-label: N/A Energy consumption (washing, spinning & drying): 5.44 kWh Energy consumption (washing &... - Page 32 DSG Retail Ltd. (co. no. 504877) 1 Portal Way, London, W3 6RS, UK EU Representative DSG Retail Ireland Ltd (259460) 3rd Floor Office Suite, Omni Park SC, Santry, Dublin 9, Republic of Ireland IB-LI8W6D17-190830V2...
Need help?
Do you have a question about the LI8W6D17 and is the answer not in the manual?
Questions and answers