Table of Contents
Advertisement
Available languages
Available languages
Quick Links
Advertisement
Table of Contents

Subscribe to Our Youtube Channel
Related Manuals for SDJ SG FASTER2448


Summary of Contents for SDJ SG FASTER2448
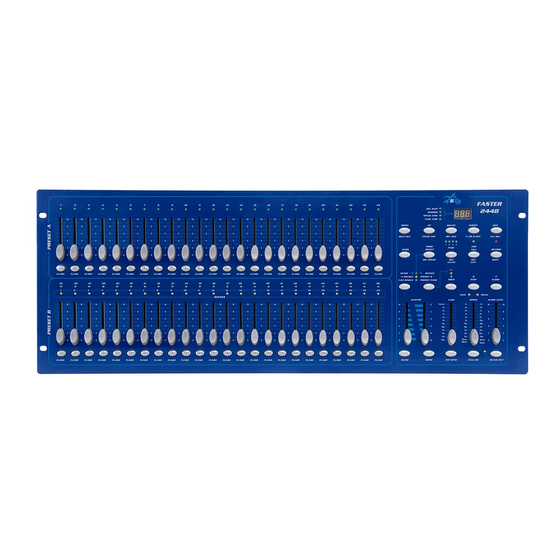
- Page 1 48 Channels DMX controller SG FASTER2448 MANUALE UTENTE USER MANUAL...
-
Page 2: Table Of Contents
Rev. 03-01/19 INDICE: 1. INTRODUZIONE p. 3 2. ISTRUZIONI DI SICUREZZA p. 4 3. APERTURA CONFEZIONE E CONTROLLO p. 6 4. INSTALLAZIONE, ACCENSIONE ED USO p. 6 5. MANUTENZIONE p. 14 6. SPECIFICHE TECNICHE p. 14 INDEX: 1. INTRODUCTION p. 15 2. -
Page 3: Introduzione
1. INTRODUZIONE Grazie per avere scelto un nostro prodotto! Vi preghiamo di fare riferimento alle istruzioni e alle avvertenze contenute nel presente manuale per l’utilizzo del dispositivo e di conservarlo per future consultazioni. Il presente manuale contiene informazioni riguardanti l’installazione e l’utilizzo del dispositivo. Le informazioni contenute in questo documento sono state attentamente redatte e controllate. -
Page 4: Istruzioni Di Sicurezza
2. ISTRUZIONI DI SICUREZZA Attenzione! Questo prodotto non è adatto ad un uso domestico. Leggere il presente manuale prima di installare e dare corrente all’apparecchiatura, seguire le precauzioni di sicurezza elencate di seguito ed osservare tutti gli avvertimenti indicati nel presente manuale e stampati sull’apparecchiatura. - Page 5 MANUTENZIONE Prima di iniziare qualsiasi operazione di manutenzione o pulire il prodotto, togliere la tensione dalla rete di alimentazione e scollegare il cavo dal dispositivo. Parti danneggiate, devono essere sostituite con ricambi originali. IMPORTANTE: danni provocati dalla noncuranza di questo manuale, non sono soggetti a garanzia.
-
Page 6: Apertura Confezione E Controllo
Controllare che la scatola contenga i seguenti articoli: N° 1 SG FASTER2448 N° 1 Alimentatore N° 1 Manuale Utente 4. - Page 7 SCHEMA DI CONNESSIONE DEI CAVI DMX: DMX-output DMX-input presa XLR spina XLR 1: terra 1: terra 2: segnale (-) 2: segnale (-) 3: segnale (+) 3: segnale (+) In caso di necessità, è possibile variare la polarità attraverso il selettore di polarità DMX, posto sul pannello posteriore.
- Page 8 DESCRIZIONE DEI PULSANTI PRESET A 24 sliders modalità manuale verde: stato di uscita di ciascuno slider SLIDERS fade: modalità manuale FLASH Flash dello slider (modalità manuale) 24 sliders modalità manuale se 1-48 SINGLE selezionato PRESET B 24 sliders modalità maunale copia del PRESET A if A-DOUBLE selezionato 24 sliders modalità...
- Page 9 SPEED slider tempo di attesa: tra una sequenza di step in una scena sensibilità microfonica se è premuto il pulsante AUDIO, durante l'esecuzione AUDIO slider di una scena (modalità automatica) pulsante BLACK-OUT black-out generale pulsante FULL ON tutti i canali in full-on (funzione flash) Impostazione velocità...
- Page 10 PAGE = seleziona le pagine 1 - 4 delle scene pulsante PAGE / REC CLEAR REC CLEAR se premuto assieme al pulsante SHIFT = cancella la memoria temporanea MODE SELECT = permette di selezionare tra modalità CHASE / modalità A- pulsante MODE SELECT / DOUBLE / modalità...
- Page 11 MODALITA’ PROGRAMMAZIONE REGISTRARE SCENE/CHASE impostare MODE SELECT in modalità SINGLE 1-48 RECORD + premere in sequenza i pulsanti FLASH 1-6-6-8, tutti i led premere e tenere premuto lampeggeranno step 1 creare una nuova nuova scena impostando gli sliders il passo 1 creato viene posizionato nella memoria temporanea (vedere premere RECORD display) step 2...
- Page 12 RIMUOVERE LA VELOCITA' DI ESECUZIONE FISSA PER SCENE/CHASE impostare MODE SELECT in modalità CHASE/SCENE impostare il pulsante MASTER B sul led giallo Impostare il pulsante AUDIO eseguire il programma desiderato alzare il corrispondente slider 25-48 (scenes 1-24) impostare lo SPEED slider in SHOW MODE (in basso) premere e tenere premuto REC SPEED + uno dei pulanti 25-48 (scenes 1-24)
- Page 13 ELIMINARE UNO STEP (in modalità RECORD) impostare MODE SELECT in modalità CHASE/SCENE select PAGE 1-4 una delle pagine PAGE 1-4, dove si trova il programma dove inserire il selezionare nuovo step EDIT + premere il corrispondente pulsante flash della SCENE da editare premere e tenere premuto (flash 25-48 / scenes 1-24) il pulsante STEP finchè...
-
Page 14: Manutenzione
5. - MANUTENZIONE Per garantire ottime prestazioni, l’apparecchio deve essere pulito frequentemente. Disconnettere l’alimentazione prima di effettuare operazioni di pulizia e manutenzione. Utilizzare un’aspirapolvere o compressore e una spazzola morbida o un panno per rimuovere la polvere depositata. Qualsiasi parte eventualmente danneggiata, deve essere sostituita con ricambi originali. - SPECIFICHE TECNICHE •... -
Page 15: Introduction
1. - INTRODUCTION Thank You for choosing one of Our products! Please refer to the instructions and warnings contained in this user manual, please retain it for future reference. This manual contains information about the installation and use of the device. The information contained in this publication has been carefully prepared and checked. -
Page 16: Safety Instructions
2. - SAFETY INSTRUCTIONS Caution! This product is not suitable for household use. Please read this manual before installing and applying power to the equipment, follow the safety precautions listed below and observe all warnings in this manual and printed on. Please contact a PROEL distributor for assistance with any questions about how to activate the equipment safely. - Page 17 MAINTENANCE Before starting any maintenance or cleaning the product, disconnect the power from the mains and disconnect the power cable from the device. Damaged parts, must be replaced with original spare parts. IMPORTANT: damages caused by the disregard of this user manual are not subject to warranty. Keep away from heaters and other heating sources.
-
Page 18: Opening And Control
Verify that the box contains the following items: N° 1 SG FASTER2448 N° 1 Power supply unit N° 1 User Manual 4. - Page 19 OCCUPATION OF THE XLR-CONNECTION: DMX-output DMX-input XLR mounting socket XLR mounting socket 1: ground 1: ground 2: signal (-) 2: signal (-) 3: signal (+) 3: signal (+) You can adjust the XLR polarity via the DMX polarity selector. BUILDING A SERIAL DMX CHAIN: connect the DMX output of the device with the DMX input of the nearest projector.
- Page 20 BUTTONS DESCRIPTION PRESET A 24 sliders manual mode green: status of output/slider SLIDERS fade manual mode FLASH instant flash of slider (manual or scene) 24 sliders manual mode if 1-48 SINGLE selected PRESET B 24 sliders manual mode copy of A if A-DOUBLE selected 24 sliders scenes mode if...
- Page 21 SPEED slider speed time: between a sequence of steps in a scene microphone sensitivity if AUDIO button is pressed, during a scene execution AUDIO slider (auto mode) BLACK-OUT button general black-out FULL ON button all channels full-on, (flash function) TAP SYNC button Set speed time in auto mode, after 2 pressing button press together with the FLASH button, takes out the relative channel from the BLIND button...
- Page 22 PAGE = select pages 1 - 4 of scenes PAGE / REC CLEAR button REC CLEAR if pressed together with SHIFT button = clear all the temporary memory MODE SELECT = allows to select between CHASE mode / A-DOUBLE mode / 1- MODE SELECT / REC SPEED 48 SINGLE mode button...
- Page 23 OPERATION RECORD A SCENE/CHASE put MODE SELECT in SINGLE 1-24 mode RECORD + press sequence FLASH buttons 1-6-6-8, all LEDs press and hold blink step 1 sliders configuration create a scene with sliders press RECORD put step 1 in the editor (see display) step 2 sliders configuration create a scene with sliders press RECORD...
- Page 24 EDIT A SCENE (in RECORD mode) put MODE SELECT in CHASE/SCENE mode select PAGE 1-4 EDIT + press corresponding SCENE flash button flash 25-48 press and hold (scenes 1-24) press STEP button until the desired step to change (see display) DOWN/UP + corresponding channel FLASH button to press and hold modify intensity (see display)
- Page 25 NOTE CHANGE 5min /10 min speed time press and hold SHIFT + 3 times FLASH button n° 5 or n°10 NOTE under RECORD mode RED Record led is ON under EDIT mode RED Record led blinks DELETE ALL 1 Press and hold RECORD KEY 2 Press FLASH 1 FLASH 3 FLASH 2 FLASH 3 in sequence.
-
Page 26: Maintenance
5. - MAINTENANCE To ensure optimal performance, the unit must be frequently cleaned. Unplug the device from the mains. Use a vacuum cleaner or an air compressor and a soft brush to remove the dust deposited. Any damaged part, must be replaced with original spare parts. 6. - Page 28 Proel S.p.A. Via alla Ruenia 37/43 64027 Sant'Omero (TE) ITALY Tel. +39 0861 81241 Fax. +39 0861 887862 Mail: info@proel.com Web: www.proel.com...
Need help?
Do you have a question about the SG FASTER2448 and is the answer not in the manual?
Questions and answers