Table of Contents
Advertisement
Available languages
Available languages
Quick Links
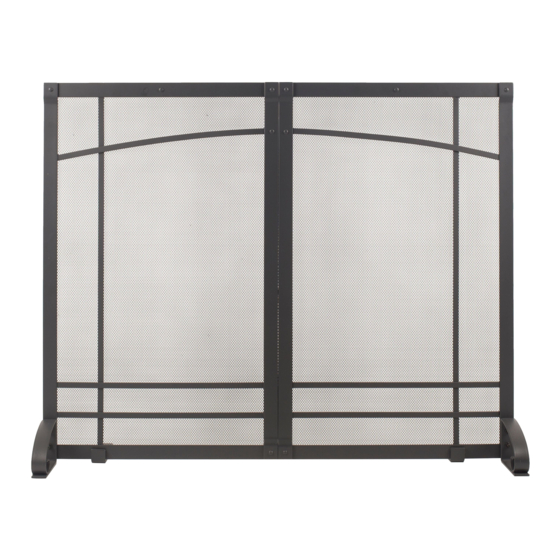
AMHERST FIREPLACE SCREEN
ATTACH YOUR RECEIPT HERE
Serial Number ________________________________ Purchase Date _________________________________
Questions, problems, missing parts? Before returning to your retailer, call our customer
service department at 1-877-447-4768, 8:30 a.m. – 4:30 p.m., CST, Monday – Friday, or
email us at customerservice@ghpgroupinc.com.
30-10-161
MODEL #FA811S
1
Español p.7
Français p.13
2018-05-02
Advertisement
Table of Contents

Related Manuals for pleasant hearth AMHERST FA811S


Summary of Contents for pleasant hearth AMHERST FA811S
- Page 1 AMHERST FIREPLACE SCREEN MODEL #FA811S Español p.7 Français p.13 ATTACH YOUR RECEIPT HERE Serial Number ________________________________ Purchase Date _________________________________ Questions, problems, missing parts? Before returning to your retailer, call our customer service department at 1-877-447-4768, 8:30 a.m. – 4:30 p.m., CST, Monday – Friday, or email us at customerservice@ghpgroupinc.com.
-
Page 2: Package Contents
PACKAGE CONTENTS PART DESCRIPTION QUANTITY Screen Front Foot Back Foot... -
Page 3: Hardware Contents
HARDWARE CONTENTS M6x20mm Bolt M6 Nut M6x25mm Bolt Wrench Qty. 4 Qty. 4 Qty. 2 Qty. 2 SAFETY INFORMATION Please read and understand this entire manual before attempting to assemble, operate or install the product. WARNING • Do not allow children to play with or around screen. •... - Page 4 ASSEMBLY INSTRUCTIONS 1. Attach the two feet (B) to the front of the screen (A) by inserting four M6x20mm bolts (AA) through the pre-drilled holes in the feet (B) and through the screen frame (A). Secure with four M6 nuts (BB). Use a wrench (DD) to hold the bolt (AA) in place while using the other wrench (DD) to tighten the nut (BB).
-
Page 5: Care And Maintenance
CARE AND MAINTENANCE • Do not attempt to clean screen while it is hot. • Use a soft cloth to wipe screen and stand. • Store in a cool, clean, dry place. 1-YEAR LIMITED FRAME WARRANTY If within one year from the date of original purchase, this item fails due to a defect in material or workmanship, we will replace or repair at our option, free of charge. -
Page 6: Replacement Parts List
REPLACEMENT PARTS LIST For replacement parts, call our customer service department at 1-877-447-4768, 8:30 a.m.-4:30 p.m., CST, Monday - Friday. PART DESCRIPTION PART # Screen 30-01-233 Front Foot 30-01-234 Back Foot 30-01-235 AA-DD Hardware Pack 30-09-538 Instruction Manual 30-10-161 Printed in China... - Page 7 PANTALLA DEL HOGAR AMHERST MODELO #FA811S English p.1 Français p.13 ADJUNTE SU RECIBO AQUÍ Número de serie ____________________________ _ Fecha de compra ___________________________ ¿Preguntas, problemas, piezas faltantes? Antes de volver a la tienda, llame a nuestro departamento de servicio al cliente al 1-877-447 4768, de lunes a viernes de 8:30 a.m.
-
Page 8: Contenido Del Paquete
CONTENIDO DEL PAQUETE PIEZA DESCRIPCIÓN CANTIDAD Pantalla Pie frontal Pie trasero... -
Page 9: Información De Seguridad
ADITAMENTOS Perno Tuerca M6 Perno Llave M6x20mm M6x25mm Cant. 4 Cant. 2 Cant. 4 Cant. 2 INFORMACIÓN DE SEGURIDAD Lea y comprenda completamente este manual antes de intentar ensamblar, usar o instalar el producto. ADVERTENCIA • No permita que los niños jueguen con la pantalla o cerca de ella. •... -
Page 10: Instrucciones De Ensamblaje
INSTRUCCIONES DE ENSAMBLAJE 1. Fije las dos patas (B) a la parte frontal de la pantalla (A) insertando cuatro pernos M6 x 20 mm (AA) por los orificios perforados en las patas (B) y por el marco de la pantalla (A). Fíjelas con cuatro tuercas M6 (BB). -
Page 11: Cuidado Y Mantenimiento
CUIDADO Y MANTENIMIENTO • No intente limpiar la pantalla mientras esté caliente. • Coloque la pantalla estirado en el piso y límpiela con un paño suave. • Para guardarla, pliéguela, colóquela en la caja y ciérrela bien. GARANTÍA LIMITADA DE 1 AÑO POR EL MARCO Si durante el transcurso de un año a partir de la fecha de compra original, este artículo no funciona correctamente debido a un defecto en el material o en la mano de obra, lo reemplazaremos o repa- raremos sin cargo, según nuestro criterio. -
Page 12: Lista De Piezas De Repuesto
LISTA DE PIEZAS DE REPUESTO Para obtener piezas de repuesto, llame a nuestro Departamento de Servicio al Cliente al 1-877-447-4768, de lunes a viernes de 8:30 a.m. a 4:30 p.m., hora central estándar. PIEZA DESCRIPCIÓN PIEZA # Pantalla 30-01-233 Pie frontal 30-01-234 Pie trasero 30-01-235... - Page 13 PARE-FLAMMES POUR FOYER AMHERST MODÈLE #FA811S English p.1 Español p.7 ATTACHEZ VOTRE REÇU ICI Numéro de série ____________________________ _ Date d’achat ______________________________ Questions, problèmes, pièces manquantes? Avant de contacter votre détaillant, contactez notre centre de service à la clientèle au 1-877-4478-4768 entre 08h30 à 16h30, heure du Centre du lundi au vendredi, ou nous envoyer un courriel à...
-
Page 14: Contenu De L'emballage
CONTENU DE L’EMBALLAGE PIÈCE DESCRIPTION QUANTITÉ Grille Pied avant Pied arrière... -
Page 15: Quincaillerie Incluse
QUINCAILLERIE INCLUSE Boulon Écrou M6 Boulon Clé M6x20mm M6x25mm Qté. 4 Qté. 2 Qté. 4 Qté. 2 CONSIGNES DE SÉCURITÉ Assurez-vous de lire et de comprendre l’intégralité du présent manuel avant de tenter d’assembler, d’installer ou d’utiliser l’article. AVERTISSEMENT • Ne laissez pas les enfants jouer avec le pare-étincelles ou à proximité de celui-ci. •... -
Page 16: Instructions Pour L'assemblage
INSTRUCTIONS POUR L’ASSEMBLAGE 1. Installez les deux pieds (B) à l’avant du pare- flammes (A) en insérant quatre boulons M6 x 20 mm (AA) dans les trous prépercés des pieds (B) et du pare-flammes (A). Fixez le tout à l’aide de quatre écrous M6 (BB). -
Page 17: Entretien
ENTRETIEN • Ne tentez pas de nettoyer le pare-étincelles lorsqu’il est chaud. • Déposez le pare-étincelles à plat sur le sol et essuyez-le avec un linge doux. • Pour ranger le pare-étincelles, refermez les panneaux, mettez-le dans la boÎte et fermez celle-ci. GARANTIE LIMITÉE D’UN AN SUR LE CADRE Si, au cours d’une période d’un an à... -
Page 18: Liste Des Pièces De Rechange
LISTE DES PIÈCES DE RECHANGE Pour obtenir des pièces de rechange, communiquez avec notre service à la clientèle au 877 447-4768, du lundi au vendredi de 8 h 30 à 16 h 30 (HNC). PIÈCE DESCRIPTION N° DE PIÈCE Grille 30-01-233 Pied avant 30-01-234...
Need help?
Do you have a question about the AMHERST FA811S and is the answer not in the manual?
Questions and answers