Table of Contents
Advertisement
Quick Links
Advertisement
Table of Contents
Troubleshooting

Related Manuals for Arcoweld ARCOSTICK MMA 180


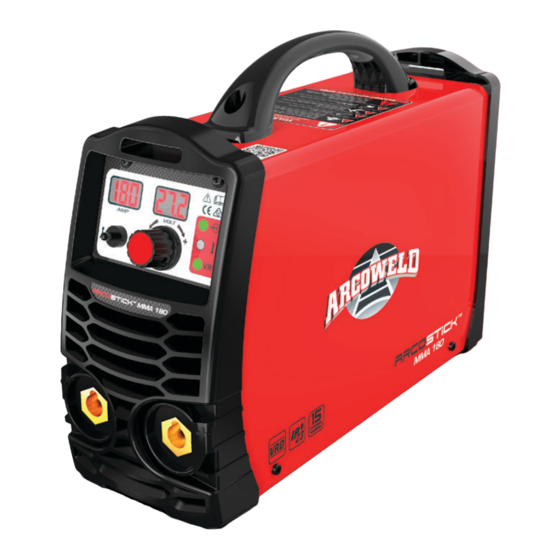
Summary of Contents for Arcoweld ARCOSTICK MMA 180
- Page 2 Our range can be viewed at - https://arcoweld.com.au/ For support please contact your Authorised distributor or Arcoweld directly + 61 8 9248 3188 + 61 8 9248 3166 93 Mulgul Road, MALAGA, WA 6090...
-
Page 3: Table Of Contents
CONTENTS 1 SAFETY…………………………………………………………………………………………………………………………..1 1.1 S …………………………………………………………………………………………………...1 IGNAL XPLANATION 1.3 T …………………………………………………………..5 HE KNOWLEDGE OF LECTRIC AND AGNETIC IELD 2 SUMMARY…………………………………………………………………………………………………………………….6 2.1 B ……………………………………………………………………………………………………6 RIEF NTRODUCTION 2.2 W …………………………………………………………………………………………………….6 ORKING RINCIPLE 2.3 V ……………………………………………………………………………………….7 MPERE HARACTERISTIC 3 INSTALLATION & ADJUSTMENT……………………………………………………………………………………...8 3.1 P ……………………………………………………………………………………………………………….8 ARAMETERS 3.2 D... -
Page 4: Safety
1 SAFETY 1.1 Signal Explanation The above signals mean warning! Running parts and electric shock can cause injury to yourself or others. The corresponding notices are as follows. It is quite a safe operation after taking several necessary protection measures. 1.2 Arc Welding Damage ... - Page 5 • Ensure the work cable makes a good electrical connection with the metal being welded. The connection should be as close as possible to the area being welded. Maintain the electrode holder, work clamp, welding cable and welding machine in good, safe operating condition.
- Page 6 Use suitable clothing made from durable flame-resistant material to protect your skin and that of your helpers from the arc rays. Protect other nearby personnel with suitable, non-flammable screening and /or warn them not to watch the arc nor expose themselves to the arc rays or to hot spatter or metal.
- Page 7 SELF-PROTECTION Keep all equipment safety guards, covers and devices in position and in good repair. Keep hands, hair, clothing and tools away from V-belts, gears, fans and all other moving parts when starting, operating or repairing welding equipment. Do not put your hands near the engine fans. Do not attempt to override the governor or idler by pushing on the throttle control rods while an engine is running DO NOT add fuel near an open flame welding arc or when engines are...
-
Page 8: The Knowledge Of Electric And Magnetic Field
the possibility of the welding current passing through lifting chains, crane cables or other alternate circuits. This can create fire hazards or overheat lifting chains or cables until they fail. Rotating parts may be dangerous. Use only compressed gas cylinders containing the correct shielding gas for the process used and properly operating regulators designed for the gas and pressure used. -
Page 9: Summary
SUMMARY 2 Summary 2.1 Brief Introduction Arcostick welders are general MMA arc welder which adopts the latest pulse width modulation (PWM) technology and the insulated gate bipolar transistor (IGBT) power module. Arcostick series welders have excellent performance: constant current output makes welding arc more stable;... -
Page 10: Volt-Ampere Characteristic
SUMMARY technology to insure current output stably. Meanwhile, the welding current parameter can be adjusted continuously to meet with the requirements of welding craft. Single phase, Medium Medium Rectify Inverter frequency frequency Hall device 220V±10%(50/60 transformer rectify Current positive- feedback control 2.3 Volt-Ampere Characteristic Arcostick welders have excellent volt-ampere characteristic as per the following graph. -
Page 11: Installation & Adjustment
3 Installation & Adjustment 3.1 Parameters Duty Cycle (10 mins): 130A@20%, 70A@60%, 55@100% 3.2 Duty cycle & Overheat The letter “X” stands for duty cycle, which is defined as the proportion of the time that a machine can work continuously within a certain time (10 minutes). The rated duty cycle means the proportion of the time that a machine can work continuously within 10 minutes at a rated welding current. -
Page 12: Tig Set Up
The different electrodes need different connections i.e.- polarity. Please refer to the electrode manual. 3.3.2 TIG SET UP ● For TIG operation, the shielded gas is inputted to welding torch directly, and the method of lifting arc is adopted. (Scratch TIG and MMA) 1、... - Page 13 INSTALLATION AND ADJUSTMENT MMA180 OPERATION Front Panel Layout 5. Volt Display 1. Amp Display 6. Over Current Light 2. MMA/Lift Tig Switch 7. High Temperature Light 3. Amperage Adjustment 8. VRD Light 9. Positive Polarity Output 4. Negative Polarity Output...
- Page 14 INSTALLATION AND ADJUSTMENT MMA180 OPERATION Back Panel 10. Primary Power Lead 11. Machine On/Off Switch...
-
Page 15: Welding Current Adjustment
OPERATION CONTROL AND CONNECTORS 4.2 Welding current adjustment ArcoStick 180 Welding current range is 5~180A). Arcostick series welders have the function of welding current pre-setting. Before welding, the welding current display will show the amperage. It is convenient to set parameters and adjust accurately. -
Page 16: Manipulation Of Electrode
OPERATION CONTROL AND CONNECTORS Lifting arc: Touch the electrode electrode on the workpiece. As you raise the electrode the arc will weld commence. workpiece 1-electrode moving; 2-the electrode swing right & left; 3-the electrode move along weld 4.3.2 Manipulation of electrode In MMA welding, there are three motions to balance being electrode angle, the electrode movement from side to side as well as the electrode travel speed. -
Page 17: Electrode Selection
OPERATION CONTROL AND CONNECTORS 4.4.2 Electrode selection The electrode diameter selection is based on the workpiece thickness, welding position, joint form, welding layer, etc. Please refer to the following table. The welding current reference for different electrode diameter Electrode diameter/mm 150~210 Welding current/A 25~40... -
Page 18: Operational Environment
OPERATION CONTROL AND CONNECTORS The groove angle or gap is too small, the Choose correct groove size Incomplete root face is too big Assemble correctly to and ensure clearance penetratio Welding parameters are not suitable, or the Choose a suitable welding current & speed assembly is not good Improve the operation skill of welders The welder’s operation skill is lower... -
Page 19: Operational Notice
OPERATION CONTROL AND CONNECTORS cannot exceed normal standard. ·Take care that there is enough ventilation during welding. There is at least 30cm free distance between the machine and wall. 4.8 Operational Notice ·Read 1 carefully before attempting to use this equipment. ... -
Page 20: Maintenance & Troubleshooting
OPERATION CONTROL AND CONNECTORS 5 Maintenance & Troubleshooting 5.1 Maintenance In order to guarantee that arc welding machine works efficiently manner it must be maintained regularly. Maintenance items in detail are in the following table. ● Warning: For safety while maintaining the machine, please shut off the supply power and wait for 5 minutes, until capacity voltage drops to safe voltage 36V. -
Page 21: Troubleshooting
OPERATION CONTROL AND CONNECTORS examination below 1MΩ, insulation is thought to be damaged and needs to change or strengthened. 5.2 Troubleshooting Before arc welding machines are dispatched from the factory, they have already been debugged accurately. Maintenance must be conducted carefully. If any wire becomes flexible or is misplaced, it may be cause potential danger to user. - Page 22 OPERATION CONTROL AND CONNECTORS Please utilise the below trouble shooting chart for addressing any issues: Issue Reasons Solutions The power light is Test and repair the inside damaged, or the Turning on the power source, and fan circuit of power light Pr3 connection is not good works, but the power light is not on? Repair or change power...
- Page 23 OPERATION CONTROL AND CONNECTORS Change the electrode Incline the electrode to the opposite way of the magnetic blow Magnetic effect Change the position of earth clamp or add earth cable on both sides of workpiece Over Reduce welding welding current output Overheat current protection...
-
Page 24: Electrical Principle Drawing
5.3 Electrical principle drawing 180 system chart... - Page 25 ARCOWELD LIMITED WARRANTY ________________________________________________________________________________ Arcoweld will repair or replace, at its discretion, any warranted parts or components that fail due to defects in material or workmanship within the time periods set out below. Arcoweld must be notified within 30 days of any failure, at which time Arcoweld will provide instructions on the warranty procedures to be implemented.
- Page 26 To make a claim under the warranty, take the product (with proof of purchase from an Arcoweld Accredited Seller) to the store where you purchased the product or contact Arcoweld on + 61 8 9248 3188 for advice on your nearest Service Provider.
- Page 27 To make a claim under the warranty, take the product (with proof of purchase from an Arcoweld Accredited Seller) to the store where you purchased the product, or contact Arcoweld on T:...
Need help?
Do you have a question about the ARCOSTICK MMA 180 and is the answer not in the manual?
Questions and answers