Table of Contents
Advertisement
Quick Links
Advertisement
Table of Contents
Troubleshooting

Related Manuals for Arcoweld ArcoTig HF200P


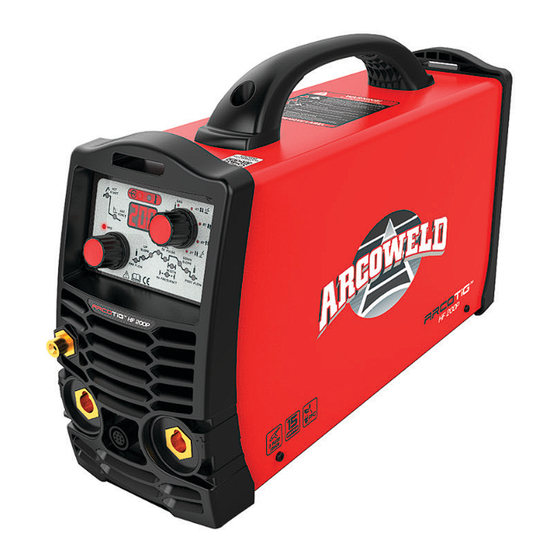
Summary of Contents for Arcoweld ArcoTig HF200P
- Page 2 CONGRATULATIONS! THANK YOU FOR YOUR PURCHASE OF THIS QUALITY ARCOWELD PRODUCT! WELCOME TO THE ARCOWELD TEAM! We look forward to supporting you with dependable service and our extensive range of first-class products. https://arcoweld.com.au/ Our range can be viewed at -...
-
Page 3: Table Of Contents
CONTENT CONTENTS 1 SAFETY ----------------------------------------------------------------------------------------------------------------------- 1 1.1 S -----------------------------------------------------------------------------------------------------1 IGNAL XPLANATION 1.2 A ELDING AMAGE --------------------------------------------------------------------------------------------------------------------------1 ---------------------------------------------------------------5 1.3 T HE KNOWLEDGE OF LECTRIC AND AGNETIC IELDS 2 SUMMARY ------------------------------------------------------------------------------------------------------------------ 7 2.1 B ------------------------------------------------------------------------------------------------------7 RIEF NTRODUCTION 2.2 M ----------------------------------------------------------------------------------------------------8 ODULE XPLANATION 2.3 W -------------------------------------------------------------------------------------------------------8 ORKING... -
Page 4: Safety
1 SAFETY 1.1 Signal Explanation The above signals mean warning! Notice! Running parts and electric shocks can injure or kill. It is a safe operation after taking several necessary protection measures. 1.2 Arc Welding Damage The following signals and word explanations relay dangers present during the welding operation. Please be aware and cautious. - Page 5 SUMMARY In semiautomatic or automatic wire welding, the electrode, electrode reel, welding head, nozzle or semiautomatic welding torch are also electrically “hot”. Always be sure the work cable makes a good electrical connection with the metal being welded. The connection should be as close as possible to the area being welded.
- Page 6 SUMMARY ARC RAYS CAN BURN. Use a shield with the proper filter and cover plates to protect your eyes from sparks and the rays of the arc when welding or observing open arc welding. Use suitable clothing made from durable flame-resistant material to protect your skin and that of your helpers from the arc rays.
- Page 7 SUMMARY SELF-PROTECTION Keep all equipment safety guards, covers and devices in position and in good repair. Keep hands, hair, clothing and tools away from V-belts, gears, fans and all other moving parts when starting, operating or repairing equipment. Do not put your hands near the engine fan. Do not attempt to override the governor or idler by pushing on the throttle control rods while the engine is running.
-
Page 8: The Knowledge Of Electric And Magnetic Fields
SUMMARY Sparks and spatter are thrown from the welding arc. Wear oil free protective garments such as leather gloves, heavy shirt, cuff less trousers, high shoes and a cap over your hair. Wear ear plugs when welding out of position or in confined places. Always wear safety glasses with side shields when in a welding area. - Page 9 SUMMARY All cables should be put away and far from the operator. Never coil the power cable around your body. Make sure welding machine and power cable are as far away from the operator as possible according to the actual circumstance.
-
Page 10: Summary
Inverters are portable, small, lightweight, with low power low consumption. The parameters of the ArcoTig HF200P on the front panel can be adjusted continuously and steplessly, such as start current, crater arc current, welding current, base current, duty ratio, upslope time, downslope time, pre-gas, post-gas, pulse frequency, hot start and arc force etc. -
Page 11: Module Explanation
ArcoTig HF200P is suitable for all positions welding for various plates made of stainless steel, carbon steel, alloyed steel, titanium, magnesium, cuprum, etc, which is also applied to pipe installment, mould mend, petrochemical, architecture decoration, car repair, bicycle, handicraft and common manufacture. -
Page 12: Volt-Ampere Characteristic
Panel PCB test ArcoTig HF200P 2.4 Volt-Amperage Characteristic ArcoTig HF200P welding machine has an excellent volt-ampere characteristic, whose graph is shown as the following figure. The relation between the conventional rated loading voltage U and the conventional welding current I... -
Page 13: Installation And Adjustment
INSTALLATION AND ADJUSTMENT 3 Installation and Adjustment 3.1 Parameters Model ArcoTig HF200P Power supply voltage(V) 1~110±10% 1~220±10% Frequency (Hz) 50/60 Rated Input Power (KW) 3.95 3,43 Rated Input Current(A) 30.2 31.7 30% 125A 30% 160A 25% 200A 30% 200A Duty Cycle (40℃ 10min) -
Page 14: Duty Cycle & Over Heat
3.4 Power supply input connection ArcoTig HF200P welding machines’ power supply connects to110V/220V. When the power supply voltage is over the safe work voltage, there are over voltage and under voltage protections inside the welder, the alarm will light up and at the same time the current output will be cut off. -
Page 15: Polarity Connection(Mma
MMA (DC): Choosing the connection of DCEN or DCEP according to the different electrodes. Please refer to the electrode manual. 3.6 Assembling the equipment (TIG) ArcoTig HF200P Workpiece is connected to the positive electrode of welding machine, and welding torch is ... - Page 16 , please contcat Arcoweld or your distributor according to the accessory codes. When ArcoTig HF200P welding machines are operated in HF ignition method, the ignition spark can cause interferences in equipment near the welding machine. Be sure to take specially safety...
-
Page 17: Operation
HF 200P OPERATION The layout of the Front Panel 1. Over Current Light 6. High Temperature Light 2. Digital Display 7. Mode Setting 3. Amperage Adjustment 4. Gas Outlet 8. Positive Polarity Output 5. Negative Polarity Output... - Page 18 HF 200P OPERATION The layout of the Back Panel 10. Machine On/Off Switch 9. Primary Power Lead...
-
Page 19: Control Panel
4.2 Control panel Welding mode selection switch Functional selection knob Ⅰ、Introduction the pilot light of ArcoTig HF200P operation panel: ⒈——Pre Flow Time (L1) ⒉——Start Current (L2) ⒊——Up Slope Time (L3) ⒋——Welding Current (Peak Current) (L4) ⒌——Base Current (L5) ⒍——Pulse Frequency (L6) ⒎——... - Page 20 adjustment is completed, confirm the parameter by pressing the ‘selection knob’ or the system will confirm the parameter automatically after 3 seconds. Other parameters such as arc force adjustment: press the ‘selection knob’;Adjust the ‘selection knob’and select the arc force LED (L13 is on); Press the ‘selection knob’again, the arc force LED(L13) is flashing It means the arc force can be adjusted.
- Page 21 ⒉ TIG parameters adjustment Adjust ‘welding mode selection switch’ to TIG mode. If in TIG 4T mode and the output pulse function is turned on, all parameters (L1~L11) of TIG can be adjusted. If in TIG 2T mode and the output pulse function is turned on, the start current and crater current is 5A;...
- Page 22 If the adjustment is complete, confirm the parameter by pressing the ‘selection knob’; or the system will confirm the parameter automatically after 3 seconds Output pulse selection: Press the ‘selection knob’. Adjust the ‘selection knob’and select the pulse LED (L11 is on); press the ‘selection knob’...
- Page 23 ‘selection knob’ Press the again, the output pulse function is turned off. Complete the adjustment after 3 seconds, the operation panel will return to original condition; welding current LED (L4) is on. If the welding mode is TIG and the output pulse function is turned on, the pulse pilot light (L11) is on. If the output pulse function is turned off, the pulse pilot light (L11) is off.
- Page 24 Base current Unit Setting range 5—200; Important! Only selectable when “pulse key” has been pressed. Ratio of pulse duration to base current duration Unit Setting range 5—100 Factory setting Important! Only selectable when “pulse key” has been pressed. Pulse frequency Unit Setting range 0.5—100...
-
Page 25: Torch Switch Control Current
4.3 Torch switch control current Adjust current button, when Torch switch it’s pushed up, the current increases, when it’s pushed down, the current decreases. 4.4 Argon Arc Welding Operation 4.4.1 TIG welding (4T operation) The start current and crater current can be pre-set. This function can compensate the possible crater that appears at the beginning and end of the welding. -
Page 26: Tig Welding (2T Operation)
t2~t3: Output current slopes up to the setting current value; adjustment range of up slope time 0~10.0S ; t3~t4: Welding process. During this period, the torch switch is released. Note: If the output pulse function is turned on, the output current is pulsed. If the output pulse function is turned off, the output current is DC current;... - Page 27 turned off, the output current is DC current; t3: Release the Torch switch, the output current slopes down; if the output pulse function is turned on, the slope down current is pulsed; t3~t4: The output current slopes down to minimum current (5A), stop arc; adjustment range of down slope ...
-
Page 28: Welding Parameters
4.5 Welding Parameters 4.5.1 Joint forms in TIG/MMA 4.5.2 The explanation of welding quality The relation of welding area color & protect effect of stainless steel Welding area Silver or blue red-grey grey black color golden Protect effect best better good worst The relation of welding area color &... - Page 29 101~150 4~9.5 4~7 151~200 6~13 6~8 201~300 8~13 8~9 tungsten electrode sharpened of the electrode angle of cone(°) background current/A diameter /mm diameter/mm 0.125 2~15 0.25 5~30 8~50 10~70 12~90 15~150 20~200 TIG of stainless steel (single run welding) Workpiece tungsten Argon gas Welding...
-
Page 30: Operation Environment
75~95 11~13 6~8 4~5 75~100 11~13 7~9 4~5 8~10 80~105 14~16 8~10 4~5 8~10 90~110 14~16 9~11 5~6 10~ 8~10 90~115 14~16 5~6 11~ 8~10 95~120 14~16 5~6 100~ 12~ 8~10 14~16 5~6 110~ 12~ 8~10 14~16 5~6 120~ 12~ 8~10 14~16 5~6... -
Page 31: Maintenance & Troubleshooting
5 Maintenance & Troubleshooting 5.1 Maintenance In order to guarantee that the arc welding machine works efficiently and in safety, it must be maintained regularly. Maintenance items in detail are in the following table. ● Warning: For safety while maintaining the machine, please shut off the supply power and wait for 5 minutes, until capacity voltage already drops to safe voltage 36V! Frequency Maintenance item... -
Page 32: Troubleshooting
Maintenance must be performed carefully. If any wire becomes flexible or is misplaced, it may be a potential danger to user! Only Professional maintenance personal who are Authorized by Arcoweld can overhaul or repair the machine. Always turn off the power source before removing covers or working on unit. - Page 33 The distance between tungsten electrode Reduce the distance (about 3mm). and workpiece is too long. The HF igniting board does not work. Repair or change Pr8 There spark on the The distance between the discharger is too Adjust this distance (about 0.7mm). igniting short.
-
Page 34: Electrical Principle Drawing
5.3 Electrical principle drawing... - Page 35 Arcoweld will repair or replace, at its discretion, any warranted parts or components that fail due to defects in material or workmanship within the time periods set out below. Arcoweld must be notified within 30 days of any failure, at which time Arcoweld will provide instructions on the warranty procedures to be implemented.
- Page 36 To make a claim under the warranty, take the product (with proof of purchase from an Arcoweld Accredited Seller) to the store where you purchased the product or contact Arcoweld on + 61 8 9248 3188 for advice on your nearest Service Provider.
- Page 37 Arcoweld Accredited Seller) to the store where you purchased the product, or contact Arcoweld on T: 61 8 9248 3188 All costs associated with lodging the warranty claim including the return of goods to Arcoweld or our Nominated Accredited Distributor / Accredited Service Provider are the responsibility of the consumer.
Need help?
Do you have a question about the ArcoTig HF200P and is the answer not in the manual?
Questions and answers