Table of Contents
Advertisement
Quick Links
DPERATDR,S MANUAL
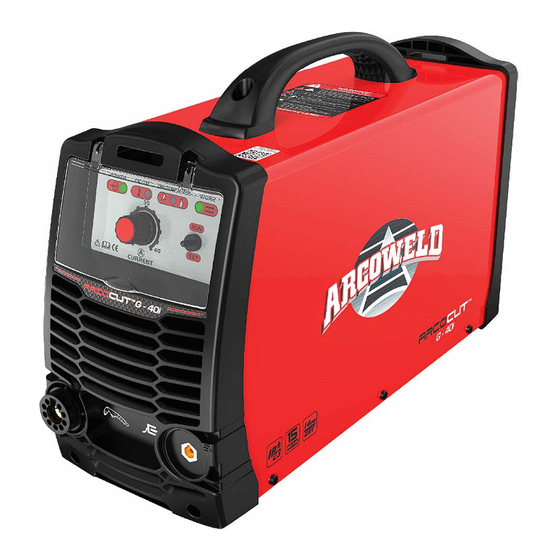
FlnC:CC:UT
IMPORTANT: Read this Owner's Manual Completely before attempting to use
this equipment. Save this manual and keep it handy for a quick reference. Pay
particular attention to the safety instruictions we have provided for your
protection. Contact your distributor i f you do not fully understand this manual.
™
G - 4Di
'All Trademarks / Part Numbers printed on this box are the property of their respective
owners and are for reference purposes only. All Trademarks / Part Numbers are in no way
connected or affiliated with Arcoweld. Specification / Production Information / Product
Appearance are subject to change without notice. Please refer to www. a rcoweld.com.au for
the most up to date data.
Advertisement
Table of Contents

Summary of Contents for Arcoweld ArcoCut G-40i
- Page 1 All Trademarks / Part Numbers are in no way this equipment. Save this manual and keep it handy for a quick reference. Pay connected or affiliated with Arcoweld. Specification / Production Information / Product particular attention to the safety instruictions we have provided for your Appearance are subject to change without notice.
- Page 2 Our range can be viewed at - For support please contact your Authorised distributor or Arcoweld directly T: + 61 8 9248 3188 F: + 61 8 9248 3166 93 Mulgul Road, MALAGA, WA 6090...
-
Page 3: Table Of Contents
CONTENTS 1 SAFETY ..............................1 2 TECHNOLOGY PARAMETERS ........................2.1 P ARAMETERS ..........................................3 INSTALLATION ..............................3.1 U NPACKING ..........................................3.2 I NPUT OWER ONNECTIONS ................................3.3 Air C ONNECTIONS ....................................4 OPERATION ............................. 4.1 L ......................... 7 AYOUT RONT ANEL... -
Page 4: Safety
1 SAFETY Important Safety Precautions OPERATION AND MAINTENANCE OF PLASMA ARC EQUIPMENT CAN BE DANGEROUS AND HAZARDOUS TO YOUR HEALTH. Plasma arc cutting produces intense electric and magnetic emissions that may interfere with the proper function of cardiac pacemakers, hearing aids, or other electronic health equipment. Persons who work near plasma arc cutting applications should consult their medical health professional and the manufacturer of the health equipment to determine whether a hazard exists. - Page 5 • Repair or replace all worn or damaged parts. • Extra care must be taken when the workplace is moist or damp. • Disconnect power source before performing any service or repairs. • Read and follow all the instructions in the Operating Manual. FIRE AND EXPLOSION Fire and explosion can be caused by hot slag, sparks, or the plasma arc.
-
Page 7: Technology Parameters
2.Technology Parameters 2.1 Parameters Models ArcoCut 40i Parameters single-phase,220V/110V,50/60Hz Input power 23.4(220V) Rated input current(A) 33.7(110V) 4.63(220V) Rated input power(KW) 3.44(110V) 20~40(220V) Adjustment range of current(A) 20~30(110V) Max no-load voltage(V) 40%(220V) Duty cycle(40℃,10 minutes) 35%(110V) Note: The above parameters are subject to change with the improvement of machines. 3 Installation 3.1 Unpacking 1. -
Page 8: Operation
G-40i OPERATION The layout of the Front Panel 4. Cutting Display 1. Power display 2. Over-Current 5. Tip/Torch Air Warning Lite Warning Light 3. Current Adjustment 6. Run-Cut, Set Switch 8. Earth Clamp Dinse Fitting 7. Cutting Torch Connection orch Connection... - Page 9 G-40i OPERATION The layout of the Back Panel 9. Primary Power Lead 10. Air Fitting 11. Machine On/Off Switch...
-
Page 10: Layout O F The Front And Rear Panel
4.1 Cutting Preparation 1. Tightly connect the power cable to electrical socket outlet (the input voltage, refer to section 2 technology parameters) 2. Connect the air pipe to the air supply equipment, the earth cable to the workpiece 3. Turn on the power switch, the power source lamp on. 4. -
Page 11: Maintenance
5 Maintenance 5.1 Cutting Torch maintenance Warning: 1. Check the consumable parts for damage, if worn, replace it. 2. Turn off the power source before the check or remove cutting torch parts Note: When operating the torch in a normal condition, a small number of air vents through the gap between the shield cup and the torch handle, do not attempt to over tighten the shield cup as irreparable damage to internal components may result. - Page 12 1. The shield cup improper installation, turn off the power source, install and screw it down properly, then turn on the power source. C. The cutting torch fails to ignite the arc, when pressing on the torch switch, the TIP/GUN/AIR lamp is on and air feeds intermittently.
-
Page 13: Packing List
Worn torch parts (consumables), shut off input power. Remove and inspect torch shield cup, tip and electrode. Replace electrode or tip if worn; replace shield cup if excessive spatter adheres to it. J. Arc shuts off during operation; arc will not restart when the torch switch is activated. Power Supply is overheated (OC/OT lamp on), let the unit cool down for at least 5 minutes. - Page 14 All warranty periods begin on the date of sale of the product to the original retail customer or 1 year after sale to an authorized Arcoweld Distributor. Limited Warranty Period as below –...
- Page 15 To make a claim under the warranty, take the product (with proof of purchase from an Arcoweld Accredited Seller) to the store where you purchased the product or contact Arcoweld on + 61 8 9248 3188 for advice on your nearest Service Provider. Arcoweld reserves the right to request documented evidence of date of purchase.
- Page 16 Arcoweld Accredited Seller) to the store where you purchased the product, or contact Arcoweld on T: + 61 8 9248 3188 All costs associated with lodging the warranty claim including the return of goods to Arcoweld or our Nominated Accredited Distributor / Accredited Service Provider are the responsibility of the consumer.


Need help?
Do you have a question about the ArcoCut G-40i and is the answer not in the manual?
Questions and answers