Table of Contents
Advertisement
Quick Links
Advertisement
Table of Contents
Troubleshooting

Related Manuals for Arcoweld ArcoTiG HF 315 AC/DC


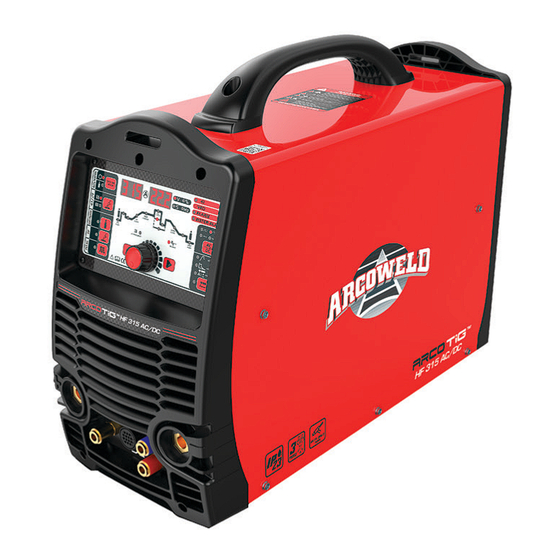
Summary of Contents for Arcoweld ArcoTiG HF 315 AC/DC
- Page 2 Our range can be viewed at - https://arcoweld.com.au/ For support please contact your Authorised distributor or Arcoweld directly + 61 8 9248 3188 + 61 8 9248 3166 93 Mulgul Road, MALAGA, WA 6090...
-
Page 3: Table Of Contents
CONTENT CONTENTS 1 SAFETY ----------------------------------------------------------------------------------------------------------------------- 1 1.1 S ----------------------------------------------------------------------------------------------------- 1 IGNAL XPLANATION 1.2 A -------------------------------------------------------------------------------------------------- 1 ELDING AMAGE 1.3 T ------------------------------------------------------------------ 5 HE KNOWLEDGE OF LECTRIC AND AGNETIC IELDS 2 SUMMARY ------------------------------------------------------------------------------------------------------------------ 4 2.1 B ---------------------------------------------------------------------------------------------------- 9 RIEF NTRODUCTION 2.2 M ------------------------------------------------------------------------------------------------- 11 ODULE XPLANATION... -
Page 4: Safety
1 SAFETY 1.1 Signal Explanation The above signals mean warning! Notice! Running parts and electric shocks can injure or kill. It is a safe operation after taking several necessary protection measures. 1.2 Arc Welding Damage The following signals and word explanations relay dangers present during the welding operation. Please be aware and cautious. - Page 5 SUMMARY semiautomatic welding torch are also electrically “hot”. Always be sure the work cable makes a good electrical connection with the metal being welded. The connection should be as close as possible to the area being welded. Maintain the electrode holder, work clamp, welding cable and welding machine in good, safe operating condition.
- Page 6 SUMMARY the arc when welding or observing open arc welding. Use suitable clothing made from durable flame-resistant material to protect your skin and that of your helpers from the arc rays. Protect other nearby personnel with suitable, non-flammable screening and /or warn them not to watch the arc nor expose themselves to the arc rays or to hot spatter or metal.
- Page 7 SUMMARY SELF-PROTECTION Keep all equipment safety guards, covers and devices in position and in good repair. Keep hands, hair, clothing and tools away from V-belts, gears, fans and all other moving parts when starting, operating or repairing equipment. Do not put your hands near the engine fan. Do not attempt to override the governor or idler by pushing on the throttle control rods while the engine is running.
-
Page 8: The Knowledge Of Electric And Magnetic Fields
SUMMARY area. Connect the work cable to the work as close to the welding area as practical. Work cables connected to the building framework or other locations away from the welding area increase the possibility of the welding current passing through lifting chains, crane cables or other alternate circuits. This can create fire hazards or overheat lifting chains or cables until they fail. -
Page 9: Brief Introduction
Inverters are portable, small in size, light weight, with low power low consumption. The parameters of ARCOTIG HF 315 AC/DC on the front panel all can be adjusted continuously and steplessly, such as start current, crater arc current, welding current, base current, duty ratio, upslope time, downslope time, pre-gas, post-gas, pulse frequency, AC frequency, balance, hot start, arc force and arc length etc. - Page 10 SUMMARY DC MMA DC TIG DC Pulse TIG AC MMA AC TIG AC Pulse TIG 1.For DC MMA, polarity connection can be chosen according to different electrodes, please refer to 3.5; 2.For AC MMA, magnetic flow caused by invariable DC polarity can be avoided; 3.
-
Page 11: Module Explanation
TIG——Tungsten Insert Gas welding 2.2 Module Explanation The module explanation of arc welding machine must accord with the correlative prescripts of National Standard GB10249. It is explained as the following (take ARCOTIG HF 315 AC/DC as an example). MAGIC AC TIG-250W... -
Page 12: Volt-Amperage Characteristic
SUMMARY Three-phase, AC Tran Hall AC or DC AC or DC Recti Invert Recti Invert sform devic fier fier 380V 50Hz (220V,50Hz) Control signal Current feedback control 2.4 Volt-Amperage Characteristic ArcoTig 250W/315W AC/DC welding machines have an excellent volt-amperage characteristic, whose graph is shown as the following figure. -
Page 13: Installation And Adjustment
INSTALLATION AND ADJUSTMENT 3 Installation and Adjustment 3.1 Parameters Models 250W (ArcoTig 250W) 315W (ArcoTig 315W) Parameters Input Voltage(V) 3~380±10%,50Hz 3~220±10%,50Hz 3~380±10%,50Hz 3~220±10%,50Hz Rated input 11.8(AC) 15.0(AC) 19.0(AC) 25.8(AC) 15.9(AC) 17.8(AC) 28.6 (AC) current(A) 10.7(DC) 14.5(DC) 18.4(DC) 25.4(DC) 14.6(DC) 15.7(DC) 27.8(DC) 9.1( Rated input power... -
Page 14: Duty Cycle & Overheat
INSTALLATION AND ADJUSTMENT AC Frequency ( Hz) 25~250 25~250 Clean Effect(%) 15~50 15~50 ARC Thrust 0~10 0~10 Thermal ARC 0~10 0~10 ARC Length 0~10 0~10 Efficiency Duty 70% 250A 60% 250A 60%315A 70% 270A cycle(40℃,10 minutes) 100% 210A 100% 200A 00% 220A 100% 210A Protection class... -
Page 15: Power Supply Input Connection
3.4 Power supply input connection ARCOTIG HF 315 AC/DC welding machines’ power supply connects to 3-phase 380V(3-phase 220V) Note: Please refer to the nameplate about the right power supply connection (three phase 220v or three phase 380v). -
Page 16: Assembling The Equipment (Tig)
INSTALLATION AND ADJUSTMENT 3.6 Assembling the equipment (TIG) (ArcoTig 250W/315W ACDC) - Page 17 INSTALLATION AND ADJUSTMENT (ArcoTig 250W/315W ACDC) Note: the red and blue water pipes on front panel are connected with torch. the red and blue water pipes on real panel are connected with water box. Workpiece is connected to the positive electrode of welding machine, and welding torch is ...
- Page 18 MAINTENANCE AND TROUBLESHOOTING HF 315 AC/DC OPERATION The layout of the Front Panel 1. Amperage Display 2. Water Cooling / Gas 18. Voltage/ Cooling Function Frequency/Hz, Display 3. 2T/4T Trigger 17. Waveform Control 4. Gas Purge 16. AC/DC Function 5. High Frequency Tig 15.
- Page 19 MAINTENANCE AND TROUBLESHOOTING HF 315 AC/DC OPERATION The layout of the Back Panel 19. On/Off Switch 24. Remote amphenol plug 20. Primary Power Lead 23. Quick Connect Gas FItting 22. Quick Connect Blue Cooling Hose 21. Quick Connect Red Cooling Hose...
- Page 21 OPERATION Overview The key feature of the control panel is the logical way in which the controls are arranged. All the main parameters needed for day-to-day working can easily be - -selected with the keys -altered with the adjusting dial -shown on the display during welding.
- Page 22 OPERATION Available parameters where 2T and 4T mode have been selected: Gas pre-flow time Unit Setting range 0.1—10 Factory setting Starting current (only with 4T) Unit Setting range REC:10—100%of main current Iw SIN:30—100%of main current Iw TRI:30—100%of main current Iw DC:5—100%of main current Iw Factory setting Upslope time...
- Page 23 OPERATION Ratio of pulse duration to base current duration Unit Setting range 5—100 Factory setting Important! Only selectable when “pulse key” has been pressed. Pulse frequency Unit Setting range 0.5—200 Factory setting Important! Only selectable when “pulse key” has been pressed. Downslope time Unit Setting range...
- Page 24 OPERATION Unit Setting range 15—50 Factory setting (9) Rod electrode (MMA) welding key Parameter Setting range Arc force 0-10 Hot start 0-10 Arc length 0-10 (10) Power/Alarm indicator Light up if the power switch on Light up if the welder overheats, over-voltage or over-current.
- Page 25 OPERATION (12) Welding current display Display the pre-set or the actual welding current value. Before the start of welding, the left-hand display shows the pre-set current value of Is, Iw, Ib and Ic. After the start of welding, the left-hand display shows the present actual value of the welding current. The control panel indicates which position has been reached in the welding process by brightening the light.
-
Page 26: Remote Control
OPERATION Water cooling Gas cooling NOTE: “Parameter selection keys” and “Adjusting dial” can be used only in the welding process. “Rod electrode welding key” and “Adjusting dial” can be used only on MMA mode. 4.3 Remote control 1-3 CURRENT SET :They are factory set, can’t be changed. If they are changed, the welder may not work. 4 FACTORY TEST:When it is ON, the welder is on debug state. -
Page 27: Torch Switch Control Current
OPERATION Pedal control Connected 14-lead aero socket Adjustment on the front panel knob of max welding current 4.3.2 Torch switch control current Adjust current button, when Torch switch it’s pushed up, the current increases, when it’s pushed down, the current decreases. 4.4 Argon Arc Welding Operation 4.4.1 TIG welding (4T operation)... - Page 28 OPERATION 0: Press and hold the torch switch, Electromagnetic gas valve is turned on. The shielding gas stars to flow; 0~t1: Pre-gas time (0.1~10S); t1~t2: Arc is ignited at t1 and then output the setting value of start current; ...
-
Page 29: Tig Welding (2T Operation)
OPERATION 4.4.2 TIG welding (2T operation) This function without the adjustment of start current and crater current is suitable for the Re-tack welding、transient welding、thin plate welding and so on. I(A) Welding current Is Loosen the welding gun switch The setting base current Ib Arc is Arc is... - Page 30 OPERATION 20A, which can reduce the tungsten spoilage,,prolong the using life of the tungsten electrode,and prevent tungsten clipping. ○ 2 TIG /DC/HF:If the tungesten electrode touches the workpiece when welding, the current will drop to 0 within 1s, which can reduce the tungsten spoilage,prolong the using life of the tungsten electrode, and prevent tungsten clipping.
-
Page 31: Welding Parameters
OPERATION 4.5 Welding Parameters 4.5.1 Joint forms in TIG/MMA 4.5.2 The explanation of welding quality The relation of welding area color & protect effect of stainless steel Welding area Silver or blue red-grey grey black color golden Protect effect best better good worst... - Page 32 OPERATION DC positive connection Welding current Gas nozzle Gas flow Gas nozzle Gas flow range/A diameter/mm rate/L·min diameter/mm rate/L·min 10~100 4~9.5 4~5 8~9.5 6~8 101~150 4~9.5 4~7 9.5~11 7~10 151~200 6~13 6~8 11~13 7~10 201~300 8~13 8~9 13~16 8~15 Notice: the above parameters originate from《Welding Dictionary》P149, Volume 1 of Edition 2. tungsten electrode sharpened of the angle of cone(°)...
-
Page 33: Accessory Kits List
OPERATION Corner 175~250 joint Notice: the above parameters originate from《Welding Dictionary》P150, Volume 1 of Edition 2. Parameters of piping back sealing welding for mild steel (DCEP) Argon Welding Tungsten flow Piping Gas nozzle Welding wire Welding rate electrode rate diameterΦ/mm diameter/mm diameter/mm current/A... -
Page 34: Operation Environment
OPERATION 180~ 10~15 8~12 - 180~ 3~4 10~15 10~12 - 240~ 16~20 14~16 - 260~ 4~5 16~20 14~16 100~ 280~ 4~5 16~20 14~16 150~ 300~ 4~5 5~6 18~22 16~20 180~ 340~ 5~6 5~6 20~24 16~20 200~ 340~ 5~6 20~24 16~20 200~... - Page 35 OPERATION ● Connect the ground wire with the machine directly and refer to 3.5. ● Do not touch the output electrode with any part of your body. ● Before operation only persons involved in the welding process should be present and must have eye protection to prevent ray damage.
-
Page 36: Maintenance & Troubleshooting
MAINTENANCE & TROUBLESHOOTING 5 Maintenance & Troubleshooting 5.1 Maintenance In order to guarantee that the arc welding machine works efficiently and is safe, it must be maintained regularly. Maintenance items in detail are in the following table. ● Warning: For safety while maintaining the machine, please shut off the supply power and wait for 5 minutes, until capacity voltage already drops to safe voltage 36V! Frequency Maintenance item... -
Page 37: Troubleshooting
Use dry compressed air to clear the inside of arc welding machine. Especially for clearing up the dusts on radiator, main voltage transformer, inductance, IGBT module, the fast Monthly recover diode and PCB, etc. examination Check the connections. Tighten loose connections. Please erase rust on al connections to ensure good connection. - Page 38 Troubles Reasons Solution Turning on the power source, No power supply input Check whether there is power supply the power lamp is not on, and The fuse inside the machine damaged Change it (3A) fan doesn’t work The number on the display is not The LED in the display is broken Change the LED intact.
- Page 39 Troubles Reasons Solution The penetration of molten pool The welding current is adjusted too low Increase the welding current is not enough. The arc is too long in the welding process Use 2T operation Two much welding Reduce the welding current output current Overheat protection Working time too...
-
Page 40: Electrical Principle Drawing
5.3 Electrical principle drawing... - Page 41 _______________________________________________________________________________________ Arcoweld will repair or replace, at its discretion, any warranted parts or components that fail due to defects in material or workmanship within the time periods set out below. Arcoweld must be notified within 30 days of any failure, at which time Arcoweld will provide instructions on the warranty procedures to be implemented.
- Page 42 Note: * No employee, agent, or representative of Arcoweld is authorized to change this warranty in any way or grant any other warranty, and Arcoweld shall not be bound by any such attempt. Correction of nonconformities, in the manner and time provided herein, constitutes fulfilment of Arcoweld’s obligations to purchaser with respect to the product.
- Page 43 To make a claim under the warranty, take the product (with proof of purchase from an Arcoweld Accredited Seller) to the store where you purchased the product, or contact Arcoweld on T:...
Need help?
Do you have a question about the ArcoTiG HF 315 AC/DC and is the answer not in the manual?
Questions and answers