
Subscribe to Our Youtube Channel
Related Manuals for Lenoxx AF1050


Summary of Contents for Lenoxx AF1050
- Page 1 Model: AF1050 BATCH NUMBER: PR3650 PLEASE READ AND RETAIN THESE INSTRUCTIONS FOR FUTURE REFERENCE...
-
Page 2: About The Product
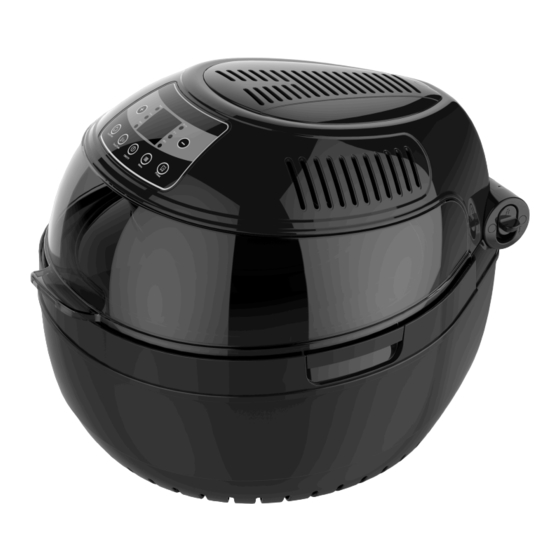
ABOUT THE PRODUCT: Your personal chef has arrived. Whatever the occasion – the Large Multifunctional Air Fryer has got you covered. Loaded with a baking cage, rack, tongs and chicken rotisserie, this air fryer is packed and ready to make meals that will take your cooking to the next level (in just a fraction of the time!). Better yet, this cutting-edge ‘turbo air’ technology cooks your food with minimum oil, while still providing maximum taste. Simply add your ingredients into its huge 10 litre capacity and wait as the air fryer circulates ‘superheated’ air up to 200 degrees Celsius. Watch as your food grills, roasts, fries or bakes its way to perfection behind our secure, glass viewing window. This Large Multifunctional Air Fryer gives you the tools to cook your way to a healthier life – offering a low-fat, low-calorie, fast-cooking alternative that does not sacrifice taste or quality. IMPORTANT SAFEGUARDS: When using electrical appliances, basic safety precautions should always be followed, including the following. 1. Read instructions carefully before use 2. Do not touch hot surfaces. Use the handles on the appliance and oven mitts. 3. Before use, check that your local voltage corresponds with the specifications shown on the appliance nameplate located under the appliance. 4. Do not turn on power until this appliance and parts are in place as required. Make sure the lid is down before plugging and switching on the power. 5.To protect against electric shock, do not immerse the cord, plug, or this appliance in water or other liquid. 6. Close supervision is necessary when any appliance is used near children. 7. Unplug from outlet when not in use and before cleaning. Allow the appliance to cool down before putting on or taking off parts, and before cleaning the appliance. 8. Do not operate any appliance with a damaged cord or plug or after the appliance malfunctions, or has been damaged in any manner. Return the appliance to the nearest authorized service facility for examination, repair or adjustment. 9. Do not use appliance for other than intended use. And this is household use only. It is not to be used out doors or for commercial purposes. 10. The unit should be operated on a separate electrical power point from other operating appliances. If the power point is overloaded with other appliances, this appliance may not work properly. -
Page 3: Short Cord Instructions
11. Extreme caution must be used when moving an appliance containing hot food. 12. Do not place on or near a hot gas or electric burner, or in a heated oven. Also keep away from the flammable material such as curtains, draperies when it is working. 13. Leave enough open space from other subject when in use. 14. Do not let cord hang over the edge of table or counter, or touch hot surface. 15. Do not leave the cord hanging. 16. Do not unplug the appliance by pulling on the cord. 17. Do not overload the internal cooking bowl, the maximum weight of the food is 2KG. 18. Do not cover the appliance while in use. 19. This appliance is not designed to be used by people (including children) with a physical, sensory or mental impairment, or people without knowledge or experience, unless they are supervised or given prior instructions concerning the use of the appliance by someone responsible for their safety. Children must be supervised to ensure that they do not play with the appliance. SHORT CORD INSTRUCTIONS: Do not use with an extension cord. A short power supply cord is provided to reduce the risks resulting from being entangled in or tripping over a long cord. PREPARATION FOR USE: Before using the air fryer for the first time: Warning: when using for the first time, the appliance may emit slight odour which is not harmful and will disappear after a few minutes. This is because a protective oil was applied to protect parts from possible friction in transport. Carefully unpack the unit and remove all the packing materials. Select a flat, heat-resistant Non- flammable surface to place the unit. Use sponge and soapy water to remove any dust on the surface that may happen during packing and transport. Allow it to dry before use. -
Page 4: Technical Specifications
TECHNICAL SPECIFICATIONS: Voltage: 220~240V Power: 1300W Frequency: 50~60Hz Temperature Range: 50~230℃ Time setting Range : 1~60 min Capacity: 10L CONSTRUCTION AND FEATURES: 1.Control Panel 2.Lid Handle 3.Heat emission hole / Louver 4.Transparent Cover 5.Heating Fan 6.Fixed Switch 7.Spindle Hole 8.The Base 9.Cold plate spray teflon 10.Low Rack 11.Tong 12.Baking Cage 13. Spindle 14. Chicken Fork... - Page 5 Warning: Below is the correct method of opening or closing the cooking lid: Warning: Before opening the lid, the cooking process must be stopped. Please press down on the Fixed Switch (as illustrated above) to unlock the lid. The steam coming out of the air fryer will be hot and may cause burns. Proceed with care when opening the unit. Warning: Before use, remove the paper holder from inside the unit.
-
Page 6: How To Use The Accessories
ACCESSORIES: Tongs Dual Rack Baking Cage Chicken Fork Item Description Tongs For holding food, baking pan or dual rack Dual Rack Low Rack: Good for cooking larger food items such as roast poultry (full size), vegetables, etc. Legs are short ways down when placed in the unit. High Rack: Suitable for cooking medium food items such as chicken wings, pizza, etc. Legs are long ways down when placed in the unit. Baking cage Suitable for food like French fries and those need rotating & even heating. Chicken Fork Suitable for a whole chickenn or lamb leg. HOW TO USE THE ACCESSORIES: When handling the heated accessories and food, please use tongs provided and if necessary use oven mitts. Please pay attention to the temperature of the inner pot. Take care handling the pot if it is hot. Use oven mitts and use both hands to lift it out and carry it to prevent any accident or injury. - Page 7 1. Use of Fork for whole chicken: (1) (2) (3) (4) (5) (6) Attach the included screws to the chicken fork and twist them to secure the chicken forks to the rotisserie stick. 2. Tong and Baking Cage (1) (2) (4) (5) Use one of the included screws to secure the baking cage to the rotisserie stick. Twist the screw to secure the baking cage to the rotisserie stick.
-
Page 8: Control Panel
CONTROL PANEL: Item Number Function 1. + PLUS Used to adjust the timer and temperature 2. - MINUS Used to adjust the timer and temperature 3. Food roller Used to start/stop the rotation function 4. Temp/Timer Used to set your desired cooking temperature and time 5. On/Off Used to turn the appliance on and off 6. Menu Used to change between different preset cooking modes 7. Preset Used to preset a delay start Note: For more information see later part of instructions. COOKING: 1. Choose your desired method to cook your food items, whether it is using the included cooking rack, the included baking cage or an oven safe pan inside the air fryer (not included). 2. Add the food to the air fryer. If you use the baking cage, please put the food inside before placing into the air fryer. -
Page 9: Operation
6. When time timer reaches zero, the air fryer will make a ‘ding’ sound to alert that the cooking process has been completed and the air fryer will stop operation. OPERATION: ON/OFF BUTTON: Press the ON/OFF button on the control panel to turn the appliance on. There are two ways to use the air fryer, one is using the pre-set menu cooking times and temperatures, the other is to manually set your desired time and temperature. PRESET MENU COOKING: Press the MENU button on the control panel. Press the menu button repeatedly to choose between the different menu cooking options. Note the red LED light next to the cooking options. When your chosen option has been selected and is shown on the screen, press the ON/OFF button on the control panel to start the cooking process. Menu Temperature Time Roast 200 25 mins French Fries (non- 230℃ 25 mins precooked) Bake... -
Page 10: Preset Function
PRESET FUNCTION: This function allows you to set the cooker to delay start – start operation at a later time. TO SET A DELAY START WITH A PRESET COOKING OPTION: When the unit is in standby mode, press the PRESET button. The red light near the preset button will be on. Press the + or – buttons on the control panel to adjust the time. The minimum time the cooker can be set to delay start is 1 hour. The maximum time the cooker can be set to delay is 9 hours and 59 minutes. When the chosen time is shown on the screen, then press the MENU button. You can press the menu button repeatedly to choose one of the preset cooking options (details are on the previous page). When you have made your selection from one of those options, press the ON/OFF button on the control panel. The time will then begin to count down, the airfryer will come on and begin the cooking process when the timer reaches 00:00. -
Page 11: Cooking Guide
COOKING GUIDE: The cooking times are a guide only. They could vary depending on quantity, temperature and weight etc. Food Temperature Time Accessory to recommend Note: Chicken breast 220℃ Low Rack Below 300g 25~ piece 30mins Roast Chicken 220℃ 90 – 100 Rotisserie stick 2 kg mins Frozen French 230℃ Baking cage 25~ Fries 30mins Cashew nuts 200℃ Baking cage 5~8mins Coffee beans 230℃ Baking cage 15~ 20mins Chicken Wings 200℃ Baking cage 12~ / High Rack + Baking Tray (not 15mins included) - Page 12 CLEANING: Unplug the unit and allow it to cool down completely before cleaning. Completely clean and dry all parts after every use. * 1. Once the unit has cooled completely, clean the bowl thoroughly with warm soapy water and a damp cloth. Do not clean with a hard object such as wire brush. 2. For self-cleaning, add half inch of water with mild liquid detergent. Close the head/lid. Set the temperature to 60℃, set the timer for 15 minutes and allow residue to soften as it heats. Unplug and cool completely before continuing to clean.
Need help?
Do you have a question about the AF1050 and is the answer not in the manual?
Questions and answers