Table of Contents
Advertisement
Quick Links
Advertisement
Table of Contents

Related Manuals for HealthCo Milla B420


Summary of Contents for HealthCo Milla B420
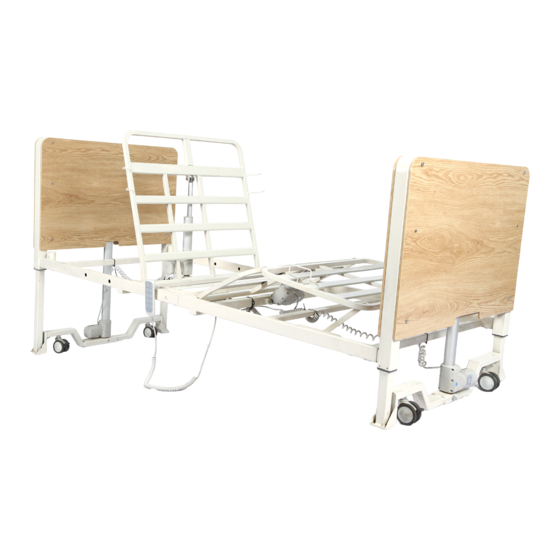
- Page 1 W: www.healthcoltd.co.uk E: enquiries@healthcoltd.co.uk Milla B420 by HealthCo Compact Low Profile Bed User Manual DEALERS: This manual MUST be given to the user of the bed. USER: Before using this bed, read this manual and save for future reference.
-
Page 2: Table Of Contents
Table of Contents WARNINGS ..............................2 DECLARIATION – ELECTROMAGNETIC EMSSIONS.....................3 TECHNICAL SPECIFICATION ..........................4 ASSEMBLY INSTRUCTIONS ..........................5 UNPACKING THE BED ..........................5 ASSEMBLING THE BED ..........................6 ASSEMBLING THE BED DECK ........................6 ASSEMBLING THE HEAD/FOOT BOARD ONTO THE BED ................7 INSTALLING THE MATTRESS RETAINING SYSTEM .................. -
Page 3: Warnings
WARNINGS • DO NOT exceed maximum weight limitation of the bed. The maximum safe working load (SWL) of the bed is 200 kg. The suggested patient weight is 165 kg. but varies based on the accessories on the bed. • The beds are intended for users who fully understand the content of this manual and is not intended for use by children. -
Page 4: Declariation - Electromagnetic Emssions
• DO NOT attempt to open the pre-sealed actuator or obtain local service, for it will VOID the warranty and might result in damage. Consult your dealer or manufacturer for further information. WHEN USING RAILS OR ASSIST BARS: • Before operating, ensure that the bed rails/bars are assembled and installed correctly as instructed. -
Page 5: Technical Specification
TECHNICAL SPECIFICATION Bed Height 99 mm – 560 mm Back Rest Angle 0° - 70° Knee Break Angle 0° - 27° Additional Manual Leg Lift Yes, various positions ± 12° Trendelenburg/ Reverse Trendelenburg Safe Working Load (SWL) 200 kg Max. Patient Weight 165 kg Sleeping Surface Dimension 900 mm x 2000 mm... -
Page 6: Assembly Instructions
ASSEMBLY INSTRUCTIONS 1. UNPACKING THE BED Unpack the components from the shipping cartons. II. Remove any zip ties holding the components to the Bed Assembly. III. Upon unpacking your bed, the package should contain all the following components. IV. Inspect the bed components for damages. If the bed is damaged, do not use the bed and contact the manufacturer. -
Page 7: Assembling The Bed
2.1 ASSEMBLING THE BED The bed comes in folded position and locked on the transport bars. Refer to FOLDING AND TRANSPORTING THE BED to dismount the bed sections. Keep the removed screws and washers for installation. 2.2 ASSEMBLING THE BED DECK 1. -
Page 8: Assembling The Head/Foot Board Onto The Bed
ASSEMBLING THE HEAD/FOOT BOARD ONTO THE BED 1. Lift up the upper bed deck slightly and insert the head board into the main bed frame. 2. Secure the head board to the deck with two socket screws on each side. 3. -
Page 9: Installing The Hand Pendant Clip
2.5 INSTALLING THE HAND PENDANT CLIP Clip the hand pendant clip over the head board and push it down firmly. 2.6 CONNECTING CABLES TO THE CONTROL BOX Motor cables will need to be connected to the control box, located at the center of the bed. - Page 10 Backup Battery Backrest Motor Kneebreak Motor Headboard Motor Spare (if applicable) Footboard Motor Underbed lighting Nursing Control Hand Control (if applicable) (if applicable) 3. Connect all cables and reinstate the locking lid, ensure there is an audible click.
-
Page 11: Installing Battery Backup
2.7 INSTALLING BATTERY BACKUP 1. Switch the power supply off when installing the backup battery. 2. Affix the backup battery with nuts and bolts to the left of the control box, on the same holding plate. 3. Open the control box locking lid by pressing in the sides and lift it up, to expose the connections ports. -
Page 12: Installing The Rails
2.8 INSTALLING THE RAILS 1. Before installing the rails, the bed should be in the flat position. 2. Unclip the metal snap ring and remove the metal pins from the rail mounting brackets. 3. Hook the rail bracket onto the edge of the bed decking. Align the rail bracket mounting holes with the bed deck mounting holes. - Page 13 Holes for Assist Bars...
-
Page 14: Equipment Operation
EQUIPMENT OPERATION 1. POSITIONING THE BED To position the bed, use the castors to move the bed. Once the bed is in its desired location, lock all castors in place. 2. USING THE CONTROLLER The UP arrow ( ) indicates raising the corresponding parts of the bed. The DOWN arrow ( ) indicates lowering the corresponding parts of the bed. -
Page 15: Leveling The Leg Rest
continue lowering the bed, release and long press button 8 again. Ensure no body parts or obstacles are within the bed’s moving range. Where a connection fault is identified and rectified, the control system will require a reset in order to operate again. If the fault occurred on the motors for platform profiling, lower the corresponding motor to the lowest position for reset;... -
Page 16: Folding And Transporting The Bed
4. FOLDING AND TRANSPORTING THE BED The bed can be disassembled and transferred in a compact manner using the transport bars. 1. Reverse the bed installation procedure to disassemble the bed into four sections, the head board, the foot board, the upper and lower bed decks. Keep the screws and washers 2. -
Page 17: Troubleshooting Guide
TROUBLESHOOTING GUIDE SYMPTOMS FAULTS SOLUTIONS Bed idle when hand pendant Adjustment may be at the Check if other buttons are buttons are pressed. maximum or minimum working. position. Power cable not connected Ensure the power cable is or damaged. properly connected to the electrical socket and the bed. -
Page 18: Service Record
SERVICE RECORD DATE PERFORMED BY CONDITION REPORT... - Page 19 DATE PERFORMED BY CONDITION REPORT...
Need help?
Do you have a question about the Milla B420 and is the answer not in the manual?
Questions and answers