Advertisement
Available languages
Available languages
Quick Links
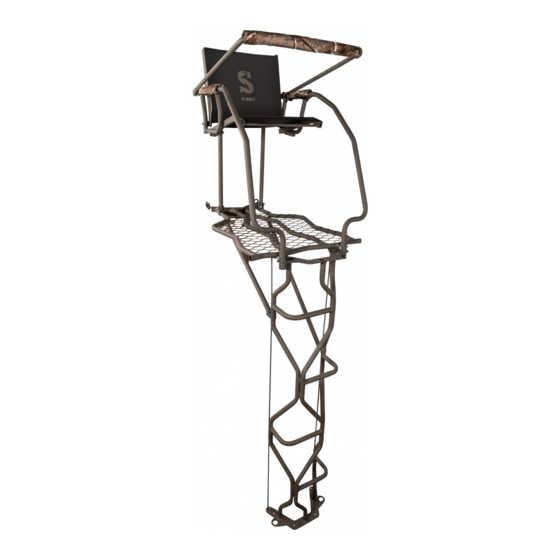
The Vine Single Hunter Ladder Treestand
SU82096
© 2016 Summit Treestands, LLC | 715 Summit Dr. Decatur, AL 35601
•
READ, FOLLOW AND UNDERSTAND ALL WRITTEN AND VIDEO WARNINGS AND INSTRUCTIONS BEFORE USE. INSPECT ALL EXPIRATION TAGS
PRIOR TO EACH USE. IF YOU DON'T COMPLETELY UNDERSTAND SAFE AND PROPER USE OF THE FULL BODY FALL ARREST HARNESS
SYSTEM (FBFAHS) OR TREESTAND, HUNT FROM THE GROUND! FAILURE TO FOLLOW ALL WARNINGS AND INSTRUCTIONS LISTED COULD
RESULT IN SERIOUS INJURY OR DEATH! IT IS REQUIRED THAT YOU WATCH AND UNDERSTAND THE DVD SUPPLIED WITH THIS PRODUCT &
THOSE SAFETY WARNINGS AND INSTRUCTIONS POSTED AT: www.summitstands.com/safety-videos
•
WHEN HUNTING FROM A TREESTAND, FALLS CAN OCCUR ANY TIME AFTER LEAVING THE GROUND! ANY FALL CAN CAUSE SERIOUS INJURY
OR DEATH! THE USE OF A FULL BODY FALL ARREST HARNESS SYSTEM (FBFAHS) IS REQUIRED WHEN USING ANY TREESTAND. IF FBFAHS IS
NOT PRESENT, HUNT FROM GROUND LEVEL!
•
THE USE OF THIS PRODUCT REQUIRES THE USE OF A FULL BODY FALL ARREST HARNESS SYSTEM (FBFAHS). THE FBFAHS MUST BE USED
AND ATTACHED TO THE TREE PRIOR TO GAINING ENTRY UPON THE TREESTAND PLATFORM, AND SHOULD BE WORN AND ATTACHED TO THE
TREE AT ALL TIMES WHILE USING THE TREESTAND UNTIL SAFELY BACK AT GROUND LEVEL. READ AND FOLLOW ALL INSTRUCTIONS THAT
WERE PROVIDED WITH YOUR FBFAHS.
•
DO NOT USE THIS PRODUCT UNTIL YOU UNDERSTAND SAFE AND PROPER USE. READ AND FOLLOW ALL INSTRUCTIONS AND WARNINGS
PRIOR TO EACH USE!
•
ALWAYS WEAR A FBFAHS THAT MEETS STRINGENT, INDUSTRY STANDARDS RECOGNIZED BY THE TMA. WEAR A FBFAHS EVERY TIME YOU
LEAVE THE GROUND, INCLUDING ASCENDING OR DESCENDING. SINGLE BELT STRAPS AND CHEST HARNESSES ARE NO LONGER ALLOWED
AND SHALL NOT BE USED! FAILURE TO USE A FBFAHS COULD RESULT IN SERIOUS INJURY OR DEATH!
•
THE LENGTH OF THE HARNESS TETHER SHALL BE MINIMIZED AT ALL TIMES. IT SHALL BE ADJUSTED SO THAT IT IS ABOVE THE HEAD WITH
NO SLACK (OR SNUG) IN THE SEATED POSITION AND YOU SHALL HAVE MINIMUM AMOUNT OF SLACK POSSIBLE WHEN CLIMBING. FAILURE TO
DO SO MAY RESULT IN SUSPENSION WITHOUT THE ABILITY TO RECOVER TO YOUR TREESTAND. BE AWARE OF HAZARDS ASSOCIATED WITH
HANGING SUSPENDED IN A FBFAHS AND THE FACT THAT PROLONGED SUSPENSION IN A HARNESS MAY BE FATAL.
•
ALWAYS NOTIFY SOMEONE OF YOUR HUNTING LOCATION IN CASE OF AN EMERGENCY. IF OTHERS ARE NOT AWARE OF YOUR HUNTING
LOCATION AND COMMUNICATION EFFORTS ARE UNSUCCESSFUL, YOU MUST HAVE A PERSONAL PLAN FOR RECOVERY/ESCAPE BEFORE
YOU ASCEND THE TREE - PROLONGED SUSPENSION IN A HARNESS CAN BE FATAL. IT IS IMPORTANT TO EXERCISE THE LEGS BY PUSHING
AGAINST THE TREE OR DOING OTHER FORMS OF CONTINUOUS LEG EXERCISES TO AVOID BLOOD POOLING WHILE BEING SUSPENDED.
HUNTERS WITH VARYING DEGREES OF PHYSICAL FITNESS MAY REQUIRE DIFFERENT PLANS TO RECOVER/ESCAPE IN ORDER TO AVOID
EFFECTS OF PROLONGED SUSPENSION. HAVE A PERSONAL PLAN AND PRACTICE IT IN THE PRESENCE OF A RESPONSIBLE ADULT BEFORE
LEAVING THE GROUND. NO ESCAPE/RECOVERY PLAN WILL WORK FOR EVERY HUNTER ON EVERY TREE IN EVERY CIRCUMSTANCE. ONLY
YOU CAN DETERMINE THE BEST RECOVERY/ESCAPE PLAN FOR YOUR HUNTING SITUATION AND YOU MUST HAVE A RECOVERY/ESCAPE PLAN
FOR YOUR SITUATION BEFORE LEAVING THE GROUND. HUNT FROM GROUND WHEN SELF-RECOVERY/ESCAPE ABILITY IS ABSENT.
•
IF THERE ARE ANY QUESTIONS OR CONCERNS WITH INSTRUCTIONS, WARNINGS, OR PROPER USE "STOP" AND CONTACT THE
MANUFACTURER. DO NOT USE UNLESS YOU FULLY UNDERSTAND SAFE AND PROPER USE. MAINTAIN ALL WARNINGS, INSTRUCTIONS, AND
DVD(S) FOR LATER REVIEW AS NEEDED, FOR INSTRUCTION USAGE TO ANYONE BORROWING YOUR STAND/FBFAHS OR TO PASS ON WHEN
SELLING THESE ITEMS. USE ALL SAFETY DEVICES PROVIDED WITH YOUR TREESTAND AND FBFAHS.
•
INSPECT THE TREESTAND PRIOR TO EVERY USE FOR UNDUE WEAR, DEFORMITY, CORROSION OR OTHER DAMAGE. INSPECT ALL STRAPS,
WEBBING AND ROPES FOR FRAYING, CUTS, TEARS, ABRASIONS, FADING, NICKS, CUTS OR ANY SIGNS THAT THE WEBBING MAY HAVE
BEEN FATIGUED OR STRESSED BY A FALL OR BY SUPPORTING EXCESS WEIGHT OR ANY OTHER TYPE OF DAMAGE. DISCONTINUE USE
IMMEDIATELY IF ANY DAMAGE IS PRESENT.
•
THIS TREESTAND IS INTENDED FOR SINGLE PERSON USE ONLY!!
•
NEVER EXCEED THE MAXIMUM RATED WEIGHT LIMIT OF THIS PRODUCT. THIS LIMIT INCLUDES USER AND ALL GEAR TAKEN TO THE
PLATFORM AREA.
•
MOST FALLS IN A LADDER OCCUR DUE TO IMPROPER INSTALLATION OR BY NOT USING THE PRODUCT AS DIRECTED. ALL SUPPLIED PARTS
MUST BE USED, INCLUDING, BUT NOT LIMITED TO, THE STABILIZER BAR, ATTACHMENT STRAPS AND ALL REQUIRED HARDWARE. LADDER
SECTIONS CONNECTIONS MUST BE SECURED TOGETHER BY MEANS OF THE PINS OR BOLTS SUPPLIED. CAREFULLY FOLLOW AND DOUBLE
CHECK ALL ASSEMBLY INSTRUCTIONS TO ENSURE THAT YOU HAVE PROPERLY ASSEMBLED THE PRODUCT. IF YOU HAVE ANY QUESTIONS OR
CONCERNS, CONTACT SUMMIT AT 800-353-0634.
•
THE ASSEMBLY AND INSTALLATION OF A LADDER STAND REQUIRES A MINIMUM OF THREE (3) ABLE ADULTS. NEVER ATTEMPT TO ASSEMBLE,
INSTALL, OR REMOVE THIS PRODUCT WITH LESS THAN THREE (3) ABLE ADULTS PRESENT.
•
REPLACE ALL WEBBING AND CABLES EVERY (2) YEARS OR SOONER IF ANY DAMAGE IS PRESENT INCLUDING BUT NOT LIMITED TO FRAYING,
CORROSION, CUTS, TEARS, ABRASIONS, FADING, NICKS, CUTS OR ANY SIGNS THAT THE WEBBING OR CABLES HAVE BEEN FATIGUED OR
STRESSED BY A FALL OR BY ANYTHING INCLUDING BUT NOT LIMITED TO SUPPORTING EXCESS WEIGHT. IF ANY OF THE DAMAGE STATED
ABOVE (OR ANY OTHER TYPE OF DAMAGE NOT LISTED) IS PRESENT, DISCONTINUE USE OF THE PRODUCT IMMEDIATELY!
•
DO NOT USE ANY TREESTAND IF ICE OR SNOW IS PRESENT ON THE PLATFORM OR LADDER SECTIONS.
•
ALWAYS HAVE THREE (3) POINTS OF CONTACT TO THE LADDER WHILE CLIMBING. NEVER CLIMB WITH ANYTHING ON YOUR BACK OR IN YOUR
HANDS WHILE CLIMBING. TAKE YOUR TIME, DO NOT BE IN A HURRY!!
PRINTED IN CHINA
PH#: (800) 353-0634 | www.summitstands.com
WARNING
!
FAILURE TO READ AND FOLLOW ALL MANUFACTURER'S
WARNINGS AND INSTRUCTIONS CONSTITUTES A MISUSE OF THIS
PRODUCT AND COULD RESULT IN SERIOUS INJURY OR DEATH!!
Vine Single 82096, 02/2016
Advertisement

Subscribe to Our Youtube Channel
Related Manuals for Summit Treestands The Vine Single Hunter


Summary of Contents for Summit Treestands The Vine Single Hunter
- Page 1 The Vine Single Hunter Ladder Treestand SU82096 WARNING © 2016 Summit Treestands, LLC | 715 Summit Dr. Decatur, AL 35601 PH#: (800) 353-0634 | www.summitstands.com FAILURE TO READ AND FOLLOW ALL MANUFACTURER’S WARNINGS AND INSTRUCTIONS CONSTITUTES A MISUSE OF THIS PRODUCT AND COULD RESULT IN SERIOUS INJURY OR DEATH!! •...
- Page 2 • PRIOR TO EACH USE INSURE: • THE CRISS/CROSS STRAPS ARE PRESENT AND SECURED CORRECTLY. • THE ADJUSTABLE STABILIZER BAR IS PRESENT AND SECURED PROPERLY. • ALL LADDER SECTIONS ARE NOT SEPARATED AND SECURED TOGETHER BY MEANS OF PINS OR BOLTS. •...
- Page 3 (Includes hunter’s weight PLUS weight of all gear carried into the treestand) DO NOT EXCEED THESE WEIGHT LIMITS! 300 lb Rated Stand: SU82096 - The Vine Single Hunter THIS TREESTAND IS INTENDED FOR SINGLE PERSON USE ONLY!! STAND / COMPONENT WARNING LABELS...
- Page 4 PARTS LIST Please call 800-353-0634 or visit http://www.summitstands.com/ contactus/ if you have any questions, if you need replacement parts, if you have any missing parts or if the included DVD does not play. All images are representations. All fabric, paint and accessories are subject to change at any time.
- Page 5 TOOLS REQUIRED Tools • 13mm Wrenches and / or Socket / Ratchet - Assembly can be made easier by the use of a powered ratchet or drill with socket adapter (take care not to overtighten when using power tools to assemble) - It is recommended that all bolts be sorted by thread count / length prior to assembly.
- Page 6 5. Place the Seat Tube (item G) onto the Foot Platform inside of the tubing as shown in figure 5. Insert (1) 65mm bolt and lock nut, per side, to secure. 6. Pivot the Seat Tube up. Place the Seat Tube to the BACKSIDE of the V-Plate Frame (item F) as shown in figure 6. Insert (1) 65mm bolt with lock nut on each side to secure.
- Page 7 SECURING THE TOP LADDER SECTION 11. Remove the bolts previously inserted into the Foot Platform that were holding the Jog Tubes to the Foot Platform. Place the Top Ladder Section (item K) tubes onto the OUTSIDE of the welded tabs on the Foot Platform. Insert the Left and Right Jog Tubes into the Top Ladder Section.
- Page 8 GRIP STRIPS 14. Self-adhesive Grip Strips are provided for the Ladder Sections. Peel and stick these grip strips to the top surface of the horizontal bars on the Ladder Sections as shown in figure 15a. HORIZONTAL BARS FINAL TIGHTENING 15. Go back through and tighten all bolts and lock nuts securely. Note: Do not overtighten the bolts where the tubes become deformed.
- Page 9 WARNING SETUP Never use this ladder stand on dead, leaning, diseased or loose barked trees. Never use on a utility pole or on trees that have any obstructions that may limit 1. Select a straight, healthy tree without any obstructions (branches or treestand use.
- Page 10 5. Attach the two long Criss-Cross straps next. Attach one shown in figure 23, location C and one at location D using the same cinch strap method (refer to figure 20-22 for threading). Lay the Criss-Cross straps on top of the ladder sections as shown in figure 24.
- Page 11 10. Take the two (2) straps that are hanging freely down, walk behind the tree so that the straps form an “X” in the straps as shown in figure 29. Pull the straps around to the bottom ladder section and secure the straps to the previously installed ratchet straps below the second and third ladder rung.
- Page 12 WARNING WARNING Never jump or bounce on any You MUST now put on your safety harness if you have other part of the treestand not already done so. ALWAYS refer to your harness in an attempt to force the instructions included with this stand for proper use of platform to seat into the tree.
- Page 13 WARNING NEVER re-use ratchet straps that were left in the field for use. Call Summit Treestands to purchase replacement straps. Sunlight, animals, or tree growth could have affected the strap integrity which could cause the strap to fail, causing serious injury or death!
- Page 14 (A) Warranty Summit Treestands, LLC (Summit) warrants to the original retail purchaser that all products manufactured by it are free from defects in material and manufacture at the time of shipment for twelve (12) months from the date of purchase. Summit will repair or replace any part found defective if the unit claimed to be defective shall be returned to Summit, postage prepaid, within the warranty period.
- Page 15 The Vine Single Hunter Mirador à échelle SU82096 AVERTISSEMENT © 2016 Summit Treestands, LLC | 715 Summit Dr. Decatur, AL 35601 PH#: (800) 353-0634 | www.summitstands.com NE PAS LIRE ET NE PAS SUIVRE LES AVERTISSEMENTS ET LES INSTRUCTIONS DU MANUFACTURIER CONSTITUE UNE MAUVAISE UTILISATION DU PRODUIT ET PEUT ENTRAÎNER...
- Page 16 • AVANT CHAQUE UTILISATION ASSUREZ-VOUS QUE: • LES COURROIES ENTRECROISÉES SONT PRÉSENTES ET ATTACHÉES CORRECTEMENT. • LA BARRE STABILISATRICE AJUSTABLE EST PRÉSENTE ET ATTACHÉE CORRECTEMENT. • LES SECTIONS DE D’ÉCHELLES NE SONT PAS SÉPARÉES ET SONT ATTACHÉES ENSEMBLE AVEC LES GOUPILLES ET LES BOULONS. •...
- Page 17 NE DÉPASSER PAS CETTE LIMITE! (* Inclus tout l’équipement) Grosseur d’arbre minimum et maximum pour le mirador: 20-50 cm de diamètre Évalué à 136 KG: SU82096 - The Vine Single Hunter Mirador à échelle CE MIRADOR A ÉTÉ CONÇU POUR UNE SEULE PERSONNE!! LES ÉTIQUETTES INDIQUANT LES AVERTISSEMENTS (POUR RÉFÉRENCE SEULEMENT)
- Page 18 LISTE DES PIÈCES Appellez le 800-353-0634 ou visitez le site web à l’adresse http://www. summitstands.com/contactus/ si vous avez des questions, si vous avez besoin de pièces de remplacement, si des pièces sont manquantes ou si le DVD inclus est défectueux. Toutes les images sont des représentations visuelles.
- Page 19 OUTILS REQUIS Outils • Clés 13mm / ou Douille / Rochet - L’assemblage peut être facilité avec l’utilisation d’un rochet électrique ou d’une perceuse avec douille (assurez-vous de ne pas serrer trop fort lors de l’assemblage avec des outils électriques). - Il est recommandé...
- Page 20 5. Placez le tube du siège (item G) sur la plateforme pour les pieds à l’intérieur des tubes tel qu’illustré à la figure 5. Insérez un boulon de 65mm avec un écrou de blocage de chaque côté puis serrez. 6. Tournez les tubes du siège vers le haut. Placez les tubes du siège à L’ENDOS de la plaque en ‘’V’’ (item F) tel qu’illustré à la figure 6. Insérez le boulon de 65mm avec un écrou de blocage de chaque côté...
- Page 21 ATTACHER LA SECTION D’ÉCHELLE SUPÉRIEURE 11. Enlevez les boulons insérez précédemment qui tenaient les tubes pliés à la plateforme pour les pieds. Placez les tubes de la section d’échelle supérieure (item K) sur l’extérieur des pattes soudées sur la plateforme pour les pieds. Insérez les tubes pliés gauche et droit dans la section d’échelle supérieure.
- Page 22 GRIP STRIPS 14. Self-adhesive Grip Strips are provided for the Ladder Sections. Peel and stick these grip strips to the top surface of the horizontal bars on the Ladder Sections as shown in figure 15a. HORIZONTAL BARS SERRAGE FINAL 15. Revérifiez tous les boulons et les écrous de blocage pour vous assurer qu’ils sont serrés fermement. Note: Ne serrez pas les boulons trop fort pour ne pas déformer les tubes.
- Page 23 AVERTISSEMENT INSTALLATION N’utilisez jamais ce mirador à échelle sur un arbre mort, penché, malade ou qui possède une écorce détachée. Ne jamais l’utiliser sur un poteau utilitaire ou sur des arbres près 1. Choisissez un arbre droit, en santé sans obstructions (branches) qui pourraient desquels se trouvent des obstructions qui pourraient limiter représenter un obstacle à...
- Page 24 5. Attachez les deux longues courroies entrecroisées. Attachez-en une tel qu’illustré à la figure 23, emplacement C et une autre à l’emplacement D en utilisant la même méthode que pour la courroie sanglée (voir les figures 20-22 pour l’enfilage). Placez les courroies entrecroisées au-dessus des sections d’échelle tel qu’illustré...
- Page 25 10. Prenez les deux courroies libres, allez derrière l’arbre de sorte que les courroies forment un ‘’X’’ tel qu’illustré à la figure 29. Tirez les courroies autour de la section d’échelle du bas et attachez les courroies aux courroies à cliquet préalablement installées sous les deuxièmes et le troisièmes barreaux d’échelle.
- Page 26 AVERTISSEMENT AVERTISSEMENT Vous DEVEZ maintenant mettre votre harnais de sécurité Ne sautez ou ne bondissez si ce n’est déjà fait. Veuillez TOUJOURS vous référer aux jamais sur toute partie du instructions de votre harnais incluses avec ce mirador pour mirador pour forcer son l’utilisation correcte de votre harnais de sécurité.
- Page 27 ENLÈVEMENT DE L’ÉCHELLE 1. Il est requis d’avoir trois (3) adultes responsables pour vous aider à enlever ce mirador à échelle de l’arbre. Avant de monter dans un mirador à échelle, revêtez votre HCCSAC et suivez les instructions et avertissements pour l’utilisation sécuritaire et correcte.
- Page 28 (A) Garantie La compagnie Summit Treestands, LLC (Summit) garantie à l’acheteur original que tous ses produits manufacturés sont sans défauts du matériel et de fabrication lors de l’expédition et ce pour douze (12) mois à partir de la date d’achat. Summit remplacera toute pièce défectueuse si le module soi-disant défectueux est retourné...
Need help?
Do you have a question about the The Vine Single Hunter and is the answer not in the manual?
Questions and answers