Table of Contents
Advertisement
Quick Links
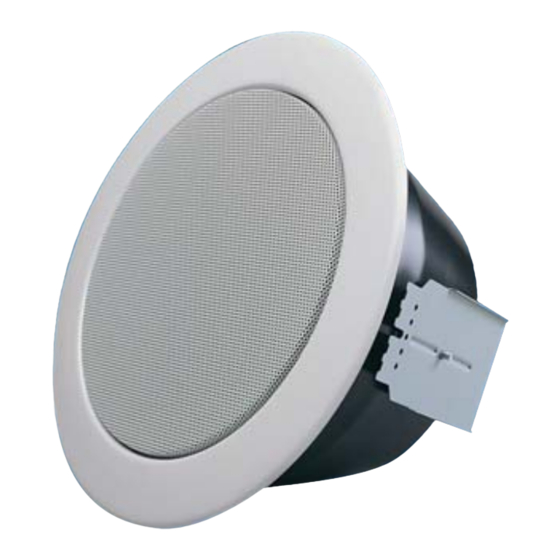
ROUND CO-AXIAL
METAL CEILING
LOUDSPEAKERS
f
RCS6/TCOAX
INSTALLATION INSTRUCTIONS
Hole cutout
190mm
f
STEP 1
Cut the required hole for the speaker
FITTING THE SPEAKER
f
STEP 3
Compress "V" spring and fit into the retaining ear within the
bracket.
Connect cable to terminal block and select wattage required.
Penton UK Ltd
Unit 2 Teville Industrials
T: +44 (0)1903 215315
www.pentonuk.co.uk
f
STEP 2
Loosen the retaining sliders and push to the top of the bracket.
Once the bracket is through the hole pull down the sliders and
tighten the retaining nut clamping the ceiling
f
STEP 4
Fit second "V" clip into second retaining ears and gently push the
speaker up into the bracket (do not push the central perforated grille
area) the speaker will self locate into the bracket.
RCS6/TCOAX
Circuit diagram 100V Common
|
Dominion Way
|
Worthing
|
F: +44(0)1903 215415
|
E: sales@pentonuk.co.uk
Thermal Fuse
1.25W
2.5W
5W
10W
|
West Sussex
|
BN14 8NW
NOVEMBER 2011
RoHS
Advertisement
Table of Contents

Related Manuals for Penton RCS6/TCOAX


Summary of Contents for Penton RCS6/TCOAX
- Page 1 Compress “V” spring and fit into the retaining ear within the Thermal Fuse bracket. Connect cable to terminal block and select wattage required. 1.25W 2.5W Penton UK Ltd NOVEMBER 2011 Unit 2 Teville Industrials Dominion Way Worthing West Sussex BN14 8NW...
- Page 2 2.5W the inside of the fire dome. Finally push the speaker into position. STEP 14 If fitted correctly the speaker should fit flush to the surface. Penton UK Ltd NOVEMBER 2011 Unit 2 Teville Industrials Dominion Way Worthing West Sussex...
Need help?
Do you have a question about the RCS6/TCOAX and is the answer not in the manual?
Questions and answers