Table of Contents
Advertisement
Quick Links
Advertisement
Table of Contents

Summary of Contents for Trix Minitrix 66331
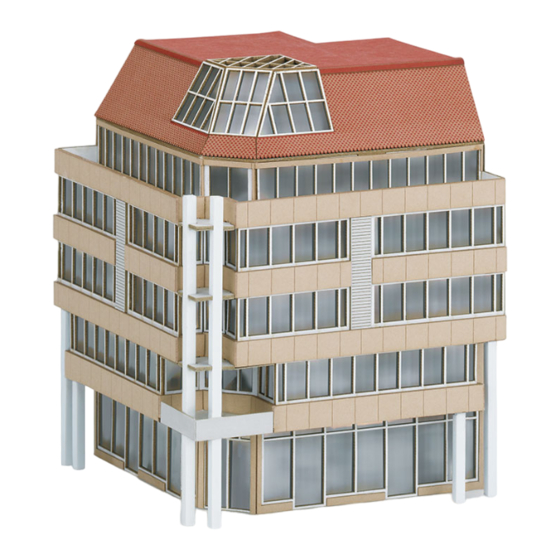
- Page 1 Bausatz City-Eckhaus „Olgaeck“ 66331...
-
Page 3: Table Of Contents
Page Inhaltsverzeichnis: Seite Sommaire : Remarques Hinweise Contenu de l‘emballage 8 / 9 Packungsinhalt 8 / 9 Zusammenbau 10 – 23 Assemblage 10 – 23 Table of Contents: Page Inhoudsopgave: Pagina Notes Opmerking Package Contents 8 / 9 Inhoud van de verpakking 8 / 9 Het bouwen 10 –... -
Page 4: Hinweise
Vor Baubeginn bitte lesen! Dieser Artikel ist ein Modellbauartikel für anspruchsvolle Modellbauer und Sammler. Aufgrund maßstabs- und vorbildgetreuer bzw. funktionsbedingter Gestaltung sind Spitzen, Kanten und filigrane Kleinteile enthalten. Für den Zusammenbau sind Werk- zeuge wie ein scharfes Bastelmesser, eine scharfe Schere und spezieller Kleber not- wendig. -
Page 5: Notes
Please read before beginning to build this kit! This product is a construction kit for experienced model builders and collectors. This model has points, edges, and delicate details due to the scale, prototypical, and/or functional elements of the design. Tools such as a sharp modeler‘s knife, a sharp pair of scissors, and special cement are necessary for building this kit. -
Page 6: Remarques
A lire impérativement avant de commencer l’assemblage ! Cet article est un article de modélisme destiné aux modélistes et collectionneurs exigeants. La conception réaliste du modèle à l’échelle et son fonctionnement imposent la présence de pièces pointues, d’arêtes et de petites pièces fragiles. Le montage du modèle nécessite des outils tels qu‘un cutter affûté, des ciseaux bien aiguisés et de la colle spéciale. -
Page 7: Opmerking
Dit eerst lezen a.u.b! voordat u begint met bouwen. Dit artikel is een modelbouwartikel voor de veeleisende modelbouwer en verzamelaar. Het artikel bevat, in verband met voorbeeldgetrouwe resp. functionerende uitvoering, punten, randen en filigrane kleine delen. Voor het in elkaar zetten is gereedschap nodig zoals een scherp hobby-mes, een scherpe schaar en speciale lijm. -
Page 8: Packungsinhalt
Packungsinhalt • Package Contents Contenu de l‘emballage • Inhoud van de verpakking Je 2x Sechseckprofil... - Page 9 Packungsinhalt • Package Contents Contenu de l‘emballage • Inhoud van de verpakking...
-
Page 10: Assembly
Teile 4, 5 und 6 mit Glasfolie Cement window material to the back of Parts 4, 5 and 6 hinterkleben Contrecoller les parties 4, 5 et 6 avec la feuille transparente Op de achterzijde van deel 4, 5 en 6 glasfolie lijmen. - Page 11 Teile 8, 9,10,10a, 11, 11a und 12 mit Glasfolie Cement window material to the back of Parts 8, 9,10,10a, 11, 11a and 12 hinterkleben Contrecoller les parties 8, 9,10,10a, 11, 11a et 12 avec la feuille transparente Op de achterzijde van deel 8, 9,10,10a, 11, 11a en 12 glasfolie lijmen.
- Page 13 Teil 16 und 17 mit Glasfolie Cement window material to the back of Parts 16 and 17 Contrecoller les parties 16 et 17 avec la feuille transparente hinterkleben Op de achterzijde van deel 16 en 17 glasfolie lijmen.
- Page 14 Teil 18, 19, 20, 22, 23 und 24 mit Glasfolie hinterkleben Cement window material to the back of Parts 18, 19, 20, 22, 23 and 24 Contrecoller les parties 18, 19, 20, 22, 23 et 24 avec la feuille transparente Op de achterzijde van deel 18, 19, 20, 22, 23 en 24 glasfolie lijmen.
- Page 15 Teile 28 und 30 mit Glasfolie hinterkleben Cement window material to the back of Parts 28 and 30 Contrecoller les parties 28 et 30 avec la feuille transparente Op de achterzijde van deel 28 en 30 glasfolie lijmen.
- Page 17 Teile 43 - 46 mit Glasfolie Cement window material to the back of Parts 43 - 46 hinterkleben Contrecoller les parties 43 - 46 avec la feuille transparente Op de achterzijde van deel 43 - 46 glasfolie lijmen.
- Page 18 An den Kanten knicken Bend on the edges. Plier les bords. Aan de zijden knikken...
- Page 19 Erst Bauteile 59 Erst Bauteile 56 und 58 kleben, dann Bauteil 60 kleben, dann Bauteile 57 First, cement Part 59, then Part 60 First, cement Parts 56 and 58, then Part 57 Coller d’abord l’élément 59, puis l’élément 60 Coller d’abord les éléments 56 et 58, puis l’élément 57 Eerst bouwdeel 59 verlijmen, daarna bouwdeel 60.
- Page 20 Teile 64 und 64a nach Teil 63 und 69 einkleben Ansicht von Ansicht von unten unten View from below View from below Vue de dessous Vue de dessous Gezien vanaf de onderzijde Gezien vanaf de onderzijde Cement Parts 64 and 64a in place after Parts 63 and 69 Coller en place les pièces 64 et 64a après 63 et 69 Deel 64 en 64a na deel 63 en 69 er inlijmen.
- Page 21 3mm Profil 3mm Profil 3mm Profil 80a 80 3mm Profil 3 mm / 1/8" profile 3 mm / 1/8" profile Profil 3 mm Profil 3 mm 3 mm profiel 3 mm profiel 3mm Profil 3mm Profil...
- Page 22 Bitte erst 82,83 dann 86 kleben First, cement Parts 82 and 83 in place, then Part 86 Coller d’abord les pièces 82 et 83, puis la pièce 86 A.u.b. eerst deel 82 en 83 er aanlijmen, daarna deel 86...
- Page 24 Gebr. Märklin & Cie. GmbH Stuttgarter Straße 55 - 57 73033 Göppingen 269593/0516/Sm1Ef Germany Änderungen vorbehalten www.trix.de © Gebr. Märklin & Cie. GmbH Made by...


Need help?
Do you have a question about the Minitrix 66331 and is the answer not in the manual?
Questions and answers