Table of Contents
Advertisement
Quick Links
Advertisement
Table of Contents

Related Manuals for Electrolux EW7F3844HB


Summary of Contents for Electrolux EW7F3844HB
- Page 1 EW7F3844HB Washing Machine User Manual...
-
Page 2: Table Of Contents
16. QUICK GUIDE....................38 WE’RE THINKING OF YOU Thank you for purchasing an Electrolux appliance. You’ve chosen a product that brings with it decades of professional experience and innovation. Ingenious and stylish, it has been designed with you in mind. So whenever you use it, you can be safe in the knowledge that you’ll get great results every time. -
Page 3: Safety Information
ENGLISH SAFETY INFORMATION Before the installation and use of the appliance, carefully read the supplied instructions. The manufacturer is not responsible for any injuries or damage that are the result of incorrect installation or usage. Always keep the instructions in a safe and accessible location for future reference. - Page 4 If a tumble dryer is stacked on the top of the washing • machine, make sure to use the correct stacking kit approved by ELECTROLUX (see more details in chapter "Accessories - Stacking kit").
-
Page 5: Safety Instructions
ENGLISH 2. SAFETY INSTRUCTIONS 2.1 Installation 2.2 Electrical connection The installation must comply WARNING! with relevant national Risk of fire and electric regulations. shock. • Remove all the packaging and the • The appliance must be earthed. transit bolts including rubber bush •... -
Page 6: Installation
• Make sure that all metal objects are in the factory. removed from the laundry. • You can extend the drain hose to 2.5 Service maximum 400 cm. Contact the Authorised Service Centre for the •... - Page 7 ENGLISH It is possible to see water flowing from the drain hose. This is because the washing machine has been tested at the factory. 7. Remove the three transit bolts and pull out the plastic spacers. 4. Put the front polystyrene packaging element on the floor under the appliance.
- Page 8 WARNING! You can extend the drain Do not put cardboard, wood hose to maximum 400 cm. or equivalent materials Contact the authorised below the appliance feet to service centre for the other adjust the level. drain hose and the extension.
- Page 9 ENGLISH Make sure that the drain hose makes a loop to prevent particles going into the appliance from the sink. ø16 4. To a stand pipe with vent hole - Insert W011 the drain hose directly into a drain pipe. Refer to the illustration.
-
Page 10: Product Description
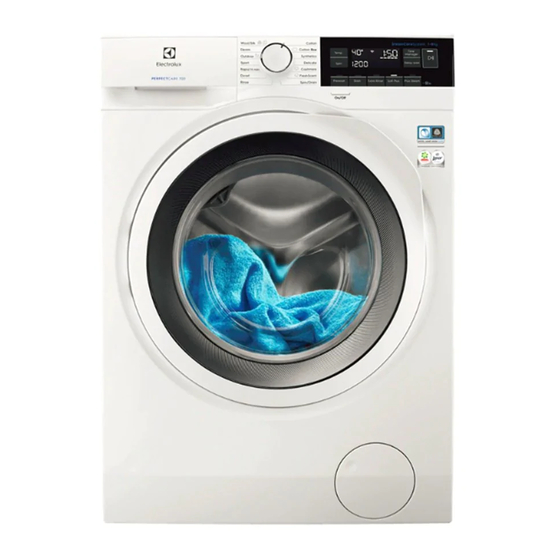
Use the delicate fragrance exclusively softness. developed by ELECTROLUX to add a • The SensiCare System detects the pleasant feeling of "just-washed" laundry load size defining the garment to the removing odours and programme duration in 30 seconds. - Page 11 ENGLISH the laundry load and the type of fabric without consuming more time, energy and water than necessary. 5.2 Control panel description Wool/Silk Duvet Rinse Programme dial Soft Plus touch button Spin touch button Extra Rinse touch button Temp. touch button Stains touch button Display Prewash touch button...
- Page 12 The Temperature area: Temperature indicator . Cold water indicator. Child safety lock indicator. Door locked indicator. Delay start indicator. The digital indicator can show: • Programme duration (e. g. • Delay time (e. g. • Cycle end ( • Warning code (e.g.
-
Page 13: Dial And Buttons
ENGLISH 6. DIAL AND BUTTONS 6.1 Introduction • Decrease the spin speed. The display shows only the spin speeds The options/functions are available for the set programme. not available with all • Additional spin options No Spin washing programmes. Check the compatibility Set this option to deactivate all spin between options/functions phases. - Page 14 The appliance empties this option is deactivated. the water out automatically after 18 6.8 Permanent Soft Plus hours approximately. Set this option to optimise the fabric 6.5 Prewash softener distribution and improve fabric softness.
- Page 15 ENGLISH The display shows the indicator indicator the selected delay time. After touching the Start Pause button, the appliance begins the countdown and the door is locked. 6.11 Time Manager With this option you can reduce the programme duration depending on the ■...
-
Page 16: Programmes
7. PROGRAMMES 7.1 Programme Chart Programme Reference Maxi‐ Programme description Default tem‐ spin (Type of load and soil level) perature speed load Temperature Spin range speed range Washing programmes 1400 rpm 8 kg White cotton and coloured cotton. Normal, (1400- 400 heavy and light soil. - Page 17 • Items that are not suitable for tumble drying. • Items with label "Dry clean only". ELECTROLUX fragrance. If you use this special gentle fragrance, your laundry will scent as just washed: pour a single dose bottle in the compartment and simply start a steam programme.
- Page 18 Programme Reference Maxi‐ Programme description Default tem‐ spin (Type of load and soil level) perature speed load Temperature Spin range speed range 1 kg Cottons, Synthetics, Delicates. Short and gentle steam programme to refresh even your FreshScent very delicate garments, including very delicate garments with sequins, lace etc.
- Page 19 ENGLISH Programme Reference Maxi‐ Programme description Default tem‐ spin (Type of load and soil level) perature speed load Temperature Spin range speed range 1200 rpm 2 kg Do not use fabric softener and (1200- 400 Outdoor make sure that there is no soften‐ 1 kg rpm) 30 °C...
- Page 20 Programme Reference Maxi‐ Programme description Default tem‐ spin (Type of load and soil level) perature speed load Temperature Spin range speed range 1200 rpm 1.5 kg Machine washable wool, hand washable (1200 - wool and other fabrics with «hand washing»...
-
Page 21: Settings
ENGLISH Programme Wool/Silk ■ ■ ■ ■ 1) Prewash and Stains cannot be selected together. 2) This option is not available with temperature lower than 40 °C. 3) If you set the No Spin option, the appliance performs draining only. 7.2 Woolmark Apparel Care - Blue The wool wash cycle of this machine has been approved by The Woolmark Compa‐... -
Page 22: Before First Use
9. BEFORE FIRST USE 1. Make sure that the electrical power is 4. Set and start a programme for cotton available and the water tap is open. at the highest temperature without 2. Pour 2 litres of water into the any laundry in the drum. - Page 23 ENGLISH - Compartment for fabric softener and other liquid treatments(fabric condi‐ tioner, starch). - Maximum level for quantity of liquid additives. - Flap for powder or liquid deter‐ gent. Always follow the With the flap in the position DOWN: instructions that you find on •...
- Page 24 The display changes accordingly. shows the indicator When the countdown is completed, the If a selection is not possible programme starts automatically. an acoustic signal sounds and the display shows 2.
- Page 25 ENGLISH At the end of the load detection, in case 2. Press the button On/Off again to activate the appliance. of drum overload, the indicator flashing in the display: If the SensiCare System has completed and the water In this case, for 30 seconds, it is possible filling has already started, to pause the appliance and remove the the new programme starts...
-
Page 26: Hints And Tips
(if they are 2. Press the Start Pause button: the active). The display shows appliance drains the water and spins. The option indicator Rinse Hold The indicator of the Start Pause disappears. button goes off. If you have set Silent... - Page 27 ENGLISH 11.1 The laundry load 11.2 Stubborn stains • Divide the laundry into: white, For some stains, water and detergent is coloured, synthetics, delicates and not sufficient. wool. We recommend that you pre-treat these • Follow the washing instructions on the stains before you put the items in the laundry care labels.
-
Page 28: Care And Cleaning
Refer to hardness is soft it is not necessary to use "Water hardness". a water softener. To find out the water hardness in your 11.5 Water hardness area, contact your local water authority. If the water hardness in your area is high... - Page 29 ENGLISH 12.5 Cleaning the drum Regularly examine the drum to prevent unwanted deposits. Rust deposits in the drum may occur due to rusting foreign body in the washing or tap water containing iron Clean the drum with special products for stainless steel.
- Page 30 2. Place a suitable bowl below the drain pump access to collect the water that 12.7 Cleaning the drain pump flows out. 3. Open the chute downwards. Always WARNING! keep a rag nearby to dry up any Disconnect the mains plug water spillages when removing the from the mains socket.
- Page 31 ENGLISH 6. Repeat the steps 4 and 5 until the 11. Put the filter back into the special water stops to flow out. guides by turning it clockwise. Make 7. Turn the filter anti-clockwise to sure that you tighten the filter remove it.
-
Page 32: Troubleshooting
12.8 Cleaning the inlet hose and the valve filter 45° 20° 12.9 Emergency drain remaining water from the inlet hose and the drain pump. If the appliance cannot drain the water, 1. Disconnect the mains plug from the carry out the same procedure, described mains socket. - Page 33 ENGLISH 13.1 Introduction The appliance does not start or it stops during operation. First try to find a solution to the problem (refer to the table). If the problem persists, contact the Authorised Service Centre. WARNING! Deactivate the appliance before carrying out any check. In case of major problems, the acoustic signals operate, the display shows an alarm code and the Start Pause button may flash continuously:...
- Page 34 13.2 Possible failures Problem Possible solution • Make sure that the mains plug is connected to the mains socket. • Make sure that the appliance door is closed. • Make sure that there is no damaged fuse in the fuse box.
- Page 35 ENGLISH Problem Possible solution • Make sure that the couplings of the water hoses are tight and there is not water leakages. There is water on the • Make sure that the water inlet hose and the drain hose floor. have no damages.
-
Page 36: Technical Data
13.3 Emergency door opening To open the door, proceed as follows: 1. Press the On/Off button to switch the In case of power failure or functioning appliance off. failure the appliance door remains 2. Disconnect the mains plug from the locked. -
Page 37: Accessories
1) Connect the water inlet hose to a water tap with a 3/4'' thread. 15. ACCESSORIES 15.1 Available in www.electrolux.com/shop or from authorised dealer Only appropriate accessories approved by ELECTROLUX ensure the safety standards of the appliance. If unapproved parts are used, any claims will be invalidated. 15.2 Fixing plate kit... -
Page 38: Quick Guide
16. QUICK GUIDE 16.1 Daily use Connect the mains plug to the mains 3. Set the desired options by means of socket. the corresponding touch buttons. 4. To start the programme, touch the Open the water tap. Start Pause button. - Page 39 ENGLISH Clean the filter regularly and, especially, if the alarm code appears on the display. 16.3 Programmes Programmes Load Product description Coton 8 kg White cotton and coloured cotton. White cotton and coloured cotton. Standard 8 kg programmes for the Energy Label con‐ Coton Eco sumption values.
- Page 40 Return the product to your local recycling facility or contact your municipal office.
- Page 41 ENGLISH...
- Page 42 www.electrolux.com...
- Page 43 ENGLISH...
- Page 44 www.electrolux.com/shop...
Need help?
Do you have a question about the EW7F3844HB and is the answer not in the manual?
Questions and answers