Hytera PD78X User Manual
Hide thumbs
Also See for PD78X:
- System planner manual (182 pages) ,
- Upgrade manual (44 pages) ,
- Service manual (44 pages)
Table of Contents
Advertisement
Quick Links
Advertisement
Table of Contents

Subscribe to Our Youtube Channel
Related Manuals for Hytera PD78X


Summary of Contents for Hytera PD78X
- Page 1 USER MANUAL PD78X(G) DIGITAL PORTABLE RADIO...
- Page 2 Welcome to the world of Hytera and thank you for purchasing this product. This manual includes a description of the functions and step- by-step procedures for use. It also includes a troubleshooting guide. To avoid bodily injury or property loss caused by incorrect operation, please carefully read the Safety Information Booklet before use.
- Page 3 Note: Changes or modifications to this unit not expressly information, please visit website approved by the party responsible for compliance could Hytera is the trademark or registered trademark of http://www.hytera.com. void the user's authority to operate the equipment. Hytera Communications Corporation...
- Page 4 l Transmit no more than the rated duty factor of 50% of the time. To transmit (talk), press the Push-to-Talk ( PTT) key. To receive calls, release the PTT key. Transmitting 50% of the time, or less, is important because the radio generates measurable RF energy only when transmitting (in terms of measuring for standards compliance).
-
Page 5: Table Of Contents
Contents Status Indications Roam LCD Icons Contents LED Indications Work Order Documentation Information Call Services Data Query Icon Conventions Group Call Call Divert Notation Conventions Private Call Call Priority Packing List All Call DGNA Product Overview Broadcast Call (Trunking Only) Supplementary Features Priority Product Layout Include Call (Trunking Only) -
Page 6: Documentation Information
Packing List Documentation Information Please unpack carefully and check that you have received the following items. If any Icon Conventions item is missing or damaged, contact your dealer. Icon Description Item Quantity (PCS) Item Quantity (PCS) Indicates references that can further describe the related topics. Radio Antenna Indicates situations that could cause data loss or equipment damage. -
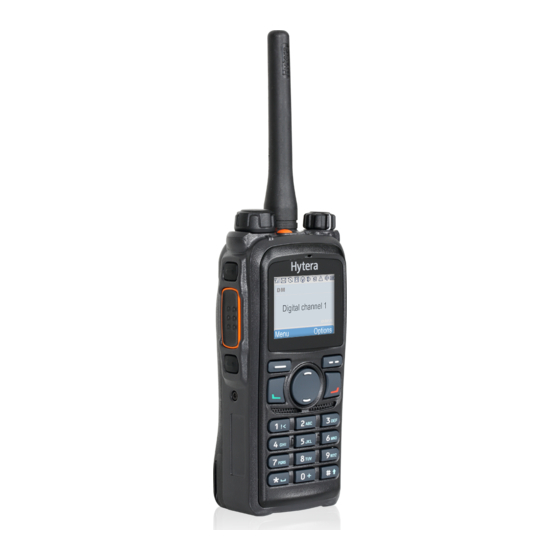
Page 7: Product Overview
Product Overview Part Name Part Name LCD Display Up Key Product Layout OK/Menu Key Down Key P1/Answer Key Battery Latch Speaker Belt Clip Numeric Keypad Battery Programmable Keys You can request your dealer to program the following keys as shortcuts to assignable radio features: SK1, SK2, TK, P1/Answer key, P2/End key, Up key, and Down key. -
Page 8: Before Use
and you have an available TF card, install the TF card as Before Use Attaching the Antenna follows: 1. Loosen the screw on the TF card cover, and then Charging the Battery l Do not hold the radio by the antenna and swing remove the cover. -
Page 9: Attaching The Audio Accessory
Attaching the Audio Accessory Basic Operations LED Indication/Tone Icon The LED indicator glows red with a low Turning the Radio On or Off battery tone. For optimal waterproof and dustproof performance, do as follows: Locking or Unlocking the Keypad l Attach accessories with care to avoid scraping the silicone rubber surrounding the accessory When the keypad is not in use, you can lock it to avoid connector screw hole. -
Page 10: Using The Keypad
Selecting a Zone Status Indications Using the Keypad A zone is a group of channels within the same operational You can use the keypad to enter user aliases or IDs and LCD Icons area, allowing you to manage channels in a convenient edit messages. -
Page 11: Led Indications
No TF card is detected.* The radio operates in low power mode. An include call is in progress. *The icon is only applicable to the PD78X enhanced An accessory is connected. version. LED Indications... -
Page 12: Call Services
» Press the preprogrammed Current Subgroup Conventional Mode LED Indicator Radio Status Contact key. l To initiate a group call to the preset contact on the during a call. During the call hang time, » Press the Back/Subgroup key. current channel, press and hold the PTT key. you can press and hold the PTT key and l To initiate a group call through the contact list, do as »... -
Page 13: Private Call
Log key by your dealer, press on the home l To initiate a private call through the keypad, do as screen. In trunking mode, the radio user of the PD78X follows: enhanced version cannot end the call by selecting an 2. Select the private contact. -
Page 14: All Call
Full Off Air Call Set-Up (FOACSU) In trunking mode, the radio user of the PD78X 1. Press the preprogrammed Contact List key, or enhanced version cannot end the call by selecting an When receiving a FOACSU private call, the radio go to Menu >... -
Page 15: Broadcast Call (Trunking Only)
A broadcast call ends in any of the following cases: 1. Go to Menu > Settings > Radio Set > Keypad In trunking mode, the radio user of the PD78X Mode, and then select Enable. l The call duration exceeds the preset time. -
Page 16: Include Call (Trunking Only)
3. Press or the PTT key. l To initiate a phone call through the keypad, do as In trunking mode, the radio user of the PD78X follows: l To initiate a phone call through the keypad, do as enhanced version cannot end the call by selecting an follows: 1. -
Page 17: Call On Analog Channel
Message Services When receiving a phone call, you can enter the connect In trunking mode, the radio user of the PD78X The Message feature allows you to send and receive the code through the numeric keypad to joins the phone... -
Page 18: Viewing A Message
Viewing a Message Instead of directly sending the quick text message, To view a newly received message, on the home screen, you can also select Save to save the modified quick press the OK/Menu key upon receiving the message. status message, and send it later. To view messages in the InBox, OutBox, or Drafts, do as Sending a Status Message follows:... -
Page 19: General Features
Conventional Conventional Trunking Trunking General Features Feature Digital Analog Feature Digital Analog Always Treble Boost √ √ √ Lone Worker √ √ √ The features supported by the radio vary with the Three Band Equalize √ √ √ TF Encryption √... -
Page 20: Basic Settings
Feature Description Operation Feature Description Operation Conventional Trunking designed 1. Go to Vibration > Feature Digital Analog illuminate On/Off, and then select Call Divert × × √ select Off, On, or Timed. feature Enable. Call Priority × × √ allows the radio 2. -
Page 21: Audio Settings
receive voice. For details, see the following table. Feature Description Operation Feature Description Operation some special alias when Option Description Operation situations. With initiating a call. When you initiate a feature The called party call by using the enabled, view radio's PTT key, the backlight and all alias... -
Page 22: One Touch Call/Menu
Configuring the Three Band Equalize One Touch Call/Menu Option Description Operation Feature The One Touch Call/Menu feature allows you to press the speaker. The Three Band Equalize feature allows the radio to preprogrammed One Touch Call/Menu key to quickly Microphone Settings adjust the balance between frequency components of the access a service assigned by your dealer. -
Page 23: Quick Dial
l Go to Menu > Scan > Scan On/Off, and then select keypad, do as follows: Mode Features Operation 1. Go to Menu > Settings > Radio Set > Keypad channel, disable the l Press the preprogrammed Scan key. Mode, and then select One Touch Call/Menu. Manual Switch Back... -
Page 24: Hunt
Hunt Mode Description Operation Mode Description Operation In trunking mode, the radio must register with a BS for in the defined team when signal normal operation. The radio can adopt versatile Trunked hunt list. strength reaches the Station Control Channel (TSCC) strategies to ensure a preset threshold. -
Page 25: Contact Management
Managing Private Contacts list, and then select View Contact, Edit Contact, or Contact Management Del Contact. Viewing, Editing, or Deleting a Private Contact Management allows you to view, add, edit, or Adding a Phone Contact delete a contact on the radio. Contact l In conventional mode, go to Menu >... -
Page 26: Tot
Trunking Mode To view the work order through the menu, go to Menu Select the call type as Private ID , PABX , or > Work Orders > All Task or New Task. PSTN. The Roam feature allows the radio on the move to After the status update, the work order moves from automatically register with a non- home BS or network. - Page 27 On Digital Channel Feature Description Operation Feature Description Operation to enable the contact disable Feature Description Operation feature, and then radio. Except remote The feature allows you to release the key to monitor, other Press send an alert call to a disable the functions of the disabled preprogramme...
-
Page 28: Interrupt
according to the emergency type preset by your dealer. Priority Interrupt XPT System The emergency types can be the following. The Priority Interrupt feature allows you to interrupt the The XPT System is based on the digital conventional ongoing activities (such as a call, a call hang status, or system. -
Page 29: Communication Security
Lone Worker Ending an Emergency Call Emergency Description Mode Conventional Mode Lone Worker feature allows the radio to automatically send an emergency alarm to your and initiate an emergency call. Both the calling and called party can end an emergency companion or the control center if you do not operate call in one of the following ways: your radio within the preset time. -
Page 30: Services Tf Card
The key value consists of digits or prevent the data from unauthorized access. When erasing The feature is only applicable to the PD78X enhanced Key Value letters. It must be shorter than the data, the radio stops voice and data services and returns version. -
Page 31: Positioning
3. Press the OK/Menu key. Positioning l In trunking mode, to send the message with position to The Positioning feature allows you to collect the location the dispatcher, do as follows: information of the radio by using satellites. 1. Go to Menu > Accessories > GPS > Msg with Enabling the GPS Feature Position, and then press the OK/Menu key. -
Page 32: Troubleshooting
Troubleshooting Phenomena Analysis Solution The battery may be installed improperly. Remove and reattach the battery. The battery power may run out. Recharge or replace the battery. The terminal cannot be turned on. The battery may be poorly connected due to dirtied or damaged battery Clean the battery contacts or replace the battery. - Page 33 Phenomena Analysis Solution The channel type (digital or analog) may be set incorrectly. Verify that you are on the correct digital or analog channel. You may be too far away from other members. Move towards other members. The signal is poor. Make sure call participants are within the communication range.
-
Page 34: Care And Cleaning
Make sure the product is completely dry before use. FOACSU Full Off Air Call Set-Up Extended Pseudo Trunk Global Positioning System Existing devices should be upgraded to Hytera’s iM or iS firmware before being used as part of a system. For details about upgrade, contact your Hytera dealer. - Page 35 Hytera Communications Corporation Limited. Hytera Communications Corporation Limited. 2019 Address: Hytera Tower,Hi-Tech Industrial Park North,9108#Beihuan Road, Nanshan District,shenzhen,People’s Republic of China...
Need help?
Do you have a question about the PD78X and is the answer not in the manual?
Questions and answers