
Related Manuals for Masport UJ102


Summary of Contents for Masport UJ102
- Page 1 RIDE-ON LAWNMOWER OWNER’S MANUAL www.masport.com IMPORTANT: Keep these instructions and the engine booklet in a safe place for future reference. They contain important information about your mower.
- Page 3 1.3.1a 1.3.1b...
- Page 4 3.3.1a...
- Page 5 3.3.1b 3.3.1c 3.3.1d...
- Page 6 3.3.1e 3.3.1f 3.3.2a...
- Page 7 3.3.2b 3.3.2c...
- Page 8 3.3.2d 3.3.2e...
- Page 9 3.3.2f 3.3.2g 3.3.2h...
- Page 10 3.3.2i 3.3.2j 3.3.2k 3.3.2l...
- Page 11 3.4.1 4.1a...
- Page 12 4.1b 4.1c 4.1d...
- Page 13 5.4.4 5.6a 5.6b 6.2.2...
- Page 14 6.3.3 6.3.6a 6.3.6b 6.3.7...
- Page 15 6.3.8 6.3.9a 6.3.9b 6.3.9c...
- Page 16 6.3.10a 6.3.10b 6.3.10c...
- Page 17 6.3.10d 6.3.11 6.3.12a...
- Page 18 6.3.12b 6.3.14...
-
Page 20: About This Manual
ABOUT THIS MANUAL This manual should guide you through, in the most simple way possible, the safe installation, operation and maintenance of your machine and provide information about its options and capabilities. It is therefore intended for all persons that will come into contact with the machine during its installation, operation and maintenance. -
Page 21: Technical Information
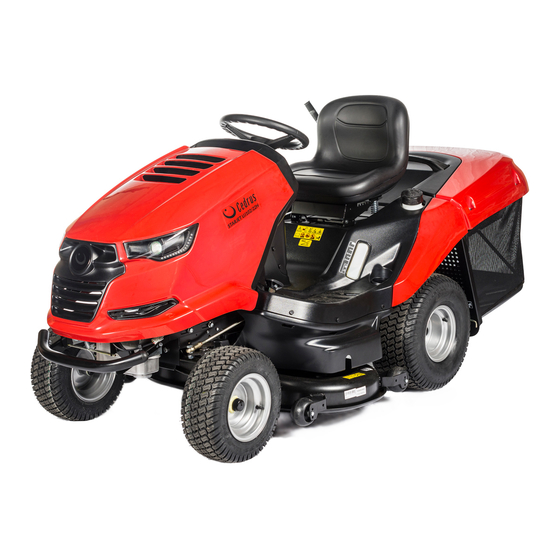
1.1 | APPLICATION The UJ102 and UJ122 STARJET is a two-axle self-propelled riding mower designed for mowing even, maintained grass areas with a maximum vegetation height of 10 cm, e.g. in parks, gardens and sports fields, possibly on minor slopes, on which there are no foreign objects (fallen branches, rocks, solid items, etc.). - Page 22 1.3 | PRODUCT IDENTIFICATION LABEL AND OTHER LABELS WITH SYMBOLS USED ON THE MACHINE MODEL IDENTIFICATION PLATE (A) ► Machine model Engine model 3. Year of production Weight 5. Name and address of the manufacturer 1.3.1a 6. EC codes used to assess the product’s compliance Compliance mark of the product 8.
- Page 23 ► LABELS ON THE MOWING DECK (F) Do not step Danger 1.3.1a 1.3.1b Rotating Guaranteed tools noise level ► FUEL TANK PLATE (G) Fuel tank capacity 1.3.1b ► LABELS AT THE BRAKE PEDAL (H): Brake 1.3.1b ► LABEL AT THE DIFFERENTIAL LOCK PEDAL (I) Differential Differential lock...
-
Page 24: Technical Parameters
1.4 | TECHNICAL PARAMETERS RIDING MOWER MODEL BASIC PARAMETERS UNITS UJ102 UJ122 Dimensions incl. grass catcher [cm] 242 x 106 x 116 264 x 127 x 129 (Length x Width x Height) Weight (without fuel, oil and driver) [kg] Wheelbase... - Page 25 UJ122 Vibration values according to Declared emission ČSN EN ISO 5395-1 (min.s level of ac. pressure at Guaranteed emission rpm±100 Engine the place of operation level of acoustic power Aggregate value of Declared emission (min LpAd (dB) (dB) vibration acceleration on acceleration value of ČSN EN ISO 5395-1 the hand-arm a...
-
Page 26: Safety Instructions
2 │ WORK SAFETY AND HEALTH Riding mowers model number UJ102 and UJ122 under the brand name STARJET are manufactured according to valid European safety norms. The machine’s manufacturer confirms this fact in the Statement of compliance, which is included at the end of this user’s manual (... - Page 27 2.1.4 While operating the machine ! The machine must not be used for work on slopes that have an incline greater than 12° (21%). ! Transport of other passengers, animals or loads directly on the machine is forbidden. Transport of loads is only permitted on trailers approved by the machine’s manufacturer.
-
Page 28: Child Safety
2.3 | CHILD SAFETY If the riding mower operator is not prepared for the presence of children then a tragic accident may happen. The movement of a riding mower attracts the attention of children. Never assume that children will remain in the location where you last saw them. ! Do not allow children without supervision in areas where you are mowing grass. -
Page 29: Preparation For Putting Into Operation
3 │ PREPARATION FOR PUTTING INTO OPERATION 3.1 | UNPACKING AND INSPECTING THE CONTENTS The riding mower is supplied wooden crate cover. For transportation reasons some machine assemblies are disassembled at the production plant and it is necessary to install them before putting the machine into operation. The unpacking and preparation for operation is performed by the seller within the scope of the pre-sale service. - Page 30 3.3.1 SEAT, STEERING WHEEL AND BATTERY a) Fit the seat sliding mechanism and the mounting bolts: Tilt out the seat console (1) by approximately 90 upwards. Into the edge of the inner hole of the console, insert the seat sliding mechanism (2), place a plate (4) against one side of the console and bolts (3) with washers on 3.3.1a the other side.
-
Page 31: Grass Catcher
3.3.2 GRASS CATCHER The grass catcher is supplied packed in a separate box. For transportation reasons some of its parts are demounted and they first need to be assembled. The following chapters provide a rough indication of their assembly. A detailed procedure is provided on the CD included with the mower, or we can send it to you on request. - Page 32 ► INSTALLATION OF THE GRASS CATCHER Screw the grass catcher hinges (1) on to the rear plate. For this purpose use the installation markings on the plate indicating the correct position of the hitches. 3.3.2c Only screw on the lower hitch (2) if you will be using a trailer (optional equipment). ...
-
Page 33: Checking The Battery
3.4 | CHECKS PRIOR TO STARTING UP 3.4.1 CHECKING THE MOTOR OIL The tractor must be in a horizontal position before the oil level can be checked. The oil cap is accessible after tilting open the hood. Screw out the oil dipstick, wipe it dry, reinsert it and screw in. Then again screw it out and take the oil level reading. Oil level dipstick: (1) - (ADD) low oil level 3.3.2g... -
Page 34: Operating The Machine
4 │ OPERATING THE MACHINE 4.1 | LOCATION OF THE MAIN CONTROL ELEMENTS AND INDICATORS (1) Throttle lever (2) Information panel (optional accessory) (3) AUT/MAN switch - control of the function of mowing when the grass catcher is full (optional accessory) (4) 12V socket (optional accessory) (5) Deactivation of the mowing deck disengagement for reversing (6) Mowing deck activation switch... - Page 35 4.2 | DESCRIPTION AND FUNCTIONS OF THE CONTROL ELEMENTS (1) THROTTLE LEVER Serves to regulate the engine speed. It has the following three positions: CHOKE* Starting a cold engine Maximum engine speed Minimum engine speed (idle) * Only on machines with a BS15, BS17, KO15, TE17 and HO16 engines (2) INFORMATION PANEL (optional accessory) The information panel contains indicator lights, that serve to signal the status of the machine’s basic functions.
- Page 36 (3) SWITCH FOR CONTROLLING THE FUNCTION OF MOWING WHEN THE GRASS CATCHER IS FULL (optional accessory) The AUT/MAN switch serves to activate and deactivate the control of the mowing function (mowing deck) when the grass catcher is full. In the MAN position, mowing is activated permanently and when the grass catcher is full, grass clippings may accumulate in the ejection chute.
- Page 37 (7) MAIN POWER SWITCH Serves to start up / shut off the engine. It has the following 4 positions: Ignition off / turn off the ignition STOP STOP Turn on / turn off the headlights on the hood Ignition on, the engine is running. Start engine –...
- Page 38 (12) BRAKE PEDAL AND PARKING BRAKE INDICATOR LIGHT The indicator light serves to signal correct and incorrect starting of the engine ( 5.2), pushed down brake and engagement of the parking brake. Parking brake engaged signal ( ) ) Brake pedal applied signal (13) DIFFERENTIAL LOCK PEDAL The pedal is used only if necessary and only when driving directly forward.
- Page 39 (16) REVERSE TRAVEL PEDAL The pedal controls the power going to the wheels and regulates the speed of the machine backwards. The more the pedal is pushed towards the floor, the faster the machine will be and vice versa. When the pedal is released it will automatically return to the neutral position and the machine will stop.
- Page 40 (21) AND (22) BY-PASS LEVER – FREE MOVEMENT OF THE REAR WHEELS The by-pass lever serves to disengage the transmission for the rear wheel drive and is used to push or pull the machine without using the engine. Depending on the type of transmission used, it is located either behind the rear left wheel or in front of the rear left wheel.
-
Page 41: Starting Up The Engine
5 │ OPERATION AND HANDLING OF THE MACHINE Information which it is good to know before the riding mower is first turned on: The riding mower is equipped with safety contacts, which are engaged by: - a switch located under the seat - a switch on an attached grass catcher or deflector - a full grass catcher switch - a brake pedal switch... -
Page 42: Turning Off The Engine
8) Slowly move the throttle lever to position “MIN” Allow the engine to run several minutes before turning on the mowing deck. Never leave a started engine running in a closed or poorly ventilated area. Exhaust fumes contain gases that are harmful to your health. -
Page 43: Driving The Machine
5.4.2 DISENGAGING THE MOWING DECK Deactivate the mowing deck by pushing down the activation switch. If the driver leaves the seat, the engine will automatically shut down and thereby the rotation of the mowing blades also. However, never turn off the mowing deck by simply leaving the seat. If you do not move the key in the ignition from the position “ON” to position “STOP”, then a part of the electrical installation will still be live and this may result in it being damaged. -
Page 44: Stopping Travel
< 8 km/hour 5.5.4 TRAVELLING ON A SLOPE Right The UJ102 riding mower may work on slopes with an incline of up to 12° (21%). When working on a slope it is necessary to adhere to the following fundamentals: Max 12 ... -
Page 45: Emptying The Grass Catcher
5.6 | EMPTYING THE GRASS CATCHER The full level of the grass catcher is signalled by the full grass catcher flap. It is possible to regulated the full level of the grass catcher by moving the sliding part of the flap (extending or shortening the arm). (1) Sliding part extended = grass catcher filled to minimum 5.6a (2) Sliding part retracted = grass catcher filled to maximum... -
Page 46: Maintenance And Adjustment
6 │ MAINTENANCE AND ADJUSTMENT Properly performed regular maintenance and inspection of the riding mower helps to increase its problem-free operating lifetime. Worn or damaged parts must be replaced in time. When replacing parts use only original spare parts, using non-original parts may damage the machine, endanger the health of the driver or other persons and during the warranty period it voids the warranty. - Page 47 (continued) INTERVAL ASSEMBLY ACTIVITY Air filter and spark plugs Inspection, replacement if necessary 6.3.2 AFTER 50 HOURS Lubrication Lubrication of parts according to lubrication plan Engine, transmission, AFTER 100 HOURS Inspection and adjustment of motion electromagnetic transmission Tyres Inspection of pressure 6.2.1 MONTHLY Mowing deck...
-
Page 48: Daily Checks And Maintenance
6.2 | DAILY CHECKS AND MAINTENANCE Before starting any maintenance or repair works, thoroughly reacquaint yourself with all instructions, restrictions and recommendations in this user’s manual. Always remove the key from the ignition and disconnect the spark plug cables before performing any cleaning, maintenance or repairs. -
Page 49: After Finishing Work
6.2.2 AFTER FINISHING WORK ► SETTING UP THE MACHINE After finishing mowing, elevate the mowing deck to the highest position and disable the drive for the mowing blades. Turn off the ignition, step on the brake pedal and secure the machine in position with the parking brake. On machines with a single cylinder engine (BS15, 15.5 HP) close the fuel supply. -
Page 50: Changing Oil
6.3 | REGULAR CHECKS, MAINTENANCE AND ADJUSTMENT 6.3.1 BATTERY Correct and regular maintenance of the battery will extend its lifespan. Therefore regularly check its condition according to the manual supplied by the battery’s manufacturer. Keep the battery contacts clean. If dirt accumulates on them, or they are rusty, clean them according to the recommendations of the battery’s manufacturer. -
Page 51: Replacing Light Bulbs
Check, maintain and replace spark plugs according to the instructions contained in the user’s manual for the engine supplied by its manufacturer. ► REPLACEMENT OF THE FUEL FILTER Never allow the engine to run without an air filter. This rapidly wears out the engine. Replace the fuel filter according to the instructions contained in the user’s manual for the engine supplied by its manufacturer. -
Page 52: Sharpening The Blades
6.3.6 MOWING DECK - SHARPENING AND REPLACING BLADES ► SHARPENING THE BLADES The mowing blades must be sharp, statically balanced and straight. Blunt, incorrectly sharpened or damaged mowing blades cause grass to be torn out of the ground, damage to lawns and mediocre collection of mowed grass in the grass catcher. Do not repair a blade that is deformed or otherwise damaged, replace it immediately. - Page 53 6.3.7 MOWING DECK - INSPECTION AND BALANCING To achieve the best mowing results the mowing deck must be set at the correct mowing height and both sides of the deck must be level. Before carrying the adjustment: Place the machine on an optimally even surface, inflate all the tyres to the prescribed pressure (80 -140 Kpa, ± 10 Kpa difference between the individual tyres) and secure the entire machine against movement (e.g.
-
Page 54: Replacing Belts
6.3.11 MAINTENANCE OF STEERING Regularly check that there is not excessive looseness between the cogged steering segment and the steering wheel pinion. If higher looseness is identified, it is necessary to limit it. Procedure for limiting (adjusting) looseness: Lift the hood. ... - Page 55 6.3.16 MAINTENANCE OF THE HYDROSTATIC TRANSMISSION For the reliable operation of the transmission it is necessary to maintain the correct oil level. The filling openings on the transmissions are accessible after taking the ejection chute off the machine ( 6.3.10). Prescribed values are provided in the following table.
- Page 56 6.4 | LUBRICATION Lubricate the machine according to figure 6.4 and the table below. In the event that the machine is operated in very dusty or sandy operating conditions, lubricate more frequently. Ball bearings of the tension pulleys, guide pulleys and bearings on the mowing deck are self-lubricating. Prior to starting lubrication, the engine must be turned off and all moving parts of the machine must be still.
- Page 57 7 │ REPAIRING MALFUNCTIONS AND DEFECTS Do not perform any repairs if you do not have the appropriate technical equipment and qualifications. The repairs described below may be performed by the user of the machine. Other repairs performed by the user that are not specified here will void the warranty.
- Page 58 PROBLEMS WITH TRAVEL PROBLEM POSSIBLE CAUSES REMEDY A “WHISTLING” Check the condition of the belts and the tensioning Worn out or damaged belts, guide or SOUND IS MADE pulleys. If the problem persists, immediately contact tensioning pulleys WHEN TRAVELLING an authorised service centre.
- Page 59 MOWING DECK PROBLEMS PROBLEM POSSIBLE CAUSES REMEDY Grass and dirt accumulated inside the Check the condition of the blades and sharpen or mowing deck replace as necessary ( 6.3.6) Check the condition of the blades and sharpen or Blunt or deformed blades THE MOWING DECK replace as necessary (...
- Page 60 MOWING DECK PROBLEMS (continued) PROBLEM POSSIBLE CAUSES REMEDY Check the condition of the belt. Perhaps the belt Damaged mowing deck drive belt jumped out of the belt pulley or it was damaged. Replace it if necessary. Check the tension of the drive belt ( 6.3.8 and 6.3.9) ...
-
Page 61: Ordering Spare Parts
MOWING DECK PROBLEMS (continued) PROBLEM POSSIBLE CAUSES REMEDY Check that the blades are not bent or twisted, also Damaged blades check that they are balanced. If they are deformed, replace them. Check that the belt does not have burned areas or ... - Page 62 8 │ POST-SEASONAL MAINTENANCE, PUTTING THE MACHINE OUT OF OPERATION After the end of the season or if you will not be using your riding mower for more than 30 days, make sure to prepare your machine for storage as soon as possible. If fuel remains in the petrol tank without movement for more than 30 days, a sticky deposit may form, which can have a negative effect on the carburettor and cause poor engine operation.
-
Page 63: Disposal Of The Machine
9 │ DISPOSAL OF THE MACHINE After the operational life of the machine is over, the owner of the machine is responsible for its disposal. This may be performed in two ways: a) Hand the machine over to a specialised company (scrap yard, secondary waste collection point, etc.). You will receive documented confirmation of the handover for disposal.
Need help?
Do you have a question about the UJ102 and is the answer not in the manual?
Questions and answers