Table of Contents
Advertisement
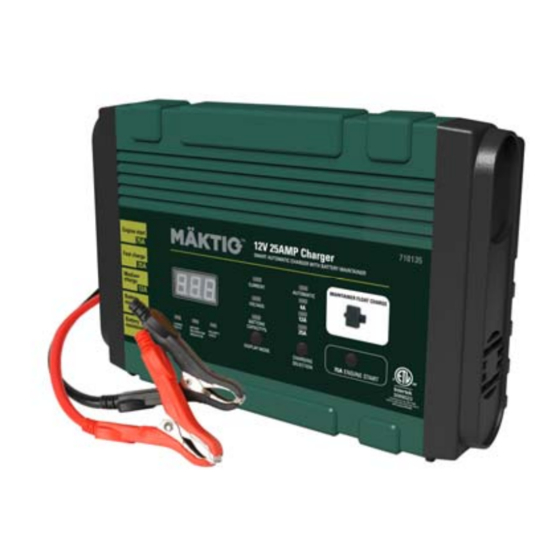
BATTERY CHARGER
MAINTAINER / JUMPSTARTER
Read carefully and understand all ASSEMBLY AND
OPERATION INSTRUCTIONS before operating. Failure to
follow the safety rules and other basic safety precautions
may damage the equipment or create hazardous conditions
for the user. Keep this manual for future reference.
12V/25A
OWNER'S MANUAL
Part No 710135
1
Advertisement
Table of Contents

Related Manuals for Mäktig 710135

Summary of Contents for Mäktig 710135
- Page 1 Read carefully and understand all ASSEMBLY AND OPERATION INSTRUCTIONS before operating. Failure to follow the safety rules and other basic safety precautions may damage the equipment or create hazardous conditions for the user. Keep this manual for future reference. Part No 710135 1 ...
-
Page 2: Table Of Contents
Keep away from WATER – FIRE - SMOKE! Recharge the unit before using it! TABLE OF CONTENTS CONVENTIONS USED ..........2 1. INTRODUCTION ..........2. IMPORTANT SAFETY INSTRUCTIONS.... 3. PERSONAL SAFETY INSTRUCTIONS....4. AC ELECTRICAL CONNECTIONS..... 5 5. PREPARING TO CHARGE ......... 6 6. -
Page 3: Introduction
1. INTRODUCTION Thank you for purchasing this premium quality Mäktig Smart Battery Charger. This charger provides the power and functionality of a charger with the option of a 75Amp jumpstarter. The automatic charger keeps 12V batteries charged while maintaining top performance. It can be easily set at 4, 12, 25Amp charge rate or operated on automatic setting and is suitable for Gel and AGM batteries. -
Page 4: Important Safety Instructions
STAGE 3 – Float Charge -- Voltage is automatically maintained and reduced to a predetermined level while current is adjusted for a safe, effective battery charge. The Automatic Float Charge feature is ideal for maintaining a battery. It automatically tops off battery as needed, to keep battery fully charged. 2. - Page 5 Do not expose charger to rain or snow. Never charge a frozen battery. If battery acid becomes frozen, bring battery to a warm area and allow it to thaw before you begin charging. Never touch the battery clamps together when the charger is on. This may cause a spark.
-
Page 6: Ac Electrical Connections
4. AC ELECTRICAL CONNECTIONS PLUGGING IT IN Your charger requires a 3-pin, grounded 120 V AC electrical wall outlet receptacle installed according to local codes and ordinances. WARNING: Never alter AC cord or plug provided. If it does not fit the outlet, have a proper outlet installed by a qualified electrician. - Page 7 Be sure to position the power cord to prevent it from being stepped on, tripped over or damaged. Never place charger directly above battery being charged. Gases from the battery will corrode and damage the charger. Never set a battery on top of a charger. ...
- Page 8 Never allow the DC output clamps to touch each other. This may cause a spark. FOLLOW THESE STEPS WHEN BATTERY IS INSTALLED IN VEHICLE. A SPARK NEAR BATTERY MAY CAUSE A BATTERY EXPLOSION. TO REDUCE THE RISK OF A SPARK NEAR BATTERY: 1.
-
Page 9: Operating Instructions
Connect and disconnect the DC output clamps only after removing the AC plug from the electrical outlet. Never allow the DC output clamps to touch each other. This may cause a spark. FOLLOW THESE STEPS WHEN BATTERY IS REMOVED FROM VEHICLE. -
Page 10: Charger Controls And Features
charger will begin charging in the Optimal Charge mode. The charger will then do everything else automatically. NOTE: If you connect AC first without connecting the DC cables to the battery, the digital display will show you “8” in turns. Once you connect DC cables to the battery, the digital display will show you the charging current. - Page 11 ensure the battery will reach 100% of its capacity. Optimal Charge logic automatically selects the ideal charge rate for your battery. In Optimal Charge mode, the charger starts charging at a low, safe current. Gradually, the charger increases current as the battery demonstrates it can accept a higher current.
- Page 12 Once charging is complete, the charger will automatically go into Maintenance mode (also known as float mode monitoring). In this mode, the charger keeps the battery fully charged by delivering a small amount of current, when necessary, to keep the battery at peak charge. This process will keep for around 1 hour, after which the digital display will show “FUL”, and the DC clamps will automatically go out of power.
- Page 13 Front panel view 1. Display Panel – Shows present voltage, present current, present battery capacity or wrong condition code. With AC power input, when unit is not connected to the battery, the charger shows that there is no power output with the display panel present moving “8”.
- Page 14 6. 2A current indicator – Indicates the charging rate you choose is 2A. 8A current indicator – Indicates the charging rate you choose is 8. 12A current indicator – Indicates the charging rate you choose is 12A. 9. Charging rates selecting switch – You can choose the charge rates-2A, 8A or 12A ,by pressing this switch.
-
Page 15: Using The Engine Start
Operation for the 2A Maintainer Connect the extension cord to the charger, and connect the Clamp cable or Ring cable to the battery, positive (+) to positive (+), negative (-) to negative (-). Then connect the clamp cable or ring cable to the extension cord. -
Page 16: Battery Charging Times
NOTE: A severely discharged battery may not be able to start an engine even with the assistance of the 75A Engine Start. If your first few attempts to boost the vehicle are unsuccessful, try charging the battery at 25A for 20 minutes before attempting to boost again. 9. -
Page 17: Troubleshooting Fault Codes
10. TROUBLESHOOTING FAULT CODES Code Condition Possible Cause Solution Short circuit in the Go to a professional Lab to battery. test the battery. Battery voltage is less than 10 V after 10 minutes of A load may be Disconnect the load and charging connected to the attempt to charge again. -
Page 18: Maintenance And Care
11. MAINTENANCE AND CARE Clean cords and clamps each time you are finished using the charger. Wipe off any battery fluid or debris that might have come in contact with the clamps to prevent corrosion. Store the power and output cable neatly to prevent damage. ...
Need help?
Do you have a question about the 710135 and is the answer not in the manual?
Questions and answers