Table of Contents
Advertisement
Quick Links
Advertisement
Table of Contents

Related Manuals for Smartwares Byron DIC-23112


Summary of Contents for Smartwares Byron DIC-23112
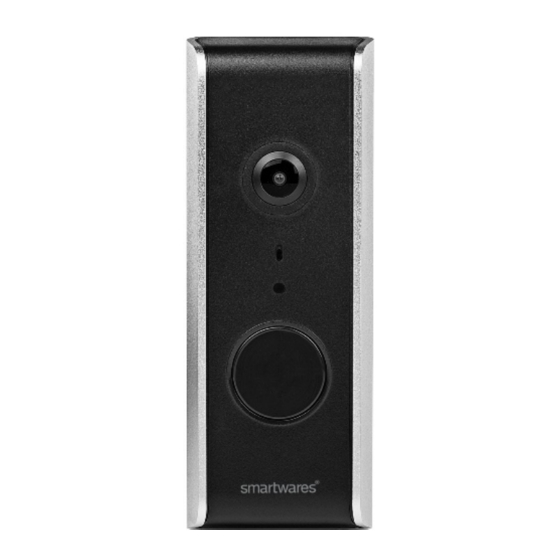
- Page 1 DIC-23112 MANUAL...
-
Page 2: Installation
Installation We recommend for the Wi-Fi doorbell to be set-up indoors and tested before final fitting. Please follow the steps included in this guide to get the product up and running. Doorbell setup To use the recording feature, it is recommended to install the SD card before installation. This can be done later but will involve removing and re-fitting some cables. - Page 3 On the side of the doorbell is the SD card slot. Remove the rubber seal and insert the SD card, then push the rubber seal back into place. Slide the doorbell back into its aluminium case and replace the 3x securing screws. Push the power cable through the hole of the rubber seal.
- Page 4 Wall Mounting Now the doorbell is working, test it in your ideal location making sure you are happy with the view from the camera. Using the wall fixing base as a template, mark and drill 2 x holes using a 6mm drill bit. Secure the wall fixing base to the wall using the wall plugs and screws provided.
- Page 5 Download the Smartwares View App and install it. You must allow notifications to receive Alerts on your device! Open the Smartwares View App and touch the plus icon on the screen to begin set-up. Type a name for your doorbell under system name.
- Page 6 Wi-Fi settings and select the RVDP-xxxx network from the list, then enter the password 12345678. 11. Return to the Smartwares View app and click “Next”. Allow a few minutes for the phone to complete the set-up. 12. Once connected, the doorbell will ring.
- Page 7 Smartwares View App Set-up (Android) Download the Smartwares View App and install it. Open the Smartwares View App and touch the plus icon on the screen to begin set-up. Type a name for your doorbell under system name. Click the “Scan DID Label” and allow the app access to your camera on your phone.
- Page 8 12. On Wi-Fi set-up click SET-UP. 13. You will be prompted to turn off your mobile data. This is to force the device to connect to the Wi-Fi of the doorbell. You can turn this back on after set-up. Return to the app and click “Start”, your device will connect to the doorbell.
-
Page 9: Smartwares View App Overview
This is because there are different versions of the app for iOS and Android, and because the app is updated regularly. Start screen The start screen offers you an overview of your Smartwares Wi-fi video doorbell and other compatible Smartwares cameras you may have installed. From this screen you have access to different functions: •... - Page 10 Adding a video doorbell to add a video doorbell or other compatible Smartwares camera. Advanced Settings . The additional setup selection icons will appear. Now tap to access the advanced settings. Tap again to exit. Note: If the device is in power saving mode, you will not be able to access the advanced settings.
- Page 11 If you want to enable/disable notifications, please follow the steps below: 1. Launch Settings from your Home screen. 2. Tap “ Notifications”. 3. Scroll down to find the Smartwares View app and tap on it. 4. Adjust the notification settings, such as On/Off, Sounds, banners, etc. Note:...
- Page 12 For Android If you want to enable/disable notifications, please follow the steps below. Note: The internet connection and wireless network speed may influence the performance of the push notification service. Video hardware acceleration Turn video hardware acceleration on for faster performance. Please turn this off if you experience any graphical glitches.
-
Page 13: Live View Page
Tap this icon once to stop video the video transmission to free up more bandwidth for audio. Door unlock Tap this icon once and enter the admin password to remotely open the door for a visitor (Smartwares DB5005 or DB5005L Trigger required). - Page 14 Hands-free mode Hands-free Mode with two-way talk Phone mode with Phone mode with two-way talk one-way audio...
-
Page 15: Event Video Playback
Event video playback The recorded video is automatically saved to the memory card. You can access the files for playback. on the main page. and the date/time filter will appear. You can define the period to display all available recorded files for playback. - Page 16 For playback, select the file from the local or the event section. During the playback you can tap the pause button to pause/resume the playback. The local network conditions may cause improper video playback, resulting in a black screen. If this happens please leave the playback mode and try again later when the internet conditions have improved.
- Page 17 Delete Select the file(s) and tap the delete icon. It’s possible to delete multiple files at once. Check the video clip Then tap the trash can icon Answering a call A pop-up like you see on the left will appear on your mobile device when a visitor presses the doorbell button on you video doorbell.
-
Page 18: Advanced Settings
Advanced settings This chapter explains the advanced settings for the administrator. The administrator is the one who owns the administration password and has full control over the Wi-Fi video doorbell. The administrator can access all functions and settings, while normal users can only receive the surveillance images for live view, capture video recordings and cannot manage the camera settings. - Page 19 Admin password The Admin Password is a specific security code for the administrator to edit the advanced settings. The default admin password is 123456. This function allows you to change the default admin password into your personal admin password. For the protection of your system configuration, you need to enter the admin password when changing the advanced settings.
- Page 20 Environment mode Choose between 50 or 60 Hz, depending on your region. If you are in Europe, you should select 50Hz. Low Light Enhancement Adjust the picture quality for darker environments Notify enable By disabling notifications here all users will not be able to receive push notifications on their mobile device, even if they have push notifications enabled.
-
Page 21: Pairing With A Smartwares Chime
If you have issues with echoes when using two-way audio, enable the acoustic echo canceler function. Pairing with a Smartwares chime You can pair you video doorbell with a separate chime. This way you get notified in your home if... -
Page 22: Factory Reset
Smartwares View app settings. If your language is not available, the app will be in English · Improve your Wi-Fi reception by adding a Wi-Fi extender... - Page 23 Wireless Network Wi-Fi 802.11b/g/n Transmission Frequency 2.4GHz Transmission Range Up to 150 Meters Image Sensor 1080P Remote Live-view 24/7 app remote view Two-Way Audio One-Way Video Push Notification Yes / iOS and Android Event List Yes / Snapshot and Video Remote Event Playback 24/7 remote event playback Night Vision...
Need help?
Do you have a question about the Byron DIC-23112 and is the answer not in the manual?
Questions and answers