
Subscribe to Our Youtube Channel
Related Manuals for peerless-AV YBTLU


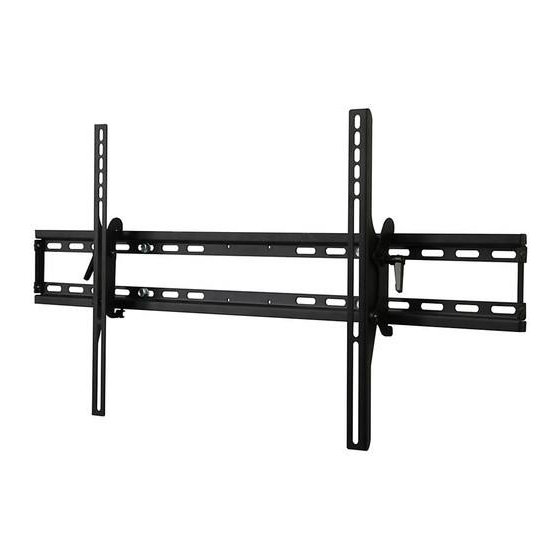
Summary of Contents for peerless-AV YBTLU
- Page 1 YBTLU 37" - 70" 105 lb (94 - 178 cm) (48 kg) EŠ TÜR 2012-01-09 #:203-9075-3 (2012-05-09)
- Page 2 WARNING ENG - This product was designed to be installed on wood stud walls and solid concrete (2000 psi density minimum) or cinder block walls. The mounting screws, top and bottom, must be equally spaced from center slot of wall plate at a minimum of 16" on center. Before installing make sure the supporting surface will support the combined load of the equipment and hardware.
- Page 3 VÝSTRAHA EŠ - Tento produkt je ur en k montáži na d evené hrázd né st ny a pevné betonové st ny (minimální hustota 2000 psi) nebo st ny ze škvárobetonových blok . Upev ovací šrouby, horní a dolní, musí být rovnom rn rozloženy od centra slotu desky st ny minimáln 16"...
- Page 4 Symbols Símbolos Symboles Symbole Symbolen WARNING Simboli ADVERTENCIA EŠ Symboly Skip to step. ADVERTISSEMENT Symboly Continúe con el ACHTUNG Screws must get at least three Símbolos paso. WAARSCHUWING full turns and t snug. Semboller TÜR Passez à l’étape. AVVERTENZA Los tornillos tienen que dar, Weiter mit Schritt.
- Page 5 Tools Needed for Assembly. Herramientas necesarias para el ensamblaje. Outils nécessaires au montage. To properly tighten screws: Tighten until screw Für den Zusammenbau erforderliche Werkzeuge. head makes contact, then tighten another 1/2 Voor montage benodigd gereedschap. turn. Do not overtighten screws. Attrezzi necessari per l’assemblaggio.
- Page 6 Parts (Before beginning, make sure you have all parts shown below). Piezas (antes de iniciar, asegúrese de tener todas las piezas siguientes). Pièces (avant de commencer, assurez-vous d’avoir toutes les pièces illustrées ci-dessous). Teile (Achten Sie vor Beginn der Arbeiten darauf, dass alle unten abgebildeten Teile vorhanden sind). Onderdelen (hoort u zich ervan te overtuigen dat u alle onderdelen hebt, die hieronder te zien zijn).
- Page 7 G (4) H (4) I (4) J (4) M4 x 12mm M5 x 12mm M6 x 12mm M8 x 12mm K (4) L (4) M (4) M4 x 25mm M5 x 25mm M6 x 25mm N (4) O (4) P (4) M8 x 25mm spacer M4/M5/M6 washer...
- Page 8 Wood stud wall. Concrete/Cinder block. Pared de madera. Concreto/Bloques de hormigón. Mur en bois. Béton plein/Bloc de parpaing. Holzwand. Massivbeton/Porenbetonstein. Houten muur. Beton/B2-blokken. Parete di legno. Calcestruzzo/Blocchi di calcestruzzo. D ev ná st na. Betonu/Škváro betonového bloku. EŠ EŠ Drevená stena. Betónu/Škvarobetónového bloku.
- Page 9 1a-3 2.5" (64mm) 1/4" 1/4" (6mm) (6mm) Drill mounting holes into supporting surface (2.5" (64mm) minimum depth required). Taladre los agujeros de montaje en la super cie de apoyo; se requiere una profundidad mínima de Mounting hole must center on stud. 2.5"...
- Page 10 WARNING ENG • When installing Peerless wall mounts on cinder block, verify that you have a minimum of 1-3/8" (35mm) of actual concrete thickness in the hole to be used for the concrete anchors. Do not drill into mortar joints! Be sure to mount in a solid part of the block, generally 1"...
- Page 11 ADVERTENCIA SPN • Cuando vaya a instalar soportes de pared de Peerless en bloques de hormigón de escorias, asegúrese de que cuente con una capa de concreto de un grosor mínimo de 1-3/8" (35mm) en el agujero, que pueda usar para los anclajes para concreto.
- Page 12 1b-1 Level wallplate. Mark mounting holes. Marque los ori cios de montaje. Marquez les trous de xation. Markieren Sie die Montagelöcher. Markeer montagegaten. Contrassegna I fori di montaggio. Vyzna te montážní otvory. EŠ Vyzna te montážne otvory. Marque os furos de montagem. Montaj deliklerini i aretleyin.
- Page 13 1b-3 1b-3 D (6) Insert anchor thru drywall (a) ush to concrete (b). Inserte el anclaje a través del yeso-cartón (a) a ras con el concreto (b). Insérez la cheville d’ancrage dans la cloison sèche (a) au ras du béton (b). Setzen Sie den Dübel durch die Trockenwand (a) bündig mit dem Beton (b) abschließend ein.
- Page 14 Center adapter brackets vertically on back of screen. Centre verticalmente los soportes en la pantalla. Centrez les supports à la verticale de l’écran. Richten Sie die Halterungen senkrecht mittig an der Bildschirm. Centreer de beugels verticaal op de van het scherm. centra le staffe verticalmente sul dello schermo.
- Page 15 Tighten. Apretar. Serrer. Anziehen. Aandraaien. Stringere. Utáhn te. EŠ Utiahnite. Apertar. S kmak. TÜR 2012-01-09 #:203-9075-3 (2012-05-09)
- Page 16 Tilt Adjustment: Loosen ratchet handle. Adjust tilt. Retighten ratchet handle. Ajuste de la inclinación: A oje la palanca de trinquete. Ajuste la inclinación. Vuelva a apretar la palanca de trinquete. Réglage de l'inclinaison : Desserrez la clé à cliquet. Réglez l’inclinaison. Resserrez la clé à cliquet. Neigungseinstellung: Lösen Sie den Ratschengriff.
-
Page 17: Limited Five-Year Warranty
LIMITED FIVE-YEAR WARRANTY Peerless Industries, Inc. (“Peerless”) warrants to original end-users of Peerless ® products will be free from defects in material and workmanship, under normal use, for a period of ve years from the date of purchase by the original end-user (but in no case longer than six years after the date of the product's manufacture). - Page 18 BESCHRÄNKTEN FÜNFJÄHRIGEN GARANTIE Peerless Industries, Inc. („Peerless”) übernimmt gegenüber den ursprünglichen Endnutzern von Peerless®-Produkten die Gewährleistung, dass diese unter normalen Einsatzbedingungen für fünf Jahre ab Datum des Kaufs durch den ursprünglichen Endnutzer (aber in keinem Fall länger als sechs Jahre nach Herstellungsdatum des Produkts) frei von Material- und Verarbeitungsfehlern sind. Peerless repariert oder ersetzt nach eigenem Ermessen ein Produkt, das dieser Garantie nicht entspricht, oder erstattet den Kaufpreis dafür.
- Page 19 OMEZENÁ P TILETÁ ZÁRUKA Peerless Industries, Inc. (“Peerless”) zaru uje p vodním koncovým uživatel m výrobk Peerless®, že budou bez vad na materiálu a provedení, za podmínky b žného používání, po dobu p ti let od data nákupu p vodním koncovým uživatelem (ale v žádném p ípad ne déle než...
- Page 20 Bu garanti size baz özel yasal haklar vermektedir, ülkeden ülkeye de i en ba ka yasal haklar n z da olabilir Peerless-AV Peerless-AV Europe Peerless-AV de Mexico 2300 White Oak Circle Unit 3 Watford Interchange, Ave de las Industrias 413...
Need help?
Do you have a question about the YBTLU and is the answer not in the manual?
Questions and answers