Advertisement
Installation and Assembly:
Desktop Swivel Mount for Philips 32HFL2082 and 40HFL2082 Displays
Model: HLG440-PH, HLG440-PH-Q10
Mounting to Desktop Surface
NOTE: Read entire instruction sheet before you start installation and assembly.
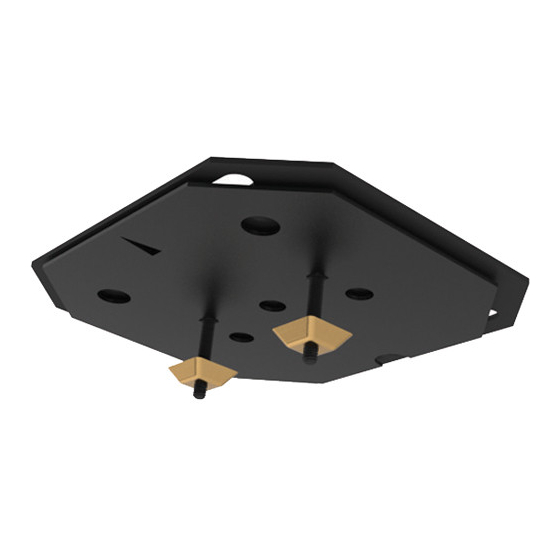
Parts List
Description
A swivel plate assembly
B 10-32 x 3/8 flat head self drilling screw
C 1/4-20 x 1-3/4" thin head carriage bolt
D 1/4-20 slope nut
E plastic cap
F 4 mm allen wrench
G M5 x 20 mm socket pin screw
H #10 split lock washer
I
#10 flat washer
Before you start make sure all parts listed are included with your product.
D
G
HLG440-PH
Qty
1
3
2
3
2
1
2
2
2
E
H
HLG440-PH-Q10
Part #
Qty
Part #
090-1983
10
090-1983
560-2743
30
560-2743
560-1764
20
560-1764
530-0035
23
530-0035
590-1294
20
590-1294
560-9646
3
560-9646
520-1065
20
520-1065
540-1035
20
540-1035
540-9400
20
540-9400
F
I
1 of 4
A
B
ISSUED: 10-30-10 SHEET #:125-9164-2 09-14-11
C
Advertisement
Table of Contents

Subscribe to Our Youtube Channel
Related Manuals for peerless-AV HLG440-PH


Summary of Contents for peerless-AV HLG440-PH
- Page 1 Installation and Assembly: Desktop Swivel Mount for Philips 32HFL2082 and 40HFL2082 Displays Model: HLG440-PH, HLG440-PH-Q10 Mounting to Desktop Surface Mounting using Bolt Down Method NOTE: Read entire instruction sheet before you start installation and assembly. Parts List HLG440-PH HLG440-PH-Q10 Description Part # Part # A swivel plate assembly...
- Page 2 Mounting using Bolt Down Method Choose swivel range below and identify swivel range holes of swivel plate assembly (A). USE HOLES TO LOCK SWIVEL FRONT PLATE ASSEMBLY 90° FROM CENTER RIGHT SIDE LEFT SIDE 60° 60° 30° 30° 90° 90° SWIVEL RANGE HOLE Use swivel plate assembly (A) as a template to mark location of holes, point 1 and point 2, approximately 3"...
- Page 3 Secure swivel plate assembly (A) to bottom of display base using three 10-32 x 3/8" flat head self drilling screws (B) in 32" or 42" orientation. NOTE: Make sure that screws in display base align with slots and holes in swivel plate assembly (A) as shown below.
- Page 4 NOTE: Display and base may appear different than illustrated 4 of 4 ISSUED: 10-30-10 SHEET #:125-9164-2 09-14-11 © 2010, Peerless Industries, Inc. All rights reserved. All other brand and product names are trademarks or registered trademarks of their respective owners.
Need help?
Do you have a question about the HLG440-PH and is the answer not in the manual?
Questions and answers