ORBILOC DOG DUAL Quick Manual
Safety light
Hide thumbs
Also See for DOG DUAL:
- User manual (48 pages) ,
- User manual (24 pages) ,
- User manual (25 pages)

Related Manuals for ORBILOC DOG DUAL


Summary of Contents for ORBILOC DOG DUAL
- Page 1 DOG DUAL QUICK GUIDE THE SAFETY LIGHT MADE IN DENMARK Register for your 3-year warranty at www.orbiloc.com/warranty...
- Page 2 ZH/ 中 . . . . . . . . . . . . . . . . . . . . . . . . . . 48 Download a complete manual at www.orbiloc.com/user-manual...
- Page 3 U.S., EU, NO and CN. Our three-year warranty applies to the Orbiloc Dog Dual. Please visit: www.orbiloc.com/warranty To get the most out of your new high quality Orbiloc Dog Dual Safety Light™, please read the Quick Guide carefully.
- Page 4 INTRODUCTION Orbiloc Dog Dual Orbiloc Dog Dual is a high quality LED Safety Light designed to keep both you and your dog safe. The Orbiloc Dog Dual Safety Light ensures that both of you are visible to others when out and about in the dark,...
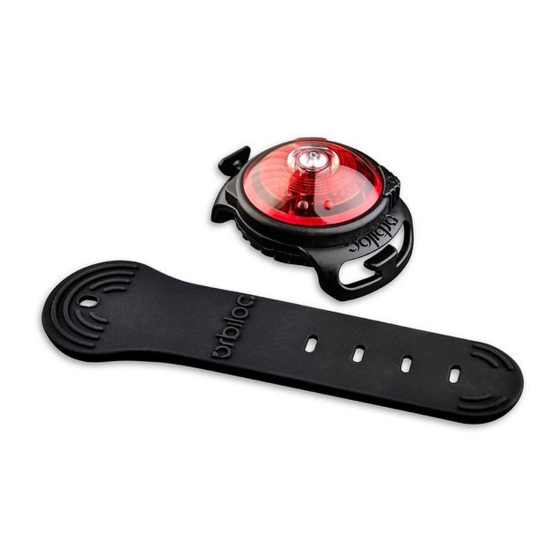
- Page 5 LENS (1) MODE SELECTOR RING (2) O-RING (3) BATTERY SHEET (4) QUICK MOUNT (5) BATTERY PACK 2 x CR2032 (6) BASE (7) ADJUSTABLE STRAP (8)
- Page 6 Dog Dual™ and accessories. Read the specific recommendations for each product in our User Manual, available at www.orbiloc.com/user-manual If the Orbiloc Dog Dual gets muddy or exposed to sea water, please rinse the outside of the Light with run- ning water, while turning the Mode Selector Ring (2).
- Page 7 The warranty period applies to the Orbiloc Dog Dual. Accessories are not covered by the warranty. The warranty of the Orbiloc Dog Dual is only valid with the use of orginal Orbiloc replace- ment parts. Use of other accessories and replacement parts will make the warran- ty of the Orbiloc Dog Dual invalid.
- Page 8 Base (7) and you are ready to use your Orbiloc Dog Dual . ON / OFF / STEADY / FLASH The Orbiloc Dog Dual is very user-friendly; just turn the Mode Selector Ring (2) to the left or right. The triangle indicates the desired function.
- Page 9 QUICK MOUNT ADJUSTABLE From the outside - with the non-slip grooves facing down - slide the end of the Orbiloc Adjustable Strap (8) with the four slots into the gab of the Orbiloc Quick Mount (5), and secure it on the designated hook.
- Page 10 Battery Pack (6) with a new Battery Pack (6) (with the symbol facing down) in the Base (7) of the Orbiloc Dog Dual . Make sure that the Mode Selector Ring (2) is clicked firmly to the Lens (1) . Please note...
- Page 11 ADDENDUM WARNING Orbiloc Lights are not toys. Keep away from chil- dren. They may contain small parts which present a choking hazard for children or pets. Individuals with photosensitive epilepsy should avoid use of this product. Do not open batteries, charge, or heat above 75°C , or burn.
- Page 12 Sehen Sie Seite 5 für graphische Erläuterungen. Entfernen Sie zunächst das Schutzpapier der Batterie (4). Drehen Sie den Boden (7) fest zu, und Sie sind bereit das Orbiloc Dog Dual zu benutzen. AN/AUS/BLINKEND/DAUERLICHT Das Orbiloc Dog Dual ist sehr benutzerfreund- lich.
- Page 13 (8) mit den vier Schlitzen in die Lücke der Orbiloc Schnellmontage (5), und sichern Sie ihn an den vorgesehenen Haken. Platzieren Sie das Orbiloc Dog Dual an das Halsband, Geschirr oder die Leine Ihres Hundes, und ziehen/wickeln Sie das andere Ende des Orbiloc Verstellriemen (8) um die Ausrüstung.
- Page 14 Silikon-gefetteten O-Ring (3) . BATTERIEWECHSEL UND WARTUNG Schrauben Sie den Boden (7) des Orbiloc Dog Dual ab und tauschen Sie den alten O-Ring (3) mit einem neuen aus dem Orbiloc Service Kit aus. Tauschen Sie die alten Batterien durch ein neues Batteriepaket (6)
- Page 15 EMC. Die Deklarationen befinden sich auf www.orbiloc.com. WEEE RICHTLINIE Waste Electrical and Electronic Equipment Directives - Dieses Symbol auf der Orbiloc Leuchte oder der Verpackung zeigt an, dass dieses Produkt nicht in den Hausmüll gehört. Gemäß EU Direktive 2002/86/EC über Elek- tromüll müssen Orbiloc Leuchten und - Ersatzteile...
- Page 16 Voir page 5 pour nos photos d’illustration. Retirez la Languette de la Batterie (4). Serrez la base (7) ; votre Orbiloc Dog Dual est prêt à l’emploi. MARCHE / ARRÊT / CONTINUE / FLASH L’Orbiloc Dog Dual est très simple d’utili- sation.
- Page 17 Orbiloc (8) avec les quatre trous dans le fente du support Orbiloc montage rapide (5), et fixez-le sur le crochet désigné. Placez le Orbiloc Dog Dual sur votre col- lier, harnais ou laisse et tirez / enveloppez l’autre extrémité du ruban réglable Orbiloc (8) autour.
- Page 18 (2 x CR2032) et un Anneau (3) lubrifié avec du silicone. CHANGEMENT DE LA PILE ET ENTRETIEN Dévissez la Base (7) de l’Orbiloc Dog Dual et remplacez le vieil Anneau (3) par le nouveau du Kit d’entretien Orbiloc. Remplacez la vieille Pile (6) par la nouvelle...
- Page 19 Européenne 2002/96/CE sur les Déchets d’équipements électriques et électroniques (DEEE), l’Orbiloc Light et ses pièces détachées ne doivent pas être jetés sans être triés. Jetez l’Orbiloc en le rapportant au votre centre local de recyclage. CE DOCUMENT Certaines informations peuvent ne pas être à jour du fait du développement constant du produit.
- Page 20 Ajustar la Base (7) y podrá comenzar a usar su Orbiloc Dog Dual . ENCENDIDO / APAGADO CONTINUO / INTERMITENTE Orbiloc Dog Dual es realmente fácil de usar, solamente se debe girar el Anillo Selector de Modo (2) hacia la izquierda o la derecha. El triángulo indica la función...
- Page 21 Montaje Rápido Orbiloc (5), y asegúrelo en el gancho designado. Coloque el Orbiloc Dog Dual en el collar de su perro, arnés o correa, y tire/envuelva el otro extremo de la Correa Ajustable Orbiloc (8) alrededor del equipo y asegure...
- Page 22 El Kit de Mantenimiento Orbiloc hace que el mantenimiento de su Orbiloc Dog Dual sea rápido y fácil. El Kit de Mantenimiento Orbiloc contiene un Pack de Batería (6) de Li- tio y una Junta Tórica (3) lubricada con silicona. CAMBIO DE BATERÍA Y MANTENIMIENTO Desatornillar la Base (7) de la Orbiloc Dog Dual y reemplazar la vieja Junta Tórica (3)
- Page 23 Directiva de la UE 2002/96/CE para el reciclado de Residuos Eléctricos y Electrónic- os (RAEE), la Luz Orbiloc o sus partes de repuesto no deben ser desechadas como basura municipal sin clasificar. Por favor al desechar la Orbiloc debe regresarla a su punto de recolección municipal para...
- Page 24 Serrate la Base (7) e sarete pronti ad utiliz- zare il vostro Orbiloc Dog Dual. ACCESO / SPENTO FISSO / INTERMETTENTE Orbiloc Dog Dual è molto facile da usare, basta ruotare l’Anello di Selezione Modalità (2) verso destra o sinistra. Il triangolo indica la funzione desiderata. I simboli...
- Page 25 - dentro l’apertura del supporto rapido Orbiloc (5) fermandolo nel gancetto prescelto. Ponete Orbiloc Dog Dual sul collare, imbra- catura o guinzaglio del vostro cane e tirate/ avvolgete l’altra estremità della cinghietta regolabile Orbiloc (8) intorno al dispositivo,...
- Page 26 ORBILOC SERVICE KIT Il Kit di Manutenzione Orbiloc rende la ma- nutenzione di Orbiloc Dog Dual facile e ve- loce. Il Kit di Manutenzione Orbiloc contiene un Pacco Batterie (6) al Litio (2 x CR2032) ed un O-ring (3) lubrificato con silicone.
- Page 27 In linea con la Direttiva UE 2002/96/ CE per Attività di Trattamento e Riciclo dei Rifiuti da Apparecchiature Elettriche ed Elettroniche. (RAEE), la Luce Orbiloc o le sue parti non devono essere smalt- iti come rifiuti urbani indifferenziati. Pertanto, per smaltire l’apparecchio Orbiloc è necessario restituirlo al punto di raccolta locale per il riciclaggio.
- Page 28 KOM GODT IGANG Registrer din nye Orbiloc Dog Dual på orbiloc. com/warranty for den udvidede 3 års garanti. Dette er en Quick Guide. Download en kom- plet manual på orbiloc.com/user-manual. Se side 5 for referencer til illustrationerne. Start med at fjerne batteripapiret (4). Stram efterfølgende bunden (7) og du er nu klar...
- Page 29 Fra ydersiden af Orbiloc Quick Mount (5) - med de skridsikre riller vendt nedad - før enden af Orbiloc Adjustable Strap (8) med de fire huller ind i åbningen af Orbiloc Quick Mount (5), og fastgør Orbiloc Adjustable Strap (8) på krogen.
- Page 30 (6) (2 x CR2032) og en O-ring (3) i silikone. SKIFT BATTERI OG VEDLIGEHOLD Skru bunden (7) af Orbiloc Dog Dual af, og fjern den gamle O-ring (3) og erstat den med en ny fra Orbiloc Service Kit.
- Page 31 TILLÆG ADVARSEL Orbiloc lygten er ikke egnet til børn. Lygten inde- holder små dele, som kan udgøre en kvælnings- risiko for børn eller kæledyr. Personer med epilepsi bør undgå at bruge dette produkt. Batterier må ikke åbnes, oplades, varmes over 75°C eller brændes.
- Page 32 Avlägsna batteriskyddet (4). Skruva åt bottenluckan (7), sedan är din Orbiloc Dog Dual redo att användas. PÅ / AV / FAST / BLINK Orbiloc Dog Dual är mycket lätt att använ- da, vrid funktionsringen (2) till vänster eller höger. Triangeln visar vald funktion.
- Page 33 änden av Orbiloc Adjustable Strap (8) med de fyra hålen i öppningen på Orbiloc Quick Mount (5), och fäst den på kroken. Placera Orbiloc Dog Dual på din hunds hals- band, sele eller koppel och linda runt den andra änden av Orbiloc Adjustable Strap (8) runt tex halsbandet och fäst Orbiloc...
- Page 34 ORBILOC SERVICE KIT Att sköta din Orbiloc Dog Dual är enkelt med en Orbiloc Underhållssats. Den inne- håller ett litiumbatteripack (6) (2xCR2032) och en silikonsmörjd o-ring (3). BYTA BATTERI OCH O-RING Skruva av bottenluckan (7) på din Orbiloc Dog Dual och avlägsna den gamla o-ringen (3) och ersätt den med en ny från Orbiloc...
- Page 35 TILLÆG VARNING Orbiloc lampan är inte en leksak. Förvaras oåtkom- lig för barn. Kan innehålla små delar som kan or- saka kvävning hos barn och husdjur. Personer med epilepsi bör ej använda produkten. Batterierna får ej laddas eller upphettas över 75°C. Förvaras torrt.
- Page 36 Last ned en komplett manual på www.orbiloc.com/user-manual. Se side 5 for illustrasjonsreferanser. Fjern arket fra batteriet (4). Stram til bun- nen (7) og Orbiloc Dog Dual lyset er klar til bruk. PÅ / AV KONSTANT LYS / BLINKEFUNKSJON Orbiloc Dog Dual lyset er veldig bruker- vennlig, bare vri ringen (2) rundt lyset til høyre eller venstre.
- Page 37 Fra utsiden - med glidende spor vendt nedover - skyv enden av Orbiloc Adjustable Strap (8) med de fire sporene i åpningen på Orbiloc Quick Mount (5), og fest den på den angitte kroken. Plasser Orbiloc Dog Dual på hundens hals- bånd, sele eller kobbel, og trekk / pakk den...
- Page 38 ORBILOC SERVICE KIT Orbiloc Vedlikeholdskit hjelper deg å holde ditt Orbiloc Dog Dual lys i orden. Orbiloc Vedlikeholdskit inneholder en Lithium batteripakke (6) (2xCR2032) og en o-ring (3) med silikon. BYTTE BATTERI OG VEDLIKEHOLDE Løsne bunnen (7) fra Orbiloc Dog Dual lyset.
- Page 39 (WEEE), må ikke Orbiloc Lysene eller dets reserve- deler kastes som usortert restavfall. Vennligst kast Orbiloc Lysene ved å returnere det til en lokal re- sirkuleringsstasjon. DETTE DOKUMENTET Konstant produktutvikling kan medføre at noe av informasjon ikke alltid er helt oppdatert.
- Page 40 Tämä on ohjetiivistelmä -lataa täydellinen ohjekirja osoitteesta orbiloc. com/user-manual. Katso lisäkuvia sivulta 5. Poista Paristosuoja (4) . Kiristä Alusta (7) – nyt Orbiloc Dog Dual – turvavalo on valmis käyttöön. PÄÄLLÄ / POIS JATKUVA VALO / VILKKUVA VALO Orbiloc Dog Dual on hyvin käyttäjäystävällin- en, sinun tarvitsee vain kääntää...
- Page 41 Pujota Orbiloc Adjustable Strap -hihna (8) liukuesteurat alaspäin Orbiloc Quick Mount:in (5) läpi ja pujota koukku sopivaan säätöreikään hihnassa. Aseta Orbiloc Dog Dual -turvavalo koirasi pantaan/valjaisiin/taluttimeen ja vedä/ kierrä Orbiloc Adjustable Strap -hihnan (8) toinen pää pannan/valjaiden/taluttimen ympäri ja kiinnitä sille varattuun koukkuun Orbiloc Quick Mount:in (5) toisella puolella.
- Page 42 Litiumparistopaketilla (6) (symboli alaspäin). Varmista, että Toimintovalitsinrengas (2) on napsautettu tukevasti yläosaan/linssiin (1) ja että Orbiloc Quick Mount (5) on ase- tettu sille tarkoitettuihin ohjaustappeihin linssissä (1). Ruuvaa Orbiloc Dog Dual – turvavalon Yläosa (1) ja Alusta (7) toisiinsa kiinni.
- Page 43 Orbiloc ei ole vas- tuussa teknisistä tai toimituksellisista vahingoista jotka johtuvat tämän dokumentin esittämisestä tai käytöstä. Tämä dokumentti sisältää informaatiota joka on suojattu tekijänoikeuslailla. Tätä dokument- tia ei saa kopioida tai jäljentää ilman Orbiloc:in kir- jallista lupaa. MALLI: Orbiloc Dog Dual...
- Page 44 ORBILOC MOUNTS De Orbiloc Quick Mount (5) en de Orbiloc Adjustable Strap (8) vormen de basis mount van de Orbiloc Dog Dual. De Orbiloc Buckle Mount (9) wordt ook meegeleverd, hier mee kunt u de verlichting direct aan de halsband van uw hond bevestigen.
- Page 45 Orbiloc Adjustable Strap (8) op de daarvoor bestemde haak aan de andere kant van de Orbiloc Quick Mount (5) . Zorg ervoor dat de Orbiloc Adjustable Strap (8) stevig bevestigd is op de uitrusting van uw huisdier.
- Page 46 (2) stevig op de lens (1) geklikt is (het ge- deelte met de kleine magneet dient geplaatst te worden in één van de vier halve cirkels op de lens (1) en dat de Orbiloc Quick Mount (5) in de overeenstemmende geleidingspinnen op de lens (1) geplaatst is.
- Page 47 Uitrusting (WEEE), mogen de Orbiloc lamp of haar reserveonderdelen niet verwerkt worden als niet-gesorteerd gemeentelijk afval. Verwerk de Orbiloc als afval door het in te leveren bij uw lokaal gemeentelijk ophaalpunt voor recyclage. DIT DOCUMENT Constante productontwikkeling kan betekenen dat sommige informatie niet volledig bijgewerkt is.
- Page 48 开始使用乐明! 请登陆乐明官网www. orbiloc.com/warran- ty,简单注册即可获得为期三年的保修服 务。本文为精简后的快速使用指南。请登 陆以下网址www.orbiloc.com/user-manual 以获取完整版。并请参考第五页的图片指 导开始使用乐明 拔出电池绝缘垫片(4).旋转并确保底座 处于紧扭状态(7)您随即便可开以始使 用乐明安全灯了! 开/关/常亮/闪烁 乐明安全灯的使用体验非常人性化,操作 简单方便;仅需向左或向右旋转模式选择 旋钮(2)即可自由且快速地切换于不同 的模式之间。灯座上的三角形 清晰地 显示了所设计的功能。闪烁( )和常亮 ( )的标志位于安全灯体(1)的顶部。 乐明安全灯配件及佩戴装置 乐明安全灯快速佩戴底座(5)与可调节 环扣搭配使用,及组成了乐明安全灯最稳 固的固定基座。包装中还包括了乐明安全 扣(9),可直接将安全灯固定在您爱宠 的项圈上。如果您爱宠的项圈太宽,或 者难以解开,您也可将乐明安全扣(9) 配合尼龙环扣(10)使用,将安全灯固定 在项圈上。...
- Page 49 可调节快速佩戴底座 中 将乐明可调节环扣的防滑槽保持向下状 态,从外部将可调节环扣的一端(8)穿 过乐明快速佩戴底座(5)两端的卡槽, 于此同时,可调节环扣上的四个孔也一 并穿过,并将环扣的一端固定在专用卡 钩上。 将乐明安全灯放置于您爱宠的项圈,胸 背带,或者牵引绳上,并将乐明可调节 环扣(8)的另一端穿过底部的牵引绳或 项圈,将乐明可调节环扣(8)固定在乐 明快速佩戴底座(5)另一端的专用卡 钩上。 为确保乐明可调节环扣(8)已安全地固 定在您爱宠身上的装备上,请通过耐心调 节以选择环扣上最能将乐明安全灯安全固 定在您装备上插孔。您可以通过选用不同 的插孔来固定环扣,来达到放松或拉紧乐 明可调节环扣(8)的目的。 注意:请登陆www.orbiloc.com/user-manu- al查看如何使用和更换各个不同的乐明安 全灯佩戴底座的详细指南 注意:请登录www.orbiloc.com/product/ orbiloc-dual-accessories参考乐明安全灯 的其他佩戴底座以及佩戴和固定安全灯 的方式。...
- Page 50 乐明安全灯服务包 乐明安全灯服务包让您能够快速轻松的保 养乐明安全灯。乐明安全灯服务包包含一 组锂电池(2 x CR2032型电池)和一个由 硅胶包裹的O型环(3)。 更换电池及灯体保养 松开乐明安全灯的底座(7),将旧的O 型环(3)取下,装上安装包里的新的O 型环(3)。 将乐明安全灯底座(7)当中的旧电池组 (6)取出,安装上新的电池组(6)(电 池上的 号朝下)。 检查并确保模式选择旋钮(2)已紧扣于 安全灯体(1)上。请注意,模式选择旋 钮上安装小磁铁的部位必须放置于安全灯 体(1)上的四个半圆形状当中,同时需 确保乐明快速佩戴底座(5)固定在安全 灯体(1)的专用导针上。 将乐明安全灯的灯体(1)和底座(7)拧 紧并固定在一起。...
- Page 51 附录 中 警告 乐明安全灯不是玩具。请放置于孩子无法 触及的地方。安全灯含有一些小部件,可 能会有让儿童和宠物窒息的风险。患有光 敏性癫痫的患者应避免使用此款安全灯。 不要拆卸电池,为电池充电,或者将电池 加热到75℃以上,抑或燃烧电池。请保持 电池和其他部件干燥。 CE认证(欧洲合格认证) 乐明安全灯的各项指标均严格遵 守CE认证(欧洲合格认证)和 RoHS指令(危害性物质限制指 令)的要求。因此,乐明特此声明乐明安 全灯符合EMC和RoHS指令的基本要求和 其他相关规定。可登陆www.orbiloc.com阅 读声明原文。 WEEE指令(废弃电子电机设备指令) 在乐明安全灯上或是安全灯的包 装上的这个标志表示,该产品不 能被当作家庭垃圾处理。根据欧 盟指令2002/96/EC对废弃电子电 机设备(WEEE)回收的规定,乐明安全 灯以及安全灯的零部件不可被当成未分类 的城市垃圾随意丢弃。请将乐明安全灯归 还到其任意销售点,或者送往城市废弃物 收集点用于回收利用。 关于本指南 由于产品的不断更新,本指南中的内容可 能包含已过时的信息。本指南中的信息如 有更改,恕不另行通知。乐明将不对本文 包含的技术或编辑错误及遗漏负责; 也不 对因为采用此指南中的指示而造成的偶然 性或后果性的损害而负责。本文件包含受 版权保护的信息。未经乐明许可,任何个 人或单位不得以任何形式复印或者复制本 文档中的任何内容。 型号:乐明安全灯...
- Page 52 THE SAFETY LIGHT MADE IN DENMARK Register for your 3-year warranty at www.orbiloc.com/warranty Download a complete manual at www.orbiloc.com/user-manual Langdyssen 5 8200 Aarhus N Denmark +45 86 99 88 77 info@orbiloc.com orbiloc.com...
Need help?
Do you have a question about the DOG DUAL and is the answer not in the manual?
Questions and answers