Table of Contents
Advertisement
Quick Links
Advertisement
Table of Contents

Related Manuals for Zanussi Z714W43BI


Summary of Contents for Zanussi Z714W43BI
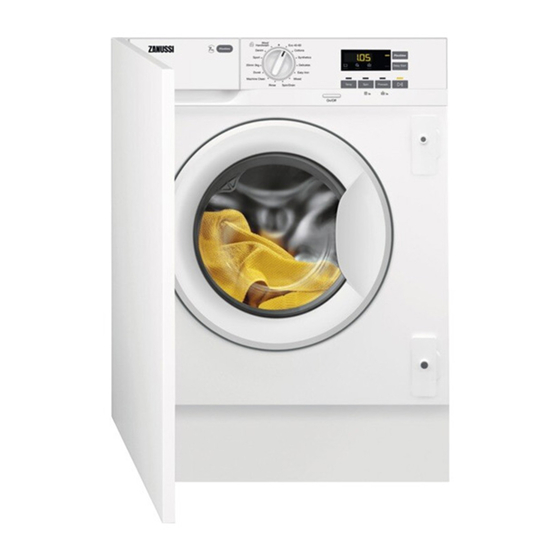
- Page 1 User Manual GETTING STARTED? EASY. Z714W43BI EN User Manual Washing Machine...
-
Page 2: Safety Information
SAFETY INFORMATION Before the installation and use of the appliance, carefully read the supplied instructions. The manufacturer is not responsible for any injuries or damages that are the result of incorrect installation or usage. Always keep the instructions in a safe and accessible location for future reference. -
Page 3: Safety Instructions
areas for communal use in blocks of flats or in launderettes. – Do not exceed the maximum load of 7 kg (refer to the • "Programme chart" chapter). The operating water pressure at the water entry point from the • outlet connection must be between 0.5 bar (0.05 MPa) and 8 bar (0.8 MPa). -
Page 4: Electrical Connection
Contact the Authorised Service Centre to • You can extend the drain hose to maximum 400 ensure which accessories can be used. cm. Contact the Authorised Service Centre for the other drain hose and the extension. ELECTRICAL CONNECTION • Make sure that there is access to the tap after the installation. - Page 5 THE APPLIANCE IS EQUIPPED WITH ... UNPACKING WARNING! Use the gloves. WARNING! Remove all the packaging and the transit bolts before installing the appliance. 1. Put two polystyrene packaging elements on the floor under the appliance. WARNING! It is strongly recom- mended that this action is carries out by two persons.
- Page 6 4. Return the appliance in vertical position and remove the socket polystyrene protection. 5. Remove the power supply cable and the drain hose from the hose holders. It is possible to see water flowing from the drain hose. This is due to the testing with water of the appli- ance in factory.
-
Page 7: Positioning And Levelling
POSITIONING AND LEVELLING 1. Install the appliance on a flat hard floor. WARNING! Make sure that carpets do not stop the air circulation below the ap- pliance. Bring the appliance near the furniture recess before levelling it. For more de- tails, refer to paragraph "Building in". - Page 8 The inlet hose 1. Remove the inlet hose from inside the drum. 2. To connect the water inlet hose towards the prop- er direction and with the proper inclination, check the position of the water tap before connecting it to the back of the appliance.
- Page 9 To a stand pipe with vent-hole Directly into a drain pipe at a height of not less than Ø 40 mm 60 cm (23.6”) and not more than 100 cm (39.3”). The end of the drain hose must always be ventilated , i.e.
-
Page 10: Installing Anti-Tilting Device
If hoses run behind the appliance, make 596 mm 553 mm sure that nothing closes the small re- cess indicated with the measures 50 x 50 mm. 819 mm 50 mm 50 mm 140 mm 76 mm The appliance is also equipped with an adhesive sponge pad H that you can find inside the drum. -
Page 11: Preparation And Assembly Of The Cupboard Door
1. Remove the screws of the top cover on the rear of the appliance and install the anti-tilting device as shown in the drawing. 2. Adjust the anti-tilting device so that the distance from the counter is 10mm. Loosen the nut counter- ~10mm clockwise with a 3mm wrench. - Page 12 Reversibility of the cupboard door Carry out the cupboard door reversibility before the appliance is built in completely. If the cupboard door has to be opened from left to right, invert the position of the hinge supports M with the magnetic plate N and lower plate O. Make sure that the plate with magnet is on the upper position.
- Page 13 Set the position of the lower hole respecting dimen- sions and distances shown in the drawing (449 16-22 mm mm). Countersink the holes. Ø 35 mm 12,5 - 14 mm 22±1,5 mm 595-598 mm Hinges To mount the hinges it is necessary to drill two holes (dia.
-
Page 14: Product Description
Counter-magnet The appliance is pre set for a magnetic closure. For a correct closure: 1. Position the screw C and the counter-magnet D on the magnetic plate N. Lean the cupboard door against the screw until it leaves a mark. 2. -
Page 15: Control Panel Description
CONTROL PANEL CONTROL PANEL DESCRIPTION Spin reduction options touch button and The permanent options are set by permanent Child Lock option holding pressed the relative button for Temp. touch button 3 seconds at least. On/Off push button Programme dial Option indicators: Display •... -
Page 16: Dial And Buttons
DISPLAY Door locked indicator. Child safety lock indicator. The digital indicator can show: • Programme duration (e. g. • Delay time (e. g. • Cycle end ( • Warning code (e.g. • Temperature ( • Spin speed ( , no spin indica- DIAL AND BUTTONS INTRODUCTION Touch the button repeatedly to set the required... -
Page 17: Child Lock
• To activate/deactivate this option , hold down are available. In some programmes the rinses are performed with more water. the Prewash button until relevant indicator comes on/goes off. If you touch the Start/Pause button, the appliance performs only the draining phase. SPIN The appliance empties the water out When you set a programme, the appliance... -
Page 18: Programme Chart
PROGRAMMES PROGRAMME CHART Programme Reference Default tempera- spin speed Maximum Programme description ture Spin speed load (Type of load and soil level) Temperature range range (rpm) 1400 rpm 7 kg White cotton and coloured cotton. Normal and (1400 - heavy soil. Cottons 400) 40 °C... - Page 19 Programme Reference Default tempera- spin speed Maximum Programme description ture Spin speed load (Type of load and soil level) Temperature range range (rpm) 1200 rpm Maintenance cycle with hot water to clean and freshen the drum and to remove residue that may cause odour. Machine Clean For the best result use this cycle once a month.
- Page 20 Programme Reference Default tempera- spin speed Maximum Programme description ture Spin speed load (Type of load and soil level) Temperature range range (rpm) 1200 rpm 1.5 kg Machine washable wool, hand washable wool (1200 - and other fabrics with «hand washing» care sym- Wool/Hand- 400) wash...
-
Page 21: Consumption Values
Programme ■ ■ ■ Spin/Drain ■ ■ ■ ■ ■ Rinse ■ ■ Machine Clean ■ ■ ■ Duvet ■ ■ ■ ■ ■ ■ ■ Daily Wash ■ ■ ■ ■ ■ ■ Sport ■ ■ ■ ■ ■ ■... -
Page 22: Acoustic Signals
Approximate Remaining Energy con- Water con- programme moisture Programmes Load (kg) sumption sumption (li- duration (kWh) tre) (minutes) Cottons 1.00 40°C Synthetics 0.69 40°C Delicates 0.43 40°C Wool/Handwash 0.14 30°C Standard cotton programmes 0.93 Standard 60°C cotton 0.70 Standard 60°C cotton 0.55 Standard 40°C cotton 1) At the end of spin phase. -
Page 23: Before First Use
BEFORE FIRST USE 1. Make sure that the electrical power is available 4. Set and start a programme for cotton at the and the water tap is open. highest temperature without any laundry in the 2. Pour 2 litres of water into the detergent drum. -
Page 24: Check The Position Of The Detergent Flap
CHECK THE POSITION OF THE DETERGENT SETTING A PROGRAMME FLAP 1. Turn the programme dial to select the desired 1. Pull out the detergent dispenser until it stops. washing programme. The indicator of the Start/Pause button flashes. The display shows an indicative programme duration. -
Page 25: The Autoadjust System Load Detection
OPENING THE DOOR - ADDING GARMENTS 2. Touch the Delay Start button repeatedly until the display shows the desired delay time. If the temperature and level of the 3. Touch the Start/Pause button again to water in the drum are too high and/or start the new countdown. -
Page 26: Stand-By Function
• You do not use the appliance for 5 minutes • You must drain the water to open the door: when no programme is running. 1. If necessary, touch the Spin button to decrease Press the button On/Off to activate the the spin speed proposed by the appliance. -
Page 27: Care And Cleaning
ECOLOGICAL HINTS Special stain removers are available. Use the special stain remover that is applicable to the type • Set a programme without the prewash phase to of stain and fabric. wash laundry with normal soil. • Always start a washing programme with the DETERGENTS AND OTHER TREATMENTS maximum load of laundry allowed. -
Page 28: Cleaning The Drum
DOOR SEAL 1. Open the drawer. Press the catch downwards as indicated in the picture and pull it out. Regularly examine the seal and remove all objects from the inner part. 2. Remove the top part of the additive CLEANING THE DRUM compartment to aid cleaning and flush it out under running warm water, to remove any Regularly examine the drum to prevent unwanted... -
Page 29: Cleaning The Drain Pump
without any clothes in the drum. Regularly check the drain pump filter and make sure that it is clean. Clean the drain pump if: • The appliance does not drain the water. • The drum does not turn. • The appliance makes an unusual noise because of the blockage of the drain pump. - Page 30 180˚ 3. Turn the filter 180 degrees in anti-clockwise direc- tion to open it, without removing. Let the water flow out. 4. When the bowl is full of water, turn the filter back and empty the container. 5. Repeat the steps 3 and 4 until the water stops to flow out.
-
Page 31: Cleaning The Inlet Hose And The Valve Filter
9. Put the filter back into the special guides by turning it clockwise. Make sure that you tighten the filter cor- rectly to prevent leakages. 10. Close the pump cover. When you drain the water with the emergency drain procedure, you must activate the drain system again: 1. -
Page 32: Emergency Drain
EMERGENCY DRAIN 1. Disconnect the mains plug from the mains socket. If the appliance cannot drain the water, carry out 2. Close the water tap. the same procedure, described in 'Cleaning the 3. Put the two ends of the inlet hose in a drain pump' paragraph. -
Page 33: Possible Failures
POSSIBLE FAILURES Problem Possible solution • Make sure that the mains plug is connected to the mains socket. • Make sure that the appliance door is closed. • Make sure that there is no damaged fuse in the fuse box. The programme does not •... -
Page 34: Emergency Door Opening
Problem Possible solution • Make sure that the couplings of the water hoses are tight and there is not water leakages. • Make sure that the water inlet hose and the drain hose have no There is water on the floor. damages. -
Page 35: Technical Data
Energy Efficiency Class A+++ Spin Speed Maximum spin speed 1351 rpm 1) Connect the water inlet hose to a water tap with a 3/4'' thread. PRODUCT INFORMATION SHEET IN REFERENCE TO E.U. REGULATION 1369/2017 Product Information Sheet Trade Mark ZANUSSI... - Page 36 Model Z714W43BI, PNC914580206 Rated capacity in kg Energy efficiency class A+++ Energy consumption in kWh per year, based on 220 standard wash- ing cycles for cotton programmes at 60 °C and 40 °C at full and partial load, and the consumption of the low-power modes. Actual energy consumption will depend on how the appliance is used.
-
Page 37: Environmental Concerns
ENVIRONMENTAL CONCERNS with the symbol with the household waste. Recycle materials with the symbol . Put the Return the product to your local recycling facility or packaging in relevant containers to recycle it. Help contact your municipal office. protect the environment and human health by recycling waste of electrical and electronic appliances. - Page 40 WWW.ZANUSSI.COM/SHOP...
Need help?
Do you have a question about the Z714W43BI and is the answer not in the manual?
Questions and answers