Advertisement
Model #
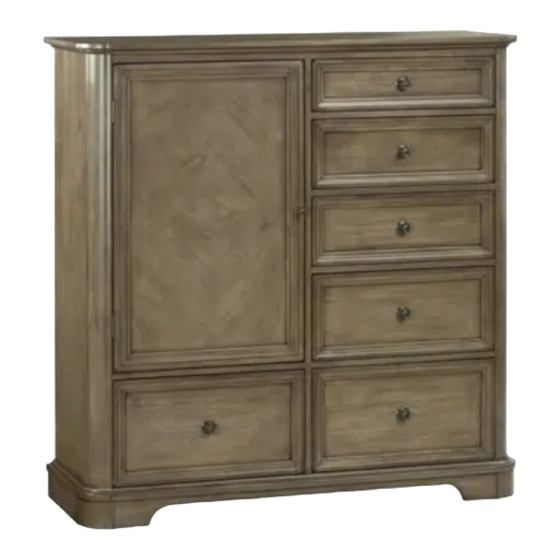
1191RGBa
Stonewood Door
Chest
RGB = Rustic Glazed Brown finish
Assembly Instructions
Thank you for allowing us to help you furnish your
home. We are certain you will be delighted with
your new furniture for many years to come.
If you ever have questions about your furniture, please do not hesitate to contact us. In the unlikely event you need a
replacement part; we can make those parts available through an authorized Whittier Wood Furniture dealer. If you
cannot order replacement parts through your dealer, please contact our customer service department.
Customer Service: 800-653-3336 • Outside the U.S.: 541-687-0213
CUSTOMER SERVICE
Hours: Our friendly customer service staff can be reached:
Monday-Friday 8:00 a.m. to 5:00 p.m. (Pacific Time).
You may leave a message 24 hours a day, seven days a week.
Fax: 541-687-2060• Email: info@whittierwood.com
P.O. Box 2827
Eugene, OR 97402 USA
IMPORTANT NOTES:
• For normal household use only. Not recommended for commercial use.
• Do not climb, sit or stand on this piece of furniture.
• Do not overload the drawers.
• Unload items before you move this unit.
• This assembly requires two people.
Serious or fatal crushing injuries can occur from furniture tip-over. Use of
tip-over restraints may only reduce but not eliminate the risk of tip-over.
To help prevent tip-over:
•
Place heaviest items in the bottom drawers.
•
Unless specifically designed to accommodate, do not set TVs or other
heavy objects on top of this product.
•
Never allow children to climb or hang on drawers, doors or shelves.
•
Never open more than one drawer at a time.
•
Do not defeat or remove the drawer interlock system.
Warning: At least one tipping restraint kit was included with your piece of
Whittier Wood Furniture. When you receive your furniture, be sure to find
and properly install the tipping restraint(s). If you cannot locate the
restraint(s), please contact us immediately for replacement.
Drilling, sawing, sanding or machining wood products can expose you to
wood dust, a substance known to the state of California to cause cancer.
Avoid inhaling wood dust or use a dust mask or other safeguards for
personal protection.
For more information go to: www.p65warnings.ca.gov/wood
This product can expose you to chemicals, including formaldehyde,
which are known to the State of California to cause cancer.
For more information go to: www.p65warnings.ca.gov/furniture
DESIGN SUBJECT TO CHANGE WITHOUT NOTICE.
Production Code:
VN
WARNING
12/16
Advertisement
Table of Contents

Related Manuals for Whittier Wood 1191RGBa


Summary of Contents for Whittier Wood 1191RGBa
- Page 1 If you ever have questions about your furniture, please do not hesitate to contact us. In the unlikely event you need a replacement part; we can make those parts available through an authorized Whittier Wood Furniture dealer. If you cannot order replacement parts through your dealer, please contact our customer service department.
- Page 2 Large Lower Drawer Face (installed) Assembled Foot (attached) 16" Drawer Slides (pre-installed set) #6 x 5/8" Undercut Screw (inserted) #6 x 3/4" Philtruss Screw (inserted) #6 x 1/2" Undercut Screw (inserted) #6 x 1/2" Philtruss Screw (inserted) 1191RGBa — Page 2 — 12/16...
- Page 3 1/4" x 20mm Insert Nut (inserted) Knob (attached) Knob Plate (attached) Tuscan Magnetic Lock & Plate (pre-installed sets) Small Adjustable Glide (installed) Shelf Bracket (installed) Anti-Tip Snapper (attached) Drawer Clip (attached) Furniture Tipping Restraint/Long (attached) 1 set 1191RGBa — Page 3 — 12/16...
- Page 4 To move the Adjustable Shelves (C), remove the #6 x 1/2" Undercut Screws (Q) and the Shelves (C). Reposition the Shelf Brackets (ZL) to the desired positions, replace the shelf and insert the screws. See Figures 3 and 3a. Door removed for illustration purposes. Fig. 3a Fig. 3 1191RGBa — Page 4 — 12/16...
- Page 5 Numbers and letters are stamped on the back of the drawers. Stamping sequence starts at the bottom, moves to the top and designated left or right. Drawer back stamping example: Fig. 5 1191RGBa — Page 5 — 12/16...
- Page 6 Snapper to the forward locked position. Now you can reinstall the Second Drawer. Fig. 6b Fig. 6d Close up view of Close up view of locked second locked first drawer. drawer. Drawer Clip Snapper Drawer Clip Fig. 6 Fig. 6a Fig. 6c Fig. 6e Unlocked position 1191RGBa — Page 6 — 12/16...
- Page 7 Before you begin this assembly, identify each part and make sure the quantities received match what is on this list. If you need to replace a part, contact Whittier Wood Furniture customer service and refer to the following list for its name and letter code.
- Page 8 Wall Fig. 8a Floor Fig. 8 1191RGBa — Page 8 — 12/16...
Need help?
Do you have a question about the 1191RGBa and is the answer not in the manual?
Questions and answers