Advertisement
Quick Links
Advertisement

Related Manuals for Westwood Design HAYDEN


Summary of Contents for Westwood Design HAYDEN
- Page 1 HAYDEN Convertible Crib Assembly Instructions...
- Page 2 1-908-719-4707, or emailing support@westwoodbaby.com If any aspect of these instructions is unclear, please contact your retailer or Westwood Design for assistance. In addition to meeting our own extensive in-house testing and standards, this crib has been independently tested to meet JPMA certification standards.
- Page 3 SHARP EDGES BEFORE AND AFTER ASSEMBLY AND FREQUENTLY DURING USE. DO NOT USE CRIB IF ANY PARTS ARE MISSING OR BROKEN. ASK YOUR DEALER OR CONTACT WESTWOOD DESIGN: 635 N. BILLY MITCHELL RD., STE. B, SALT LAKE CITY, UTAH 84116, PHONE: 1-908-719-4707, EMAIL: SUPPORT@WESTWOODBABY.COM; FOR REPLACEMENT...
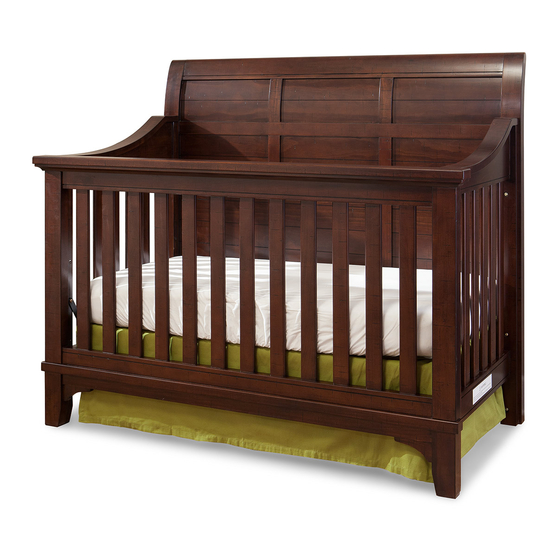
- Page 4 Headboard Footboard Crib End (Left) Crib End (Right) Day Bed Cap Day Bed Cap Mattress Support (Right) (Left) M6 x 40mm M6 x 20mm Allen Wrench Allen Bolt (12) Allen Bolt (4)
- Page 5 Required Parts & Hardware (A) Headboard (C) Crib End (Left) (H) M6x40mm (D) Crib End (Right) (J) Allen Wrench Allen Bolt (6) Step 1...
- Page 6 Required Parts & Hardware (E) Mattress Support (I) M6x20mm (J) Allen Wrench Allen Bolt (4) Step 2 There are three possible height settings. The mattress support should be at the highest setting for a newborn, then adjust to the lower position as the child grows and becomes mobile. Once the child is able to stand, adjust to lowest position.
- Page 7 Required Parts & Hardware (B) Footboard (H) M6x40mm (J) Allen Wrench Allen Bolt (6) Step 3...
- Page 8 (G) Day Bed Cap (Right) (F) Day Bed Cap (Left) (J) Allen Wrench Step 1: Remove the 4 bolts attaching the footboard to the bottom support using the allen wrench provided. Step 2: Remove the 4 bolts from the crib end attaching the footboard using the allen wrench provided.
-
Page 9: Care And Maintenance
- Your crib has a durable and protective non-toxic finish. However, if you decide to refinish it, you must use a non-toxic finish specified for children’s products. Do not use any toxic stripping methods to remove the old finish. westwood design 635 N. Billy Mitchell Rd., Ste. B Salt Lake City, UT 84116 Phone: 908-719-4707 www.westwoodbaby.com...
Need help?
Do you have a question about the HAYDEN and is the answer not in the manual?
Questions and answers