
Related Manuals for D-Link MediaLounge DSM-622H


Summary of Contents for D-Link MediaLounge DSM-622H
- Page 1 ® D-Link DSM-622H/624H 802.11g Wireless Central Home Drive Manual (10/27/2004) Building Networks for People...
-
Page 2: Table Of Contents
Accessing the DSM-622H/624H in Windows XP/Me ... 21 Accessing the DSM-622H/624H in Windows 2000... 22 Accessing the DSM-622H/624H in Windows 98SE ... 25 Accessing the DSM-622H/624H in Macintosh OS X ... 27 Networking Basics ... 30 Technical Specifications ... 41 Technical Support ... -
Page 3: Introduction
Ethernet cable — either straight-through or crossover cable if you are using an Ethernet connection. With the DSM-622H & 624H communicating with your wireless router — all the computers in your LAN will have instant access to extra data storage and file sharing! -
Page 4: Features And Benefits
Up to 250 Audio CDs Up to 20,000 JPEG Images Up to 20/40GB of storage space - The DSM-622H provides up to 20GB of storage space. The DSM-624H provides up to 40GB of storage space. High-speed 802.11g wireless data transfer for large media files... -
Page 5: Package Contents
Package Contents D-Link MediaLounge DSM-622H/624H Central Home Drive Manual and Warranty on CD Printed Quick Installation Guide Vertical Stands (2 pcs.) Stackable Stands (4 pcs.) 5V DC Power Adapter Ethernet CAT5 Cable Detachable antenna If any of the above items are missing, please contact your reseller. -
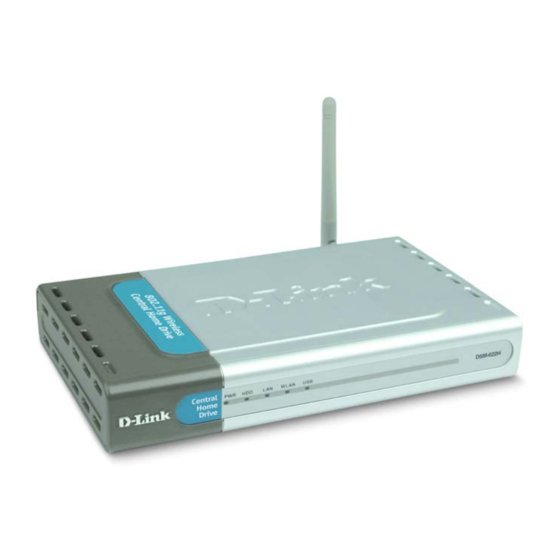
Page 6: Hardware Overview
Network. Displays activity on the USB port. Reset Button Pressing this button for 10 seconds restores the DSM-622H/624H to its original factory default settings. USB 2.0 port One USB 2.0 port offers an increased capacity for storage and file transfer. -
Page 7: Getting Started
Getting Started Below is a sample network using the DSM-622H/624H. The DSM-622H/624H can be installed for wireless and Ethernet access, as shown above. -
Page 8: Hardware Installation
1 1 1 1 1 Connect the power adapter to the connector on the back panel of the DSM-622H/624H. Then plug the other end of the power adapter into a wall outlet or power strip. The Power LED will be ON to indicate proper operation. -
Page 9: Enabling Upnp
Enabling UPnP Please note that UPnP It is highly recommended that you enable UPnP although it is not required. ™ To enable UPnP , go to the Start menu, select Settings and launch Control Panel. Inside of the Control Panel, select Add or Remove Programs. - Page 10 Enabling UPnP Click Next Click Finish Double-click on My Network Places on your desktop. Your DSM-622H/624H network hard drive appears as UPnP E-Storage. UPnP ™ (continued) ™ is now enabled!
-
Page 11: Using The Configuration Utility
UPnP However, if you wish to use the advanced configuration features that include assigning folder and access rights; or if you want to use the DSM-622H/624H attached directly to one computer, you can configure it. - Page 12 Using the Configuration Utility (continued) Home This Setup Wizard screen will appear. Click Run Wizard and the utility will guide you through a simple setup. Set as Default Interface: Select Yes for Wired. Select No for Wireless. When you select No, you will be directed to the Wireless interface (shown on the next page).
- Page 13 Using the Configuration Utility (continued) Home > Wireless Please see the following page for an explanation of the features displayed here.
- Page 14 Home > Wireless (continued) Set as Default Interface: Wireless Mode: Client: Select this mode to use the DSM-622H/624H in client mode Access Point: Select this mode to use in access point mode. SSID: Enter the SSID in access point mode. You may click Site Survey to select an available wireless AP or router.
- Page 15 Using the Configuration Utility (continued) Advanced > Storage Storage Name: Enter a name for the device. Work Group: Enter a the workgroup name. ™ ™ UPnP Settings: Enable or Disable UPnP here.
- Page 16 USB device. (When you plug a USB drive into the USB port of the DSM-622H/624H, the USB LED will light up solidly. When the LED has a solid light, click the Folder button to refresh the contents of this page.
- Page 17 Using the Configuration Utility (continued) Advanced > Disk Format: Click to format the hard drive. ScanDisk: Click to check the hard drive for errors. Tools > Admin New Password: Enter a new password of up to 15 characters here. Confirm Password: Retype the password.
- Page 18 Open in the browser window and click Apply in this screen to begin the firmware upgrade. When the upgrade is complete, a message will appear and the DSM-622H/624H will restart itself. Tools > System Tools > Firmware...
- Page 19 Using the Configuration Utility (continued) Default NTP Server: Network Time Protocol synchronizes time on your network. Input an optional NTP server address here. Interval: Select an interval in seconds before time resynchronization with the NTP server. Set Time: Enter the time manually and click Set Time.
- Page 20 Using the Configuration Utility (continued) Status > Stats Hard Drive Volume Information: Hard drive information is available here. Help > Menu Help Menu: Click on an item in the window above for more information.
-
Page 21: Accessing The Dsm-622H/624H In Windows Xp/Me
For Windows XP or Me users, it is recommended to activate UPnP for ease of use. To learn how to activate UPnP, please refer to page 9 in this manual. Double Click My Network Places on the Windows Desktop. The DSM-622H/624H will appear on the My Network Places ™ screen as UPnP E-Storage... -
Page 22: Accessing The Dsm-622H/624H In Windows 2000
Accessing the DSM-622H/624H in Windows 2000 Double Click My Computer on the Windows Desktop. Under Tools, select Map Network Drive. - Page 23 Accessing the DSM-622H/624H in Windows 2000 (continued) Select a drive letter for the DSM-622H/624H. Select Browse to find the DSM-622H/624H on the network. Select your DSM-622H or DSM-624H shared folder. Click...
- Page 24 Accessing the DSM-622H/624H in Windows 2000 (continued) Click Finish The DSM-622H/624H will be displayed in the My Computer window with a mapping to the drive letter you selected. Your setup in Windows 2000 is now complete! \\DSM-622H\Share...
-
Page 25: Accessing The Dsm-622H/624H In Windows 98Se
Accessing the DSM-622H/624H in Windows 98SE Double-click Network Neighborhood on the Windows desktop. Double-click on the DSM-622H/624H in the Network Neighborhood. - Page 26 Accessing the DSM-622H/624H in Windows 98SE (continued) Right-click on the share folder and click Network Drive. Select the drive and click In the My Computer window, the DSM-622H/ 624H will be displayed with a mapping to the drive letter you selected.
-
Page 27: Accessing The Dsm-622H/624H In Macintosh Os X
Accessing the DSM-622H/ 624H in Macintosh OS X From the desktop menu, select Connect to Server. Click Browse Click DSM-622H DSM-622H... - Page 28 Accessing the DSM-622H/624H in Macintosh OS X (continued) Click By default, there is no password. Click The share window will open. Enter username and password for DSM-622H...
- Page 29 Accessing the DSM-622H/624H in Macintosh OS X (continued) DSM-622H/624H will appear on your desktop. Double-click on the shared volume to access your wireless Central Home Drive! Your setup in MAC OS X is now complete!
-
Page 30: Networking Basics
Networking Basics Using the Network Setup Wizard in Windows XP In this section, you will learn how to establish a network at home or work, using Microsoft Windows XP. Note: For information about networking computers using Windows 2000/Me/98SE, please refer to websites such as: http://www.homenethelp.com http://www.microsoft.com/windows/otherversions/default.mspx Go to Start>Control Panel>Network Connections... - Page 31 Networking Basics (continued) Select the best description of your computer. If your computer connects to the Internet through a gateway/ router, select the second option as shown. Click Next Enter a Computer description and a Computer name (optional). Click Next Enter a Workgroup name.
- Page 32 Networking Basics (continued) Please wait while the Network Setup Wizard applies the changes. When the changes are complete... Click Next Please wait while the Network Setup Wizard configures the computer. This may take a few minutes. In this window, select the option that fits your needs.
- Page 33 Networking Basics (continued) Insert a disk into the disk drive, in this case drive A. Click Next Please read the information under Here’s how. After you complete the Network Setup Wizard, you will use the Network Setup Disk to run the Network Setup Wizard once on each of the computers on your network.
- Page 34 Networking Basics (continued) Please read the information on this screen, then click Finish complete the Network Setup Wizard. The new settings will take effect when you restart the computer. Click to restart the computer. You have completed configuring this computer. Next, you will need to run the Network Setup Disk on all the other computers on your network.
-
Page 35: Naming Your Computer
Networking Basics (continued) Naming your Computer To name your computer in Windows XP, please follow these directions: Click Start (in the lower left corner of the screen). Right-click on My Computer. Select Properties and click. Select the Computer Name Tab in the System Properties window. -
Page 36: Checking The Ip Address In Windows Xp
Networking Basics (continued) Naming your Computer In this window, enter the Computer name. Select Workgroup and enter the name of the Workgroup. All computers on the network must have the same Workgroup name. Click OK. Checking the IP Address in Windows XP The wireless adapter-equipped computers in your network must be in the same IP address range. - Page 37 Networking Basics (continued) Checking the IP Address in Windows XP This window will appear. Click the Support tab. Click Close. Assigning a Static IP Address in Windows XP/2000 Note: DHCP-capable gateways/broadband routers will automatically assign IP addresses to the computers on the network, using DHCP (Dynamic Host Configuration Protocol) technology.
- Page 38 Networking Basics (continued) Assigning a Static IP Address in Windows XP/2000 Double-click on Network Connections. Right-click on Local Area Connections. Click on Properties.
- Page 39 IP Address: e.g., 192.168.0.2 Subnet Mask: 255.255.255.0 Default Gateway:Enter the LAN IP address of the router. Note: D-Link routers have a default LAN IP address of 192.168.0.1. Select Use the following DNS server addresses. Enter the LAN IP address of the router. (D-Link routers have a LAN IP address of 192.168.0.1).
- Page 40 Networking Basics (continued) Checking the Network Connection by Pinging in Windows XP/2000 Go to Start > Run > type cmd. A window similar to this one will appear. Type ping xxx.xxx.xxx.xxx, where xxx is the IP address of the router. A good network connection will show four replies from the router, as shown.
-
Page 41: Technical Specifications
Technical Specifications Standards IEEE 802.3 IEEE 802.3u UPnP (Windows/UPnP Rendezvous (Mac OS X) Management Web-based - Internet Explorer 5.0 or above, Apple Safari, Linux Nautilus, or Netscape 6.2.x or above. LEDs Power HDD (Hard Drive Disk) WLAN Temperature: Operating Temperature: 32°F to 149°F (0°C to 55°C) Storing Temperature: -4°F to 158°F (-20~70°C) Humidity: 5%~90% non-condensing... -
Page 42: Technical Support
Technical Support You can find software updates and user documentation on the D-Link website. D-Link provides free technical support for customers within the United States and within Canada for the duration of the warranty period on this product. U.S. and Canadian customers can contact D-Link Technical Support through our website, or by phone. -
Page 43: Warranty
D-Link’s sole obligation shall be to repair or replace the defective Hardware during the Warranty Period at no charge to the original owner or to refund at D-Link’s sole discretion. Such repair or replacement will be rendered by D-Link at an Authorized D-Link Service Office. The replacement Hardware need not be new or have an identical make, model or part. - Page 44 Canada) D-Link may reject or return any product that is not packaged and shipped in strict compliance with the foregoing requirements, or for which an RMA number is not visible from the outside of the package. The product owner agrees to pay D-Link’s reasonable handling and return shipping charges for any product...
- Page 45 LIABILITY OF D-LINK UNDER THIS WARRANTY IS LIMITED TO THE PURCHASE PRICE OF THE PRODUCT COVERED BY THE WARRANTY. THE FOREGOING EXPRESS WRITTEN WARRANTIES AND REMEDIES ARE EXCLUSIVE AND ARE IN LIEU OF ANY OTHER WARRANTIES OR REMEDIES, EXPRESS, IMPLIED OR STATUTORY.
-
Page 46: Registration
Registration Register your D-Link product online at http://support.dlink.com/register/...
Need help?
Do you have a question about the MediaLounge DSM-622H and is the answer not in the manual?
Questions and answers