
Related Manuals for PA 4PMC5000

Summary of Contents for PA 4PMC5000
- Page 1 WINDOW AIR CONDITIONER USER MANUAL FOR MODEL: 4PMC5000 Before using your air conditioner, please read this manual carefully and keep it for future reference, along with your receipt.
- Page 2 CONSUMER PRODUCT INFORMATION For your own records, please attach a copy of your sales receipt to this manual and complete the following: Model Number: _____________________________________ Serial Number: _______________________________________ Purchase Date: ____________________________________ Store Purchased: _____________________________________ Installation Date: ___________________________________ Installation Co.: _______________________________________ Installer Name: _____________________________________ Installer Phone No.: ___________________________________...
-
Page 3: Table Of Contents
CONTENTS SAFETY PRECAUTIONS ..............1 IMPORTANT SAFETY INSTRUCTIONS ...........3 INSTALLATION INSTRUCTIONS .............4 NORMAL SOUNDS ................9 AIR CONDITIONER FEATURES ............9 CARE AND CLEANING ..............12 TROUBLESHOOTING ...............13 This manual provides the information needed for proper use and maintenance of this air conditioner. Basic preventative care can help extend the life of this unit. -
Page 4: Safety Precautions
SAFETY PRECAUTIONS READ SAFETY PRECAUTIONS BEFORE INSTALLATION To prevent injury to the user or other people and property damage, the following instructions must be followed. Incorrect operation due to ignoring of instructions may cause harm or damage. The seriousness is classified by the following indications. THIS SYMBOL INDICATES THAT IGNORING INSTRUCTIONS MAY CAUSE DEATH OR SERIOUS INJURY. THIS SYMBOL INDICATES THAT IGNORING INSTRUCTIONS MAY CAUSE MODERATE INJURY TO YOUR PERSON, OR DAMAGE TO YOUR UNIT OR OTHER PROPERTY. - Page 5 CAUTIONS When removing air filter, DO NOT touch metal parts of Doing so may cause an injury. the unit. DO NOT clean with water. Water may enter the unit and degrade the insulation causing an electric shock. Ensure proper ventilation, especially in rooms with a Failure to do so may result in an oxygen shortage. ...
-
Page 6: Important Safety Instructions
IMPORTANT SAFETY INSTRUCTIONS NOTE : WARNING FOR YOUR SAFETY: Do not store or use gasoline or other flammable The power supply cord with this air vapors and liquids in the vicinity of this or any other appliances. conditioner contains a current detection device designed to reduce the risk of fire. Please refer to the section WARNING - PREVENT ACCIDENTS “Operation of Current Device” (below) for details. In the event that the power To reduce the risk of fire, electrical shock, or injury to persons when using supply cord is damaged, it cannot be your air conditioner, follow basic precautions, including the following: repaired. -
Page 7: Installation Instructions
INSTALLATION INSTRUCTIONS BEFORE YOU BEGIN CAUTION Read these instructions completely and carefully. DO NOT, under any circumstances, cut or remove the third (ground) prong from the power cord. IMPORTANT- Save these instructions. DO NOT change the plug on the power cord of the air IMPORTANT- Observe all governing codes conditioner. - Page 8 STEP 1: D. Secure the top rail to the unit with the 3/8″ screws as shown in Fig. C. PREPARE THE WINDOW FIG. C Lower sash must open sufficiently to allow a clear vertical opening of 13 inches (330 mm). Side louvers and the rear of the AC must have clear air space to allow enough airflow through the condenser for heat removal. The rear of the unit must be outdoors, not inside a building or garage.
- Page 9 D. Once the panel has been installed on the side of B. Extend the side panels out against the window the cabinet, make sure it sits securely inside the frame (Fig. 6). frame channel by making slight adjustments. Slide the top and bottom ends of the frame into the top FIG. 6 and bottom rails of the cabinet. (Fig. 3) Top Rail Window Frame FIG.
- Page 10 IF AC IS BLOCKED BY A C. To secure lower sash in place, attach right angle sash lock with 3/4″ (19 mm) or 1/2″ (12.7 mm) screw as STORM WINDOW shown (Fig. 9). Add wood as shown in Fig.11, or remove storm window before air conditioner is installed. If storm window frame must remain, be sure the drain holes or slots are not caulked or painted shut.
-
Page 11: Normal Sounds
NORMAL SOUNDS HIGH PITCHED CHATTER High efficiency compressors VIBRATION may have a high pitched chatter Unit may vibrate and make during the cooling cycle. noise because of poor wall or window construction or incorrect SOUND OF RUSHING AIR installation. This DOES NOT At the front of the unit, indicate a defective unit. the sound of rushing air being moved by the fan may be heard. -
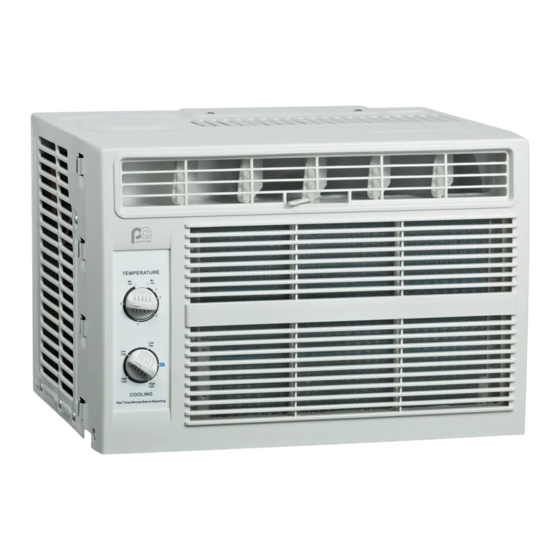
Page 12: Air Conditioner Features
AIR CONDITIONER FEATURES WARNING To reduce the risk of fire, electric shock, or injury to persons, read the IMPORTANT SAFETY INSTRUCTIONS before operating this appliance. NOTE : After the air conditioner is turned off, leave the unit OFF for a minimum of 3 minutes before attempting to turn back on. The cool circuit has an automatic 3 minute time delayed start if the unit is turned off and on quickly. This allows pressure inside of the compressor to equalize and prevents overheating as well as possible circuit breaker tripping. Failure to follow these instructions may be harmful to your unit. To begin operating the air conditioner, follow these steps: 1. Set the thermostat (“TEMPERATURE”) to the highest number (coldest or cooler setting). 2. Set the Cooling knob to the highest COOL setting. -
Page 13: Care And Cleaning
CARE AND CLEANING CAUTION Clean air conditioner occasionally to keep it looking and operating like new. Be sure to unplug the unit before cleaning to prevent shock or fire hazards. AIR FILTER CLEANING The air filter should be cleaned at least every two weeks or as necessary. Trapped particles in the filter can build up and cause an accumulation of frost on the cooling coils. ● Remove the filter by sliding it out from the right-hand side (shown in figure on the right). ● Wash the filter using liquid dishwashing detergent and warm water. Rinse filter thoroughly. ● Gently shake excess water from the filter. Be sure the filter is thoroughly dry before replacing. ● As an alternative to washing the filter, vacuum the filter clean. -
Page 14: Troubleshooting
TROUBLESHOOTING BEFORE CALLING FOR SERVICE, PLEASE REVIEW THE CHART BELOW ISSUE POSSIBLE CAUSES • Be sure unit is not too large or too small for the area of the room. • Verify that all doors, windows, curtains and any other openings are closed. Verify nothing is obstructing the front grille of unit, such as curtains, etc. • Allow enough time for room to cool, especially if outside temp is very high. • Check that the filter is not dirty and louvers are open all the way and blowing in the desired direction. AIR CONDITIONER NOT • Check that unit is set to COOL mode and that temperature is down enough (but COOLING ROOM, OR NOT BLOWING not too low). - Page 15 The design and specifications are subject to change without prior notice for product improvement. Consult with the sales agency or manufacturer for details.
- Page 16 Distributed by: Perfect Aire, LLC 5151 Belt Line Rd. Suite 878 Dallas, TX 75254 844-4PA-AIRE | 844-472-2473 www.perfectaire.us PA/User_4PMC5000/10172017 Specification and performance data is subject to change without notice. Printed in China...
Need help?
Do you have a question about the 4PMC5000 and is the answer not in the manual?
Questions and answers