Table of Contents
Advertisement
Quick Links
This model is not intended for sale in the USA.
LG-E617g
This guide helps you to get started using your phone.
•
Some of the contents of this manual may not apply to your phone,
depending on the software and your service provider.
•
This handset is not suitable for people who have a visual impairment
due to the touch screen keyboard.
•
Copyright ©2012 LG Electronics, Inc. All rights reserved. LG and the
LG logo are registered trademarks of LG Group and its related entities.
All other trademarks are the property of their respective owners.
•
Google™, Google Maps™, Gmail™, YouTube™, Google Talk™ and
Android Market™ are trademarks of Google, Inc.
User Guide
ENGLISH
Advertisement
Table of Contents

Related Manuals for LG LG-E617G


Summary of Contents for LG LG-E617G
- Page 1 • Copyright ©2012 LG Electronics, Inc. All rights reserved. LG and the LG logo are registered trademarks of LG Group and its related entities. All other trademarks are the property of their respective owners. •...
- Page 2 Part 15.21 statement " Change or Modifications that are not expressly approved by the manufacturer could void the user's authority to operate the equipment. “ Part 15.105 statement This equipment has been tested and found to comply with the limits for a class B digital device, pursuant to Part 15 of the FCC Rules.
- Page 3 Part 15 Class B Compliance This device and its accessories comply with part15 of FCC rules and ICES-003 Class B digital apparatus requirements for Industry Canada. Operation is subject to the following two conditions: (1) This device & its accessories may not cause harmful interference. (2) This device &...
-
Page 5: Getting To Know Your Phone
Getting to know your phone Before you start using the phone, please read this! Please check to see whether any problems make more memory available. you encountered with your phone are To uninstall applications: described in this section before taking the Touch >... -
Page 6: Optimising Battery Life
2. Optimising battery life • Turn off automatic syncing for Google Mail™, Calendar, Contacts and other Extend your battery's life between charges applications. by turning off features that you don't need to • Some applications you have downloaded having running constantly in the background. may reduce battery power. -
Page 7: Using Folders
Getting to know your phone To monitor and control how battery 3. Using folders power is being used: You can combine several app icons in a • Touch > Apps tab > Settings > folder. Drop one app icon over another on Power Saver from the DEVICE >... -
Page 8: Before Installing An Open Source Application And Os
4. Before installing an open NOTE: After you open an app, you can source application and OS usually adjust its settings by choosing items from its Menu icon near the top or WARNING bottom of the screen. If you install and use an OS other than the one provided by the manufacturer it may cause your phone to malfunction. -
Page 9: Using The Hard Reset (Factory Reset)
Menu key settings from the phone. with your right hand. You need to do this immediately, before the screen displays the LG logo. Make sure your left hand is still... -
Page 10: Opening And Switching Applications
Then release the power key at vibration up any important data before performing a time. hard reset. When the LG logo is displayed on the 6. Opening and switching screen, continue to hold the keys for applications around 2 seconds, and then release all... -
Page 11: Installing Pc Software (Lg Pc Suite)
7. Installing PC Software consume resources unnecessarily. (LG PC Suite) To return to view list recently used "LG PC Suite" PC Application is a program applications: that helps you connect your device to a PC via a USB cable and Wi-Fi. Once connected, Simply press and hold the Home key. - Page 12 PC. "LG PC Suite" PC application can be • Backup the applications in your device. downloaded from the webpage of LG. Go to www.lg.com and select a country of • Update the softwares in your device. your choice. •...
- Page 13 Memory: 512 MB or higher RAMs LG integrated USB driver is required • Graphic card: 1024 x 768 resolution, to connect an LG device and PC and 32 bit color or higher installed automatically when you install "LG PC Suite" PC software.
-
Page 14: Synchronising Your Phone To A Computer Via Usb
The procedure is as follows: your PC using the USB cable, you need Connect your device to PC. (Use a USB to install LG PC Suite onto your PC. cable or Wi-Fi connection.) Please refer to previous pages to install LG PC Suite. - Page 15 Getting to know your phone Copy the files from your PC to the drive Touch > Apps tab > Settings > folder. Storage from the DEVICE to check out the storage media. (If you want to transfer Select Charge only option to disconnect files from or to a memory card, insert a the phone.
-
Page 16: Hold Your Phone Upright
10. Hold your phone upright computer: Hold your mobile phone vertically, as you Open the notification drawer and touch would a regular phone. The LG-E617g > Charge only to disconnect your has an internal antenna. Be careful not to phone from the computer safely. -
Page 17: When The Screen Freezes
Getting to know your phone 11. When the screen freezes If the screen freezes or the phone does not respond when you try to operate it: Remove the battery, reinsert it, then turn the phone on. Press and hold the Power/Lock key for 10 seconds to turn it off. -
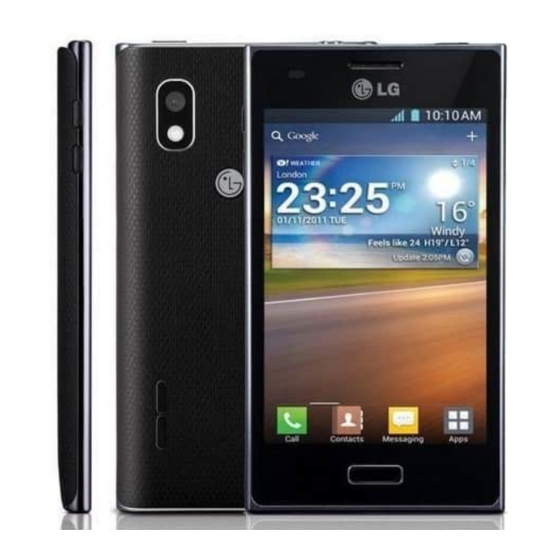
Page 18: Device Components
Device components Power/Lock key Earpiece • Switch your phone on/off by pressing and holding this key. Proximity sensor • Short press to lock/unlock the screen. Home key Return to the Home screen from any screen. Menu key Back key • Check what options are available. Return to the previous screen. - Page 19 Getting to know your phone NOTE: Proximity sensor WARNING When receiving and making calls, the Placing a heavy object on the phone or proximity sensor automatically turns sitting on it can damage the LCD and the backlight off and locks the touch touch screen functions.
- Page 20 Power/Lock key Flash Camera lens Earphone Jack SIM card slot Charger/USB port Battery cover Microphone Volume keys • In the Home screen: Control ringer volume. • During a call: Control your earpiece Battery volume. • When playing a track: Control microSD Card volume continuously.
-
Page 21: Installing The Sim Card And Battery
Getting to know your phone Installing the SIM card and battery Before you can start exploring your new phone, you'll need to set it up. To insert the SIM card and battery: To remove the battery cover, hold the phone firmly in one hand. With your other hand, lift off the battery cover with your thumbnail as shown in figure. - Page 22 Slide the SIM card into the SIM card slot. Insert the battery into place by aligning Make sure the gold contact area on the the gold contacts on the phone and the card is facing downwards. battery (1) and pressing it down until it clicks into place (2).
-
Page 23: Charging Your Phone
Getting to know your phone Align the battery cover over the battery Charging your phone compartment (1) and press it down until it The charger connector is at the bottom of clicks into place (2). the phone. Insert the charger and plug it into an electrical outlet. -
Page 24: Using The Memory Card
and other ultra-small devices, and are ideal NOTE: The battery must be fully charged for storing media-rich files such as music, initially to improve battery lifetime. programs, videos, and photographs for use with your phone. To insert a memory card: NOTE: Do not open the battery cover during the charging of your phone. - Page 25 Getting to know your phone NOTE: • Use only compatible memory cards with your phone. Using incompatible memory cards may damage the card and data stored on the card, as well as the phone. • As the device uses FAT32 the Maximum size for any given file is 4 GB.
- Page 26 NOTE: All files on your memory card are WARNING deleted when it is formatted. Do not insert or remove the memory card when the phone is on. Doing so On the home screen, touch > Apps may damage the memory card as well tab to open the menu.
-
Page 27: Locking And Unlocking The Screen
This helps to prevent accidental touches and memory card, the folder structure may saves battery power. be different after formatting as all the When you are not using the LG-E617g, files will be deleted. press the Power/Lock key to lock... -
Page 28: Secure Your Lock Screen
If there are any programs running when you TIP! To wake up your phone, you can set lock screen, they may be still running in alternatively use the home key while the Lock mode. It is recommended that you exit screen is turned off. - Page 29 Getting to know your phone Select Screen lock and desired NOTE: options (None, Swipe, Pattern, PIN or Precautions to take when using Password). pattern lock. It is very important to remember the unlock pattern you set. You will not be able to access your phone if you use an incorrect pattern 5 times.
- Page 30 When you cannot recall your unlock pattern: If you logged in to your Google account on the phone but failed to enter the correct pattern 5 times, tap the Forgot pattern button. You are then required to log in with your Google account to unlock your phone.
-
Page 31: Your Home Screen
Your Home screen Touch screen tips Flick – To scroll through a list or move quickly, flick across the touch screen (drag Here are some tips on how to navigate quickly and release). around your phone. Touch – To choose a menu/option or open NOTE: an application, touch it. -
Page 32: Home Screen
Home screen functions you use the most. Touch the Phone icon to bring up the Simply swipe your finger to the left or right touch screen dialpad to make a call. to view the panels. You can customise each panel with Apps, Downloads, Widgets and Touch the Messaging icon to access wallpapers. -
Page 33: Customising The Home Screen
Your Home screen Customising the Home screen Drag it to the location you want and lift your finger. You can customise your Home screen by adding Apps, Downloads, Widgets or To remove an item from the Home Wallpapers. For more convenience using screen: your phone, add your favourite widgets to •... -
Page 34: Returning To Recently-Used Applications
Returning to recently-used Notification drawer applications The notification drawer runs across the top of your screen. Touch and hold the Home key. The screen displays a pop-up with icons of applications you used recently. Touch an icon to open the application. Or touch the Back key to return to your current application. -
Page 35: Viewing The Status Bar
Your Home screen Touch and slide the notification drawer down Viewing the status bar with your finger. The status bar uses different icons to display Touch > to manage the Notifications. phone information such as signal strength, Here you can check and manage Sound, new messages, battery life, active Bluetooth Wi-Fi, Bluetooth, Airplane mode, Accounts &... - Page 36 Below is a table explaining the meaning of icons you're likely to see in the status bar. Icon Description Icon Description No SIM card Wired headset No signal Call in progress Airplane mode Call hold Connected to a Wi-Fi network Speakerphone Power saver is on Phone microphone is muted...
- Page 37 Your Home screen Icon Description Icon Description Missed call NFC is on Bluetooth is on Vibrate mode System warning Battery fully charged Alarm is set Battery is charging New voicemail Phone is connected to PC via USB cable Ringer is silenced Downloading data...
- Page 38 Icon Description Icon Description Uploading data New message GPS is acquiring Song is playing FM radio turned on in the Receiving location data from GPS background Data is syncing USB tethering is active New Gmail Portable Wi-Fi hotspot is active New Google Talk message Both USB tethering and portable hotspot are active...
-
Page 39: On-Screen Keyboard
Your Home screen Onscreen keyboard Using the keypad & entering text You can enter text using the onscreen Tap once to capitalise the next letter keyboard. The onscreen keyboard appears you type. Double-tap for all caps. automatically on the screen when you Tap to switch to the numbers and need to enter text. -
Page 40: Entering Accented Letters
Entering accented letters When you select French or Spanish as the text entry language, you can enter special French or Spanish characters (e.g. "á"). For example, to input "á", touch and hold the "a" key until the zoom-in key grows bigger and displays characters from different languages. -
Page 41: Google Account Setup
Google account set up When you first turn on your phone, you have password, then touch Sign in. the opportunity to activate the network, to Once you have set up your Google account sign into your Google Account and how you on your phone, your phone automatically want to use some Google services. -
Page 42: Connecting To Networks And Devices
Connecting to Networks and Devices Wi-Fi Turn off Wi-Fi when you're not using it to extend the life of your battery. With Wi-Fi, you can use high-speed Internet access within the coverage of the wireless NOTE: If you are out of the Wi-Fi zone or access point (AP). - Page 43 Connecting to Networks and Devices scanning for available Wi-Fi networks. The status bar displays icon that indicate Wi-Fi status. Tap Wi-Fi menu again to see a list of active and in-range Wi-Fi networks. Bluetooth • Secured networks are indicated by a You can use Bluetooth to send data by lock icon.
- Page 44 • Some devices, especially those that are not tested or approved by • LG is not responsible for the loss, Bluetooth SIG, may be incompatible interception, or misuse of data sent with your device. or received via the Bluetooth wireless feature.
- Page 45 Connecting to Networks and Devices Tap Bluetooth menu again. Your phone Send data using the Bluetooth wireless will scan for and display the IDs of all feature available Bluetooth in-range devices. If Select a file or item, such as a contact, the device you want to pair with isn’t on calendar event, memo, or media file, from the list, make sure the target device is...
-
Page 46: Sharing Your Phone's Data Connection
Sharing your phone's data bar and as an ongoing notification in the notifications drawer. connection For the latest information about tethering USB tethering and portable Wi-Fi hotspot are and portable hotspots, including supported great features when there are no wireless operating systems and other details, visit connections available. -
Page 47: To Rename Or Secure Your Portable Hotspot
Connecting to Networks and Devices To rename or secure your TIP! If your computer is running portable hotspot Windows 7 or a recent distribution of You can change the name of your phone's some flavours of Linux (such as Ubuntu), Wi-Fi network name (SSID) and secure its you don't usually need to prepare your Wi-Fi network. - Page 48 Touch Configure Wi-Fi hotspot. • If you touch the WPA2 PSK security option, a password field is added to • The Configure Wi-Fi hotspot dialog the Configure Wi-Fi hotspot dialog. If box will open. you enter a password, you will need to •...
-
Page 49: Using The Wi-Fi Cast
Connecting to Networks and Devices Using the Wi-Fi Cast ATTENTION! You can share your music, picture and video If you set the security option as Open, content between users who use Android you cannot prevent unauthorised usage Phones connected via the same Wi-Fi & Wi- of online services by other people and Fi Directed network. -
Page 50: Enabling Wi-Fi Direct To Share Through Smartshare
Select a device to connect from the NOTE: Wi-Fi Direct cannot be enabled scanned device list. while using other Wi-Fi functions. Touch Connect. Touch > Apps tab > Settings > Enabling Wi-Fi Direct to share More from the WIRELESS & NETWORKS through SmartShare >... -
Page 51: Using Smartshare
Connecting to Networks and Devices that is set in Password. Using SmartShare SmartShare uses DLNA (Digital Living NOTE: When your phone becomes Network Alliance) technology to share digital a group owner, it will consume more content through a wireless network. battery power than when it is a client. - Page 52 • Touch Always accept request if you To share contents from remote content would like to automatically accept sharing library to other devices requests from other devices. Let your renderer device (e.g. TV) play multimedia contents from your remote • Touch Receive files if you would like to content library (e.g.
- Page 53 Connecting to Networks and Devices You can browse the content library. Touch Share on the menu and select the SmartShare. Touch a content thumbnail or touch the Menu key and select Play button. SmartShare is automatically launched with the selected files. To share contents from your phone to Select the device from renderer lists to your renderer device(e.g.
- Page 54 Notice: Check that your device is connected You can browse the content library. with your home network using Wi-Fi Touch a content thumbnail then touch connection to use this application. Some Download menu key. DLNA enabled devices (e.g. TV) support Notice: A few types of contents are not only the DMP feature of DLNA and will supported.
- Page 55 Connecting to Networks and Devices Touch > Apps tab > SmartShare Touch the top left button and select My phone. You can browse the content library. Touch and hold a content thumbnail and then touch the Upload menu key. Select a device of remote content library to be uploaded.
-
Page 56: Making A Call
Calls Making a call Calling your contacts Touch to open the keypad. Touch to open your contacts. Enter the number using the keypad. To Scroll through the contact list or enter the delete a digit, touch the first few letters of the contact you want to call by touching Search contacts. -
Page 57: Adjusting Call Volume
Calls Hold and slide the Quick msg icon from the Making a second call bottom if you want to send one. During your first call, touch Menu > Add call and dial the number. Also, you TIP! Quick msg can go recent dialled list by touching You can send a message quickly using or can search contacts by touching this function. -
Page 58: Viewing Your Call Logs
To end active calls, touch End or press TIP! Touch any call log entry to view the Home Key and slide the notification bar date, time and duration of the call. down and select End call icon NOTE: You are charged for each call TIP! Touch the Menu key, then touch you make. - Page 59 Calls Voicemail settings – If you are using your On the Home screen, touch carrier’s voicemail service, this option allows Touch the Menu key. you to enter the phone number to use for Tap Call settings and choose the options listening to and managing your voicemail.
- Page 60 Call forwarding – Choose whether to divert Call costs – View the charges applied all calls, when the line is busy, when there is to your calls. (This service is network no answer or when you have no signal. dependent; some operators do not support this function) Call barring –...
-
Page 61: Searching For A Contact
Contacts Add contacts to your phone and synchronise Adding a new contact them with the contacts in your Google Touch , enter the new contact's account or other accounts that support number, then touch the Menu key. Touch contact syncing. Add to contacts >... -
Page 62: Favourite Contacts
Favourite contacts Removing a contact from your favourites list You can classify frequently called contacts Touch to open your contacts. as favourites. Touch the Favourites tab, and choose a Adding a contact to your favourites contact to view its details. Touch to open your contacts. -
Page 63: Import Or Export Contacts
Touch the Menu key > Import/Export. sync program. Select an desired option for importing/ Install LG PC Suite on the PC first. Run exporting. If you have more than one the program and connect your Android account, select an account to which you mobile phone to the PC using a USB want to add the contact. - Page 64 CSV file saved on your PC. If the fields in the imported CSV file are different from those in LG PC Suite, you need to map the fields. After mapping the fields, click OK. The contacts are then added to LG PC Suite.
-
Page 65: Sending A Message
Messaging Your LG-E617g combines SMS and MMS NOTE: You will be charged for a text into one intuitive, easy-to-use menu. message for every person you send the message to. Sending a message Touch on the home screen, and touch Touch Enter message field and start to to open a blank message. -
Page 66: Threaded Box
The message screen opens, with your WARNING: If an image, video or message after Recipient Name/Number. audio file is added to an SMS message, Responses appear on the screen. As you it is automatically converted into an view and send additional messages, a MMS message and you are charged message thread is created. -
Page 67: Using Smilies
Liven up your messages using Smilies. When writing a new message, touch the Menu key, then choose Insert smiley. Changing your message settings Your LG-E617g message settings are predefined, so you can send messages immediately. You can change the settings based on your preferences. -
Page 68: Managing An Email Account
Email You can use the Email application to read To add another email account: emails from services other than Google Mail. • Touch > Apps tab > Email > in the The Email application supports the following account screen, touch >... -
Page 69: Email Account Screen
Email To delete an email account: Only the most recent emails in your account are downloaded to your phone. • Touch > Apps tab > Email > in the account screen, touch > Settings Working with account folders > touch an account you want to delete > Each account has an Inbox, Outbox, Sent Remove account and Drafts folder. - Page 70 Enter an address for the message's you're connected to a network again. If intended recipient. As you enter text, it contains any pending messages, the matching addresses are offered from your Outbox is displayed on the Accounts Contacts. Separate multiple addresses screen.
-
Page 71: Getting To Know The Viewfinder
Camera Getting to know the viewfinder Zoom – Zoom in or zoom out. Alternatively you can use the side volume keys. Brightness – This defines and controls the amount of sunlight entering the image. Shot mode – Choose from Normal, Panorama or Continuous shot. -
Page 72: Taking A Quick Photo
Taking a quick photo Using the advanced settings Open the Camera application. In the viewfinder, touch to open all advanced options. Hold the phone, point the lens towards • : Restore all camera default settings. the subject you want to photograph. Touch the screen and a focus box will •... - Page 73 Camera • -Select the image resolution. If you • - Improves colour qualities in different choose the high resolution, the file size will lighting conditions. increase, which means you will be able to • - Choose a color tone to use for your store fewer photos in the memory.
- Page 74 NOTE: This function is only available TIP! When you exit the camera, some when GPS is active. settings return to their defaults, such as white balance, timer and scene mode. Check these before you take your next • - Select one of the four shutter sounds. photo.
-
Page 75: View A Photo
Camera After taking photos, select the image View a photo viewer icon to view the taken photos. Learn to view photos saved in your phone's • To view more photos, scroll left or right. storage. • To zoom in or out, place two fingers on the In Home screen, open the application list screen and spread them apart (move your and select Gallery. - Page 76 • To send a photo to others, touch Share or Wallpaper. > desired item like Bluetooth, Move – Touch to move the image to other Email, Memo, Picasa and so on. place. Rename – Touch to edit the name of the TIP! If you have an SNS account and set selected picture.
- Page 77 Camera store fewer photos in the memory. NOTE: Some file formats are not - Improves colour qualities in different supported depending on the software of lighting conditions. the device. - Applies artistic effects to the pictures. - Applies the additional options for NOTE: If the file size exceeds the pictures.
-
Page 78: Video Camera
Video camera Getting to know the viewfinder Zoom – Zoom in or zoom out. Alternatively you can use the side volume keys. Brightness – This defines and controls the amount of sunlight entering the video. Live effect – Changing backgrounds and providing morphing effects to transform facial features during video recording. -
Page 79: Shooting A Quick Video
Video camera Shooting a quick video Touch on the screen to stop Touch the Camera mode button down recording. and the icon changes to Using the advanced settings The video camera viewfinder appears on Using the viewfinder, touch to open all the screen. - Page 80 the Back key displayed on a map. - Touch to set the size (in pixels) of the - Choose Off to record a video without video you are recording. sound. - Improves colour qualities in different - Auto review automatically shows you lighting conditions.
-
Page 81: Play A Video
Video camera • To play a video, select Play NOTE: • To delete a video, select Delete • Some file formats are not supported depending on the software of the Play a video device. Learn to use the video player to play various •... -
Page 82: Adjusting The Volume When Viewing A Video
Touch the Menu key to open all Adjusting the volume when advanced options. viewing a video Touch to open all the advanced To adjust the volume of a video while it is options. playing, use the volume keys on the left- hand side of the phone. - Page 83 Multimedia You can store multimedia files on a memory (Codec: MPEG4, H.263, Sorenson ® card for easy access to all your image and H.263, H.264, VC-1, DivX , XviD) video files. • Avoid locking the device’s screen while playing a DivX Video-On-Demand. Gallery Each time you lock the screen while Learn to view photos and play videos saved...
-
Page 84: Music Player
Transferring music files using NOTE: If you installed LG Android USB mass storage devices Platform Driver, you will immediately see Connect the LG-E617g to a PC using a a pop-up saying Turn on USB storage. USB cable. If you haven't installed LG Android Platform Driver on your PC, you need to change the settings manually. -
Page 85: Playing A Song
Multimedia Playing a song Touch to go back to the beginning of the song. Touch twice to return to the In the Home screen, touch > Apps previous song. tab > Music Player. Touch to manage the music volume. Touch Songs. Touch to set repeat mode. - Page 86 To change the volume while listening to NOTE: Music file copyrights may be music, press the up and down volume keys protected by international treaties and on the left-hand side of the phone. national copyright laws. Touch and hold any song in the list. It Therefore, it may be necessary to obtain displays Play, Add to playlist, Set as permission or a licence to reproduce or...
-
Page 87: Searching For Stations
FM Radio then saved to specific channel numbers, so you don't have to find them again. Your LG-E617g has a built-in FM Radio so You can store up to 48 channels on your you can tune in to your favourite stations phone. - Page 88 NOTE: You can also manually tune in to What is LG Tag+ a station using the on-screen wheel. LG Tag+ allows easy saving and loading to NFC tag, which can be customized to suit TIP! To improve radio reception, extend certain environments.
- Page 89 Multimedia Touch the back of your device to a tag or a device to share, then launching application and changing settings can be set. Using Tag+ reading When touching the set tag, mode will be activated right away.
-
Page 90: How To Get To Lg Smartworld From Your Phone
LG Execute and install the downloaded SmartWorld. file. Tap Sign in and enter ID/PW for LG Access LG SmartWorld by tapping the SmartWorld. If you have not yet signed icon. up, tap Register and get a LG SmartWorld... -
Page 91: How To Use Lg Smartworld
Try other useful functions as well. (Content Detail screen) Categories – Find contents by category (e.g. Education, Entertainment, Games, NOTE: LG SmartWorld may not be etc). available in all carriers or countries. Search – Search Content. Apps for you – Recommended content... -
Page 92: Setting Your Alarm
> Apps tab > Alarm/Clock by =. > For more complex calculations, touch After you set the time, the LG-E617g lets , select the Advanced panel, then you know how much time is left before choose sin, cos, tan, log and so on. -
Page 93: Polaris Office
Utilities Tap on the date you want to add event If you want to repeat the alarm, set REPEAT, and set REMINDERS, if necessary. Tap on to add a event. Touch Done to save the event in the Touch Event name then enter the event calendar. - Page 94 When viewing documents using Polaris Office, the objects This Backup application support between LG and layout remain the same as in their smart phones, other S/W version or OS. And original documents. so, when you buy the new LG smart phone,...
- Page 95 Utilities you can back up the current LG-E617g • To restore your smart phone data. smart phone data on your new one. Back up your smart phone data If you have preloaded application Backup Insert to the memory card into the slot on your smart phone, you can back up and and check out the storage status.
- Page 96 Continue to back up. select Backup > Schedule. When all selected files backed up, you On the Scheduled Backup Location will see the message ‘Done’ and select screen, touch Storage Card or Internal Continue to finish backing up data. memory. From the list, select how often you want Scheduling automatic backups to back up your device data and settings,...
- Page 97 Utilities Restoring smart phone data Card or Internal memory. To restore data that is in your on-board On the Restore screen, select a backup device memory, mass storage mode must file that contains the data you want to be turned off. restore.
- Page 98 If the backup file is encrypted, type the encryption, To restore synchronized organizer password that you set to encrypt. data, you must have an activation password. When all selected files restored, you will NOTE: see the message ‘Done’ and select Yes •...
- Page 99 Utilities • When you insert a memory card in • Backup allows a user to immediately your smart phone, the file directory back up what the user selects. of the memory card will appear in (Application (Downloaded, Pre- the Polaris Office / My folders/_ installed), Contacts, Messages, Call ExternalSD/backup folder under the log, Calendar, Bookmarks) For the...
- Page 100 LG morning when the user usually does smart phones. not use the phone. No scheduled backup is set by default if there is no previous setting through Schedule;...
-
Page 101: Using The Web Toolbar
The web Browser Using the web toolbar Browser gives you a fast, full-colour world Touch to go back a page. of games, music, news, sport, entertainment Touch to go forwards a page, to the and much more, right on your mobile phone. page you connected to after the current Wherever you are and whatever you enjoy. -
Page 102: Using Options
Using options Save for offline reading – You can view the saved web page. Press to view options. Settings – Displays Browser settings. Refresh – Update the current web page. Save to Bookmarks – Add the current web page as bookmark. Share page –... -
Page 103: Lg On-Screen Phone
LG On-Screen Phone 2.0 LG On-Screen Phone 2.0 allows you to view Exits the On-Screen Phone program. your mobile phone screen from a PC via a Maximises the On-Screen Phone USB, Bluetooth, or Wi-Fi connection. window. You can also control your mobile phone from Minimises the On-Screen Phone your PC using the mouse or keyboard. - Page 104 • LG Home Panorama: Shows the whole Polaris Office) to your PC. Simply right- workspaces of LG Home. You can easily click and drag to send a file to your PC. organise icons or widgets and run an application by double-clicking the shortcut.
-
Page 105: Installing On-Screen Phone On Your Pc
LG On-Screen Phone 2.0 Connecting your phone to your NOTE: Please make sure LG Home is a default launcher. On-Screen Phone 2.0 provides USB, Bluetooth and Wi-Fi connection. Installing On-Screen Phone on Please follow the instruction on Connection your PC Wizard of OSP program. -
Page 106: Checking The On-Screen Phone Connection
drag down the status bar at the top of the NOTE: Please make sure that On- home screen to check the On-Screen Phone Screen Phone check box in System connection status. settings > Connectivity > On-Screen Phone settings. Disconnecting your phone from Please make sure that the battery may your PC run out more quickly due to the current... - Page 107 MAC filters, you may need to enter the MAC address of your < Wi-Fi > LG-E617g into the router. Wi-Fi – Turns on Wi-Fi to connect to You can find the MAC address in the available Wi-Fi networks.
- Page 108 < Bluetooth > < More > Turns on Bluetooth to connect to Bluetooth Airplane mode – After switching to airplane devices. mode, all wireless connections are disabled. Turn the Bluetooth wireless feature on or off. VPN – Displays the list of Virtual Private Refer to page Bluetooth chapter in details.
- Page 109 NOTE: Be careful not to scratch or the portable Wi-Fi hotspot settings. damage the inside of the battery cover NFC – Your LG-E617g is NFC-enabled as this is the NFC antenna. mobile phone. NFC (Near Field Communication) is a wireless connectivity...
- Page 110 NOTE: Make sure both devices Using NFC: To use NFC, make sure your are unlocked, support Near Field device is switched on and activate the Communication (NFC), and have both NFC setting, if disabled. NFC and Android Beam™ turned on. Android Beam –...
- Page 111 Settings Wi-Fi Direct – Tick the check box to make & notifications. Touch feedback & system. Wi-Fi Direct active. Set Wi-Fi Direct device Phone ringtone – Allows you to set your name and scan for other devices. default incoming call ringtone. Mobile networks –...
- Page 112 Touch sounds – Allows you to set your orientation automatically when you rotate phone to play a sound when you touch the phone. buttons, icons and other onscreen items that Screen timeout – Set the time for screen react to your touch. timeout.
- Page 113 Settings < Lock screen > < Storage > Screen Lock – Set an unlock pattern to INTERNAL STORAGE – View the internal secure your phone. Opens a set of screens storage usage. that guide you through drawing a screen SD CARD – Check total available SD card unlock pattern.
- Page 114 < Apps > determines your approximate location using Wi-Fi and mobile networks. When you You can view and manage the applications. select this option, you're asked whether PERSONAL you consent to allowing Google to use your location when providing these services. <...
- Page 115 Settings < Security > Install from SD card – Choose to install encrypted certificates from your SD card. Set up SIM card lock – Set up SIM card lock or change the SIM PIN. Clear credentials – Remove all certificates. Make passwords visible –...
- Page 116 Back up my data – Set to back up your Android. settings and application data to the Google SYSTEM server. < Date & time > Backup account – Set to back up your account. Use Date & time settings to set how dates are displayed.
-
Page 117: Phone Software Update
< Connectivity > USB connection type – You can set the Phone software update desired mode (Charge only, Media sync, LG Mobile phone software update from USB tethering or PC software). the Internet Ask on connection – Ask USB connection For more information about using this mode when connecting to a computer. - Page 118 NOTE: LG reserves the right to make needing to visit a service centre. This feature firmware updates available only for will only be available if and when LG makes selected models at its own discretion a newer firmware version available for your and does not guarantee the availability device.
-
Page 119: Divx Mobile
Settings be available if and when LG makes a newer NOTE: This feature is dependent on firmware version available for your device. your network service provider, region First, you can check the software version and country. on your mobile phone: System settings >... - Page 120 ® ® ABOUT DIVX VIDEO-ON-DEMAND: This DivX DivX , DivX Certified and associated ® Certified device must be registered in order logos are trademarks of Rovi Corporation to play purchased DivX Video-on-Demand or its subsidiaries and are used under (VOD) movies. To obtain your registration license.
- Page 121 Accessories These accessories are available for use with the LG-E617g. (Items described below may be optional.) Travel adaptor Battery Stereo headset Data cable User Guide NFC Tag Connect your Learn more LG-E617g and about your LG-E617g. NOTE: • Always use genuine LG accessories.
-
Page 122: Troubleshooting
Troubleshooting This chapter lists some problems you might encounter while using your phone. Some problems require you to call your service provider, but most are easy to fix yourself. Message Possible causes Possible corrective measures There is no SIM card in the phone Make sure that the SIM card is correctly SIM error or it is inserted incorrectly. - Page 123 Troubleshooting Message Possible causes Possible corrective measures To change a security code, you will need to confirm the new code Codes do not If you forget the code, contact your service by re-entering it. match provider. The two codes you have entered do not match.
- Page 124 Message Possible causes Possible corrective measures On/Off key pressed too briefly. Press the On/Off key down for at least two seconds. Phone cannot Battery is not charged. Charge battery. Check charging indicator on be switched on the display. Battery contacts are dirty. Clean the battery contacts.
- Page 125 Check the charger and connection to the phone. Contact problem Check the battery contacts and clean them if Charging error necessary. No voltage Plug the charger into a different socket. Charger defective Replace charger. Wrong charger Only use original LG accessories. Battery defective Replace battery.
- Page 126 Message Possible causes Possible corrective measures Number not The Fixed dialling number Check the Settings menu and turn the function permitted function is on. off. Impossible to receive / send Memory full Delete some messages from the phone. SMS & picture Files not Unsupported file format Check the file formats that can be supported.
- Page 127 Troubleshooting Message Possible causes Possible corrective measures The screen If you use any protection tape or case, check does not turn to see if it has covered the area around the Proximity sensor problem on when I proximity sensor. Make sure that the area receive a call.
Need help?
Do you have a question about the LG-E617G and is the answer not in the manual?
Questions and answers