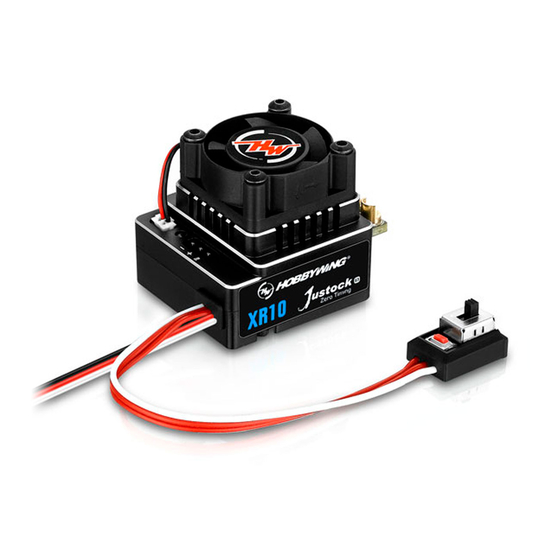
Hobbywing XERUN XR10 STOCK SPEC User Manual
Brushless electronic speed controller
Hide thumbs
Also See for XERUN XR10 STOCK SPEC:
- User manual ,
- User manual (2 pages) ,
- User manual (2 pages)
Table of Contents
Advertisement
Quick Links
USER MANUAL
Brushless Electronic Speed Controller
XERUN XR10 STOCK SPEC
02
Warnings
• To avoid short circuits, ensure that all wires and connections must be well insulated before connecting the ESC to related devices.
• Ensure all devices are well connected to prevent poor connections and avoid damage to your electronic devices.
• Read through the manuals of all power devices and chassis and ensure the power configuration is rational before using this unit.
• Please use a soldering iron with the power of at least 50W to solder all input/output wires and connectors.
• Do not hold the vehicle in the air and rev it up to full throttle, as rubber tires can "expand" to extreme size or even crack to cause serious injury.
• Stop immediate usage once the casing of the ESC exceeds 90℃/194℉ as this may cause damage to both the ESC and motor. Hobbywing recommends setting the "ESC Thermal
Protection" to 105℃/221℉ (this refers to the internal temperature of the ESC).
• Users must always disconnect the batteries after use as the current on the ESC is consuming continuously if it is connected to the batteries (even if the ESC is turned off). The battery will
completely be discharged and may result in damage to the battery or ESC when it is connected for a long period of time. This WILL NOT be covered under warranty.
03
Features
• 5 select-to-use profiles including zero-timing/blinky mode, stock mode particularly applicable to the Stock class of 1/10th touring car and buggy racing.
• Innovative double-switch design (a built-in electronic switch & an external detachable switch), the external switch is really handy when the car shell is installed on and the internal switch
is no longer touchable.
• Built-in switch mode BEC with a maximum output of 6A and voltage adjustable between 6V and 7.4V for usage with high voltage servos.
• Small size makes the installation convenient, light weight of 28g (w/o wires) provides more weight margin when adjusting the balance of the chassis.
• Separate PRG/FAN port is able to power an external fan for maximize cooling performance or connect a LCD program box or WiFi module to the ESC.
• With the New WIFI express module from Hobbywing, users are able to program parameters, upgrade firmware and check relevant data during the event using either the iPhone or
Android devices.
• New brakes and throttle functions: 100 levels of brag brake, 50 levels of initial brake force, 9 levels of maximum brake force, 20 levels of brake rate, and 30 levels of throttle rate.
• Adjustable brake mode, PWM and brake frequencies for different competitions and control feel.
• Adjustable Turbo Timing & Boost Timing for different applications.
• Softening function (HOBBYWING-initiated) for milder or wilder driving control and better driving efficiency.
• Multiple protections: low-voltage cutoff protection, ESC and motor thermal protection, and fail safe (throttle signal loss protection).
• Data logging for recording the maximum ESC/motor temperature, motor speed/RPM, and others in real time.
• Firmware upgrade via Hobbywing multifunction LCD program box or WiFi Express (item sold separately).
04
Specifications
Model
Cont. / Peak Current
80A / 380A
Motor Type
Sensored / Sensorless Brushless Motors
Applications
Stock Class of 1/10th Touring Car and Buggy Racing
Motor Limit (*Note 1)
Brushless Motor Limit with 2S LiPo/6S NiMH: (Touring Car) T≥10.5T, (Buggy) T≥13.5T
LiPo / NiMH Cells
2S LiPo / 6S NiMH (Only)
BEC Output
6V/7.4V Switchable, Continuous Current of 3A (Switch-mode)
Cooling Fan
Powered by the stable BEC voltage of 6V/7.4V
Connectors
Input End: No Connectors; Output End: No Connectors
Size/Weight
31.5 x 25.6 x16.1mm (w/o fan) / 54.5g (w/ wires)
Programming Port
PRG/FAN Port (*powered by the built-in BEC)
Note 1: The recommended T counts are only applicable with the standard 3650/540 size (3 slot 2 pole) motors when ESCs are in blinky mode.
05
Connections
Battery
Receiver
This is an extremely powerful brushless motor system. For your safety and the safety of those around you, we strongly recommend removing the pinion gear attached to
the motor before performing calibration and programming functions with this system. It is also advisable to keep the wheels in the air when you turn on the ESC.
ATTENTION
1. Motor Wiring
The motor wiring is different between the sensored and the sensorless; please only follow the introductions below.
• Sensored Motor Wiring
There is strict wiring order from the ESC to the motor, the three A/B/C ESC wires must connect to the three A/B/C motor wires correspondingly. Next, connect the ESC sensor port and
the motor sensor port with the stock 6-pin sensor cable. If you don't plug the sensor cable in, your ESC will still work in sensorless mode even if you're using a sensored motor.
• Sensorless Motor Wiring
Users do not need to be worried in regards to the connectivity with the A/B/C(ESC and motor) as there is no polarity. You may find it necessary to swap two wires if the motor runs in
reverse.
2. Receiver Wiring
The throttle control cable on the ESC has to be plugged into the throttle (TH) channel on the receiver. The throttle control cable has an output voltage of 6V/7.4V to the receiver and
steering servo, hence, no separate battery can be connected to the receiver. Otherwise, your ESC may be damaged.
3. External switch Connecting (Optional):
A detachable switch (stock accessory) is included in the product box. You only need to plug this switch into the 3-pin port marked with "SW" when you want to use external switch
(instead of the built-in electronic switch).
3. Battery Wiring
Proper polarity is essential. Please ensure positive (+) connects to positive (+), and negative (-) connects to negative (-) when plugging in the battery! When reverse polarity is applied to
the ESC from the battery, it WILL damage the ESC. This WILL NOT be covered under warranty!
06
ESC Setup
1
ESC/Radio Calibration
Begin using your ESC by calibrating with your transmitter. We strongly recommend Hobbywing users to use the "Fail Safe" function on the radio system and set (F/S) to "Output OFF" or
"Neutral Position". Example of calibrating Neutral range and Endpoint. (*The operation is same when you're using the external switch.)
1. Turn on the transmitter, ensure all parameters (D/R, Curve, ATL) on the throttle channel are at default (100%). For transmitter without LCD,
please turn the knob to the maximum, and the throttle "TRIM" to 0. Please also turn the corresponding knob to the neutral position.
Release the
For FutabaTM transmitter, the direction of throttle channel shall be set to "REV", while other radio systems shall be set to "NOR". Please ensure
ON/OFF button
once the LED
the "ABS/braking function" of your transmitter must be DISABLED.
flashes.
2. Start by turning on the transmitter with the ESC turned off but connected to a battery. Holding the "ON/OFF" button, the RED LED on the ESC
starts to flash (Note 2: the motor beeps at the same time), and then release the ON/OFF button immediately.
Note 2: Beeps from the motor may be low sometimes, and you can check the LED status instead.
01
Introduction
Congratulations and thank you for your trust in Hobbywing product. By
purchasing the XERUN XR10 STOCK SPEC, you have chosen a high
performance sensored brushless electronic speed controller! This speed
ATTENTION
controller is equipped with high-tech features to enhance your
experience with Hobbywing brushless power systems. Improper usage
and unauthorized modification to our product is extremely dangerous
CAUTIONS
and may damage the product and related devices. Please take your time
and read the following instructions carefully before you start using your
speed control. We have the right to modify our product design,
appearance, features and usage requirements without notification.
We, HOBBYWING, are only responsible for our product cost and nothing
else as result of using our product.
20180518
XERUN XR10 STOCK SPEC
Yellow (B)
Blue (A)
Electronic Speed Controller
Sensor wire
Move the throttle trigger
to the neutral position
Press the ON/OFF button.
The Green LED flashes
once and
motor emits
"Beep" tone.
3. Set the neutral point, the full throttle endpoint and the full brake endpoint.
• Leave transmitter at the neutral position, press the "ON/OFF" button, the RED LED dies out and the GREEN LED flashes 1 time and the motor beeps 1 time to accept the neutral position.
• Pull the throttle trigger to the full throttle position, press the "ON/OFF" button, the GREEN LED blinks 2 times and the motor beeps 2 times to accept the full throttle endpoint.
• Push the throttle trigger to the full brake position, press the "ON/OFF" button, the GREEN LED blinks 3 times and the motor beeps 3 times to accept the full brake endpoint.
4. The motor can be started 3 seconds after the ESC/Radio calibration is complete.
2
Power On/Off
Attention! The temperature of its Aluminum housing may be very high when there is heavy load. For precaution, we recommend users to have a fan blown towards the ESC.
(Start with the ESC turned off), press the ON/OFF button to turn on the ESC (the indication LED comes on); and press the ON/OFF button again to turn off the ESC (the indication LED dies out).
Note 3: Do not turn off the ESC when the motor is spinning. The sudden stoppage may result in unwanted damage to both the motor and ESC. If there is an emergency, battery plugs can be
pulled out to switch the ESC off.
3
Programmable Items
Section
Item
Programmable Items
1A
Running Mode
1B
Max. Reverse Force
1C
Cutoff Voltage
1D
ESC Thermal Protection
1E
Motor Thermal Protection
1F
BEC Voltage
1G
Remote Off
1H
Sensor Mode
2A
Throttle Rate Control
2B
Throttle Curve
2C
Neutral Range
2D
2E
PWM Drive Frequency
2F
Softening Value
2G
Softening Range
3A
Drag Brake
3B
Max. Brake Force
3C
Initial Brake Force
3D
Brake Rate Control
3E
Brake Curve
3F
Brake Frequency
3G
Brake Control
4A
Boost Timing
4B
Boost Timing Activation
4C
Boost Start RPM
4D
Boost End RPM
5A
Turbo Timing
5B
Turbo Delay (sec)
5C
Turbo Increase Rate (degree/0.1sec)
5D
Turbo Decrease Rate (degree/0.1sec)
Note 4: Item 4C (Boost Start RPM) & item 4D (Boost End RPM) are not programmable if item 4B (Timing Activation) is set to "Auto".
1A. Running Mode
Option 1: Forward with Brake
Racing mode. It has only forward and brake functions.
Option 2: Forward/ Reverse with Brake
This option is known to be the "training" mode with "Forward/ Reverse with Brake" functions. Hobbywing has adopted the "DOUBLE-CLICK" method, that is your vehicle only brakes on
the 1st time you push the throttle trigger forward (brake) (1st push). The motor stops when you quickly release the throttle trigger and then re-push the trigger quickly (2nd push), only
then the vehicle will reverse. The reverse function will not work if your car does not come to a complete stop. The vehicle only reverses after the motor stops. This method is for preventing
vehicle from being accidentally reversed.
Option 3: Forward and Reverse
This mode is often used by special vehicles (rock crawler). It adopts the "SINGLE-CLICK" method. The vehicle will reverse immediately when you push the throttle trigger forward (brake).
Orange (C)
1B. Max. Reverse Force
The reverse force of the value will determine its speed. For the safety of your vehicle, we recommend using a low amount.
1C. Cutoff Voltage
Sensor port of motor
Sets the voltage at which the ESC lowers or removes power to the motor in order to either keep the battery at a safe minimum voltage (for LiPo batteries). The ESC monitors the battery
voltage all the time, it will immediately reduce the power to 30% (in 3 seconds) and cut off the output 10 seconds later when the voltage goes below the cutoff threshold. The RED LED
will flash a short, single flash that repeats (☆, ☆, ☆) to indicate the low-voltage cutoff protection is activated. Please set the "Cutoff Voltage" to "Disabled" or customize this item if you
are using NiMH batteries.
Option 1: Disabled
The ESC does not cut the power off due to low voltage. We do not recommend using this option when you use any LiPo battery as you will irreversibly damage the product. You need to
select this option when you are using a NiMH pack.
Motor
Option 2: Auto
The ESC calculates the corresponding cutoff voltage as per the number of LiPo cells it detects and the "3.3V/cell" rule. For example, if the ESC detects a 2S, the cutoff voltage for the
battery shall be 6.6V.
Option 3: Customized
The customized cutoff threshold is a voltage for the whole battery pack (adjustable from 3.0V to 8.0V). Please calculate the value as per the number of LiPo cells you are using.
For example, when you use a 2S and you want the cutoff voltage for each cell is 2.8V, you will need to set this item to 5.6V.
1D. ESC Thermal Protection
The output from the ESC will be cut off with the value you have preset.
The GREEN LED flashes (☆, ☆, ☆) when the ESC temperature reaches to the preset value. The output will not resume until the ESC temperature gets down.
Warning! Please do not disable this function unless you're in a competition. Otherwise the high temperature may damage your ESC and even your motor.
1E. Motor Thermal Protection
The GREEN LED flashes (☆☆, ☆☆, ☆☆) when the motor temperature reaches to the preset value. The output will not resume until the motor temperature gets down.
Warning! Please do not disable this function unless you're in a competition. Otherwise the high temperature may damage your motor and even your ESC. For non-Hobbywing motor,
the ESC may get this protection activated too early/late because of the different temperature sensor inside the motor. In this case, please disable this function and monitor the motor
temperature manually.
1F. BEC Voltage
Option 1: 6.0V
It's applicable to ordinary servos. Do not use this option with high voltage servos; otherwise your servos may not function normally due to insufficient voltage.
Option 2: 7.4V
It's applicable to high voltage servos. Do not use this option with ordinary servos; otherwise your servos may be burnt due to high voltage.
1G. Remote Off
Option 1: Enabled
Users can simply push and hold the brake trigger for 6 seconds. This option allows the user to turn off the ESC without pushing the ON/OFF button switch.
Option 2: Disabled
Users must turn off the ESC by pressing the ON/OFF switch button from the ESC.
1H. Sensor Mode
Full Sensored
The power system will work in the "sensored" mode at all times. The efficiency and drivability of this mode is at the highest.
2A. Throttle Rate Control
This item is used to control the throttle response. It can be adjustable from 1 to 30 (step: 1), the lower the throttle rate, the more the limit will be on the throttle response. A suitable rate
can help driver to control his vehicle properly during the starting-up process. Generally, you can set it to a high value to have a quick throttle response if you are proficient at throttle control.
2B. Throttle Curve
The throttle curve parameter reconciles the position of the throttle trigger (in throttle zone) and the actual ESC throttle output. It is linear by default and we can change it to non-linear via
adjusting the throttle curve. For example, if adjust it to +EXP, the throttle output at the early stage will be higher (than the output when the curve is linear); if it is adjusted to –EXP,
the throttle output at the early stage will be lower (than the output when the curve is linear).
2C. Neutral Range
As not all transmitters have the same stability at "neutral position", please adjust this parameter as per your preference. You can adjust to a bigger value when this happens.
2D. Coast
The RPM of the motor will be lowered gradually when throttle is reduced. The vehicle will not reduce speed abruptly when the throttle is reduced to return to the neutral position.
The bigger the value, the more the "COAST" will be felt. Example, COAST of 0 deactivates, and a COAST of 20% would be the maximum amount of COAST.
Move the throttle trigger to the
end position of forward
Press the ON/OFF button.
The Green LED flashes
twice andmotor
emits "Beep-
Beep" tone.
Parameter Values
Forward with Brake
Forward/ Reverse with Brake
Forward and Reverse
25%
50%
Disabled
Auto
3.0-11.1V Adjustable (Step:0.1V)
105℃/221℉
125℃/257℉
Disabled
105℃/221℉
125℃/257℉
Disabled
6.0V
7.4V
Enabled
Disabled
Full Sensored
1-30 Adjustable (Step: 1)
Linear
Customized
4%
6%
Coast
0%-20% Adjustable (Step: 1%)
1K
2K
0-30° Adjustable (Step: 1°)
0%
10%
0%-100% Adjustable (Step: 1%)
0%
12.5%
=Drag Brake
0%-50% Adjustable (Step: 1%)
1-20 Adjustable (Step: 1)
Linear
Customized
0.5K
1K
Linear
Traditional
0-64° Adjustable (Step: 1°)
RPM
Auto
500-35000 RPM Adjustable (Step: 500RPM)
3000-60000 RPM Adjustable (Step: 500RPM)
0-64° Adjustable (Step: 1°)
Instant
0.05
0.1
0.15
0.2 0.25
6
12
6
12
Move the throttle trigger to the
end position of backward
Press the ON/OFF button.
The Green LED flashes
three times and motor
emits "Beep-Beep-
Beep" tone.
75%
100%
8%
4K
8K
12K
16K
24K
32K
20%-75% Adjustable, Step: 5%
25%
37.5%
50%
62.5%
75%
87.5%
100%
2K
4K
8K
16K
Hybrid
0.3 0.35
0.4
0.45
0.5
0.6
0.7 0.8
0.9
1.0
18
24
30
Instant
18
24
30
Instant
Advertisement
Table of Contents

Related Manuals for Hobbywing XERUN XR10 STOCK SPEC


Summary of Contents for Hobbywing XERUN XR10 STOCK SPEC
- Page 1 Generally, you can set it to a high value to have a quick throttle response if you are proficient at throttle control. Begin using your ESC by calibrating with your transmitter. We strongly recommend Hobbywing users to use the “Fail Safe” function on the radio system and set (F/S) to “Output OFF” or 2B.
- Page 2 Note 5: The “Coast” will be void (even if you set it to any value besides 0) if the above “drag brake” is not “0%”. You can program this XR10 STOCK SPEC ESC via a multifunction LCD program box or via a multifunction LCD program box & a PC (HOBBYWING USB LINK software needs to be 2E.
Need help?
Do you have a question about the XERUN XR10 STOCK SPEC and is the answer not in the manual?
Questions and answers