
Related Manuals for JVC KW-R935BTS


Summary of Contents for JVC KW-R935BTS
- Page 1 KW-R935BTS / KW-X830BTS / KW-R930BTS KW-SX83BTS CD RECEIVER DIGITAL MEDIA RECEIVER INSTRUCTION MANUAL INSTRUCTION MANUAL...
-
Page 2: Table Of Contents
• Never put or leave any metallic objects (such as coins or metal tools) inside the unit to prevent a short circuit. AUDIO SETTINGS • For KW-R935BTS/KW-R930BTS: If a disc error occurs due to condensation on the laser lens, eject the disc and wait for the moisture to evaporate. -
Page 3: Basics
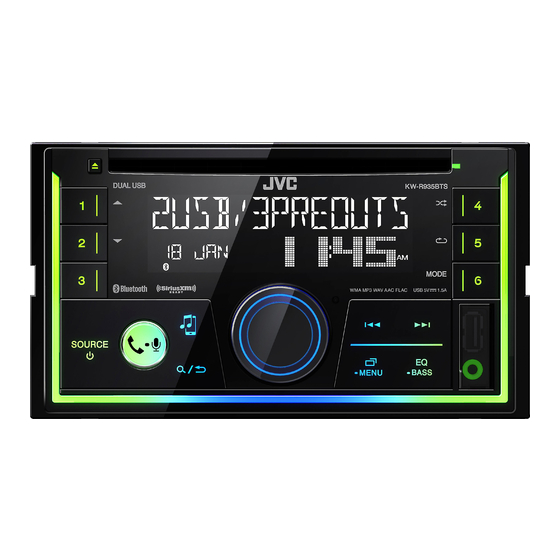
Pull out the insulation Display window sheet when using for the first time. How to replace the battery Volume knob KW-R935BTS: USB cable from the rear of the unit On the faceplate On the remote control Turn on the power Press ( Not available ) •... -
Page 4: Getting Started
GETTING STARTED To set the date Turn the volume knob to select [DATE SET], then press the knob. Turn the volume knob to make the settings, then press the knob. Day Month Year Press to exit. To return to the previous setting item, press Set the basic settings Press and hold Turn the volume knob to select an item (see the following table),... -
Page 5: Radio
RADIO GETTING STARTED F/W UPDATE UPDATE SYSTEM F/W UP YES: Starts upgrading the firmware. ; NO: Cancels xxxx (upgrading is not activated). FACTORY YES: Resets the settings to default (except the stored RESET station). ; NO: Cancels. CLOCK TIME SYNC ON: The clock time is automatically set using the Clock Time (CT) data in FM Radio Broadcast Data System “STEREO”... - Page 6 RADIO Select a stored station SSM 01–06 /SSM 07–12 /SSM 13–18: Automatically presets up to 18 stations for FM. “SSM” stops flashing when the first 6 stations are stored. Press one of the number buttons (1 to 6). Select SSM 07–12/SSM 13–18 to store the following 12 stations. (or) Press IF BAND...
-
Page 7: Cd/Usb/Ipod/Android
When connecting an Android device, “Press [VIEW] to install JVC MUSIC PLAY APP” is shown. Follow the instructions to install the application. You can also install the latest version of JVC MUSIC PLAY application on your Android device before USB cable * connecting. - Page 8 (via USB input terminal). Press the volume knob to start searching. Preparation: Install the latest version of JVC Remote application on your device before • To return to the previous setting item, press connecting. • To cancel, press and hold You can make the settings in the same way as connection via Bluetooth.
-
Page 9: Pandora
[BY DATE]: According to the registered date and/or [A-Z]: By alphabetical order Turn the volume knob to select the desired station, then press the KW-R935BTS: You can also connect to knob. the USB cable from the rear of the unit. To cancel, press and hold Press repeatedly to select PANDORA FRONT/ PANDORA REAR/PANDORA. -
Page 10: Iheartradio
Press 3 again to listen to the station. and/or Search and store a station KW-R935BTS: You can also connect to Press the USB cable from the rear of the unit. Turn the volume knob to select a category, then press the knob. -
Page 11: Spotify
Save favorite song information and/or While listening to the Radio on Spotify... KW-R935BTS: You can also connect to Press and hold the volume knob. the USB cable from the rear of the unit. “SAVED” appears and the information is stored to “Your Music” or “Your Press repeatedly to select SPOTIFY FRONT/... -
Page 12: Siriusxm® Radio
SiriusXM® Radio Only SiriusXM® brings you more of what you love Start listening to listen to, all in one place. Get over 140 channels, including commercial-free music plus the best sports, Press repeatedly to select SIRIUS XM. news, talk, comedy and entertainment. Welcome to the Press world of satellite radio. - Page 13 SiriusXM® Radio Using SiriusXM tuner models later than SXV200: This unit can SiriusXM Replay™ assign a maximum of 18 SmartFavorites channels. Initially, all preset While listening to a channel..channels are assigned as SmartFavorites. Press the volume knob. • “ ”...
- Page 14 SiriusXM® Radio TuneScan™ CODE SET 1 Press the volume knob to enter [NEW CODE]. 2 Turn the volume knob to select a number. You can get a short preview of the songs that you have missed on each of 3 Press to move to the entry position.
-
Page 15: Bluetooth
BLUETOOTH® BLUETOOTH — Connection Pair and connect a Bluetooth device for the first time Press to turn on the unit. Supported Bluetooth profiles – Hands-Free Profile (HFP) Search and select “KW-R9 BTS”/“KW-X8 BTS”/“KW-SX8 BTS” on the Bluetooth – Advanced Audio Distribution Profile (A2DP) device. - Page 16 – Bluetooth function of the connected device is turned on. – [AUTO PAIRING] is set to [ON]. ( 19) – JVC MUSIC PLAY application is installed on Receive a call the Android device ( 7) and [AUTO MODE] is When there is an incoming call: selected ( 8).
- Page 17 BLUETOOTH® Default: XX On the faceplate On the remote control MIC GAIN LEVEL –10 to LEVEL +10 (LEVEL –04): The sensitivity of the While talking on the first incoming call... microphone increases as the number increased. Answer another incoming Press or the volume NR LEVEL LEVEL –05 to LEVEL +05 (LEVEL 00): Adjust the noise call and hold the current ( Not available )
- Page 18 BLUETOOTH® Make a call using voice recognition Make a call Press and hold to activate the connected You can make a call from the call history, phonebook, or dialing the number. Call by phone. voice is also possible if your mobile phone has the feature. Speak the name of the contact you want to call or Press to enter Bluetooth mode.
- Page 19 BLUETOOTH® Bluetooth mode settings Bluetooth compatibility check mode Press and hold You can check the connectivity of the supported Turn the volume knob to select an item (see the following table), then press the knob. profile between the Bluetooth device and the unit. Repeat step until the desired item is selected/activated or follow the instructions •...
- Page 20 BLUETOOTH® The connectivity result flashes on the display. BLUETOOTH — Audio “PAIRING OK” and/or “HANDS-FREE OK”* and/ While in BT AUDIO source, or “AUD.STREAM OK”* and/or “PBAP OK”* you can connect to five Compatible Bluetooth audio devices and Compatible with Hands-Free Profile (HFP) switch between these five Compatible with Advanced Audio Distribution Profile (A2DP) devices.
- Page 21 ANDROID Selects the Android smartphone to use from the list. LIST * Preparation: Install the latest version of JVC Remote application on your device before STATUS Shows the status of the selected device. connecting. IOS CONNECTED: You are able to use the application using the iPhone/iPod Press and hold connected via Bluetooth or USB input terminal.
- Page 22 BLUETOOTH® Listen to iPhone/iPod via Bluetooth Listen to iHeartRadio You can listen to the songs on the iPhone/iPod via Bluetooth on this unit. Preparation: Select [ON] for [IHEART SRC] in [SOURCE SELECT]. ( 4) Press repeatedly to select iPod BT. • You can operate the iPod/iPhone in the same way as iPod/iPhone via Open the iHeartAuto application on your device.
-
Page 23: Aux
AUDIO SETTINGS Use a portable audio player Connect a portable audio player (commercially available). 3.5 mm (1/8") stereo mini plug with “L” shaped connector (commercially available) Portable audio player Auxiliary input jack Select [ON] for [BUILT-IN AUX] in [SOURCE SELECT]. ( 4) Press repeatedly to select AUX. - Page 24 AUDIO SETTINGS Other settings PRO EQ Adjust your own sound settings. • The settings are stored to [USER]. Press and hold • The settings made may affect the current settings of [EASY EQ]. Turn the volume knob to select an item (see the following table), 62.5HZ then press the knob.
- Page 25 AUDIO SETTINGS FADER (Not applicable when 3-way crossover is selected.) SOUND EFFECT POSITION R15 to POSITION F15 (POSITION 00): Adjusts the front and SPACE ENHANCE (Not applicable for TUNER source.) rear speaker output balance. SMALL/MEDIUM/LARGE: Virtually enhances the sound space. ; BALANCE * POSITION L15 to POSITION R15 (POSITION 00): Adjusts the left and OFF: Cancels.
- Page 26 AUDIO SETTINGS Speaker output settings Crossover settings [SPK/PRE OUT] Below are the available setting items for 2-way crossover and 3-way (Applicable only if [X ' OVER TYPE ] is set to [2-WAY]) ( 25) crossover. Select the output setting for the speakers [SPK/PRE OUT], based on the speaker connection method.
- Page 27 AUDIO SETTINGS 2-way crossover setting items 3-way crossover setting items SPEAKER SIZE SPEAKER SIZE FRONT SIZE 3.5"/4"/4.75"/5"/6.5"/6.75"/7"/4×6/5×7/ TWEETER SMALL/MIDDLE/LARGE 6×8/6×9/7×10 MID RANGE 3.5"/4"/4.75"/5"/6.5"/6.75"/7"/4×6/5×7/6×8/6×9 TWEETER SMALL/MIDDLE/LARGE/NONE (not connected) WOOFER * 6.5"/8"/10"/12"/15" OVER/NONE (not connected) REAR * 3.5"/4"/4.75"/5"/6.5"/6.75"/7"/4×6/5×7/6×8/6×9/7×10/ X ' OVER NONE (not connected) TWEETER HPF FRQ 1KHZ/1.6KHZ/2.5KHZ/4KHZ/5KHZ/6.3KHZ/8KHZ/10KHZ/...
- Page 28 AUDIO SETTINGS Digital Time Alignment settings Determining the value for [DISTANCE] and [GAIN] of [DTA SETTINGS] If you specify the distance from the center of the Digital Time Alignment sets the delay time of the speaker output to currently set listening position to every speaker, create a more suitable environment for your vehicle.
-
Page 29: Display Settings
DISPLAY SETTINGS Zone identification for brightness setting Default: XX DISPLAY DIMMER Dim the illumination. OFF: Dimmer is turned off. Brightness changes to [DAY] setting. ON: Dimmer is turned on. Brightness changes to [NIGHT] setting. ( [BRIGHTNESS]) DIMMER TIME: Set the dimmer on and off time. 1 Turn the volume knob to adjust the [ON] time, then press the knob. -
Page 30: References
REFERENCES DISPLAY SETTINGS Maintenance DAY COLOR Store your own day and night illumination colors for different zones. Cleaning the unit 1 Select a zone. ( 29) Wipe off dirt on the faceplate with a dry silicone or soft cloth. 2 RED/GREEN/BLUE: Select a primary color. 3 00 to 31: Select the level. - Page 31 REFERENCES Playable files • Depending on the version of the operating system of the iPod/iPhone, some functions may • Playable audio file: not operate on this unit. For disc: MP3 (.mp3), WMA (.wma), AAC (.aac) For USB mass storage class device: About Android device MP3 (.mp3), WMA (.wma), AAC (.aac), AAC (.m4a), WAV (.wav), FLAC (.flac) •...
- Page 32 Date (Status) Channel CD or USB FRONT/ (For CD-DA) number (Status) with music synchronisation* (back to USB REAR/USB (Applicable only for KW-R935BTS/KW-R930BTS) the beginning) Track title (Artist) Track title (Disc name) Track title (Date/Clock) * Playing time (Date/Clock) * BT AUDIO...
-
Page 33: Troubleshooting
TROUBLESHOOTING Symptom Remedy Symptom Remedy Sound cannot be heard. • Adjust the volume to the optimum level. “UNSUPPORTED DEVICE” • Check whether the connected device is compatible with this • Check the cords and connections. appears. unit and ensure the file systems are in supported formats. ( 31) “MISWIRING CHECK WIRING Turn the power off, then check to be sure the terminals... - Page 34 Registration of thumbs up/thumbs down has failed due unit. ( 31) to insufficient network connectivity. Cannot playback at • Make sure JVC MUSIC PLAY APP is installed on the “THUMBS N/A” Registration of thumbs up/thumbs down is not allowed. [AUTO MODE].
- Page 35 TROUBLESHOOTING Symptom Remedy Symptom Remedy “CH UNAVAIL” The selected channel is unavailable. Sound is being interrupted • Reduce the distance between the unit and the Bluetooth or skipped during playback audio player. of a Bluetooth audio • Turn off, then turn on the unit and try to connect again. player.
-
Page 36: Specifications
SPECIFICATIONS FM Frequency Range 87.9 MHz — 107.9 MHz (200 kHz step) USB Standard USB 1.1, USB 2.0 (Full speed) 87.5 MHz — 108.0 MHz (50 kHz step) Compatible Devices Mass storage class Usable Sensitivity (S/N = 26 dB) 8.2 dBf (0.71 μV/75 Ω) File System FAT12/16/32 Quieting Sensitivity (DIN S/N = 46 dB) 17.2 dBf (2.0 μV/75 Ω) Maximum Supply Current DC 5 V ... -
Page 37: Installation/Connection
4 Ω — 8 Ω Caution Preout Level/Load KW-R935BTS: • For safety’s sake, leave wiring and mounting to professionals. Consult the car audio dealer. CD/USB: 4 000 mV/10 kΩ load • Install this unit in the console of your vehicle. Do not touch the metal parts of this unit during and shortly after use of the unit. - Page 38 INSTALLATION/CONNECTION Part list for installation Installing the unit (in-dash mounting) (A) Wiring harness Install onto the car brackets using the supplied screws (B) or (C). The screw holes differ depending on the model of the cars. Do the required wiring. ( 39) (B) Flat head screw M5 ×...
-
Page 39: Remote Control (Rm-Rk52)
INSTALLATION/CONNECTION Wiring connection IMPORTANT We recommend installing the unit with a commercially available custom wiring harness specific for your car and leave this job to professionals for your safety. Consult your car audio dealer. Fuse (10 A) Vehicle dashboard Antenna terminal Factory wiring Light blue/yellow To the steering wheel... - Page 40 INSTALLATION/CONNECTION Connecting external components MIC (Microphone input terminal) ( 15) KW-R935BTS: USB cable (DC 5 V 1.5 A) (approx. 1.2 m/4 feet) Expansion port (12 V 500 mA) To the optional SiriusXM Vehicle Tuner (commercially available) ( 12) Connecting external amplifiers via output terminals...
Need help?
Do you have a question about the KW-R935BTS and is the answer not in the manual?
Questions and answers