
Subscribe to Our Youtube Channel
Related Manuals for Icron USB 2.0 Ranger 2312


Summary of Contents for Icron USB 2.0 Ranger 2312
- Page 1 ® USB 2.0 Ranger 2312 2-port USB 2.0 100m CAT 5e/6/7 Extender System with Flexible Power User Guide...
- Page 2 CE Statement We, Icron Technologies Corporation, declare under our sole responsibility that the USB 2.0 Ranger 2312, to which this declaration relates, is in conformity with European Standard EN 55022, EN 61000, and EN 55024.
-
Page 3: Table Of Contents
Contents Introduction ........................3 USB 2.0 Ranger 2312 Product Contents............................ 3 Requirements ....................................3 Features ....................................... 3 The LEX Unit ...................................... 4 The REX Unit ...................................... 5 Installation Guide ....................... 6 Preparing for Installation ................................6 Installing the LEX ..................................... 6 Installing the REX ..................................... -
Page 4: Introduction
USB devices. note Notes provide additional information that could be useful. Caution symbols are followed by very important information about an operational requirement. USB 2.0 Ranger 2312 Product Contents Your Ranger 2312 is packaged with: • LEX (Local Extender) •... -
Page 5: The Lex Unit
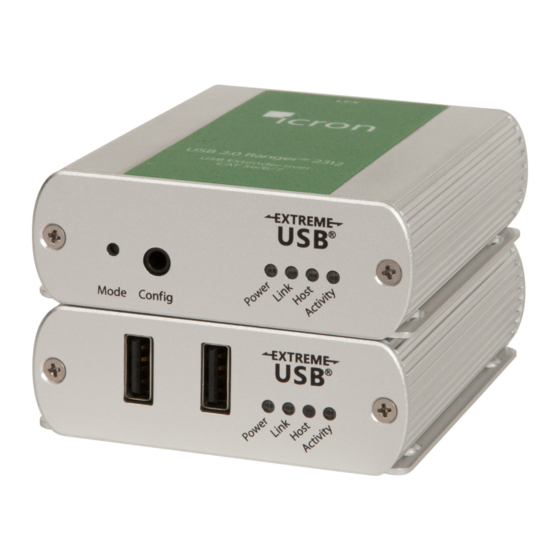
The LEX Unit The LEX unit connects to the computer using a standard USB cable (included). Power for the LEX is provided by the host computer. Power for the REX is provided by the 24V AC adapter connected at either the LEX or REX. -
Page 6: The Rex Unit
The REX Unit The REX unit provides two USB Type A ports for connecting standard USB devices allowing up to 1 Amp per USB port, or 1.5 Amps total when both ports are used concurrently. Additional devices may be connected by attaching USB hubs to the REX. -
Page 7: Installation Guide
Installation Guide Connect the provided power adapter to either the LEX or REX. Host Computer Power can be supplied to either LEX or REX All USB Devices Up to 100m between extenders over CAT 5e/6/7 Preparing for Installation Before you can install the Ranger 2312, you need to prepare your site: 1. -
Page 8: Connecting The Lex To The Rex
Connecting the LEX to the REX To ensure proper operation, it is recommended that only solid core CAT 5e/6/7, Unshielded Twisted Pair (UTP) cabling note be used to connect the LEX to the REX. The cabling must have a straight-through conductor configuration with no crossovers and must be terminated with 8 conductor RJ45 connectors at both ends. -
Page 9: Checking The Installation
Checking the Installation 1. Check that the Power, Activity, Link and Host LEDs on the LEX and REX units are on. If the Host or Link LEDs are permanently off, then the cabling between the LEX and REX units may not be installed properly or is defective. -
Page 10: Optional Usb Extender Mounting Options
Optional USB Extender Mounting Options The bottom of the Ranger 2312 enclosure features four convenient pre-drilled holes for optional direct surface mounting and four mounting slots for easy cable-ties. Based on your requirements, choose from three available mounting options: 1. USB Extender Mounting Kit 2. -
Page 11: Option 2: Usb Extender Direct Surface Mounting
Option 2: USB Extender Direct Surface Mounting (using your own hardware) The bottom of the Ranger 2312 enclosure features four pre-drilled holes for optional direct surface mounting. Using the stencil below, along with your own hardware you can directly mount your USB Extender on a surface. -
Page 12: Troubleshooting
The following table provides troubleshooting tips. The topics are arranged in the order in which they should be executed in most situations. If you are unable to resolve the problem after following these instructions, please contact Icron Technologies’ Technical Support for further assistance. - Page 13 PROBLEM CAUSE SOLUTION Link LED on the • The REX is not receiving power. 1. Confirm the host computer is on and providing LEX and REX is off. power to LEX. • The LEX is not receiving power. 2. Ensure the supplied AC power adapter is properly •...
-
Page 14: Warranty Information
Icron Technologies Corporation product or service, even if Icron Technologies Corporation, its suppliers or licensors have been advised of the possibility of such damages. -
Page 15: Contacting Technical Support
Contacting Technical Support If you are experiencing problems not referenced in the Troubleshooting section, contact Icron Technical Support: www.icron.com/support Tel: +1 604 638 3939 To help us serve you better, please include the following information with your technical support request: •... -
Page 16: Technical Glossary
Technical Glossary Category 5e/6/7 (CAT 5e/6/7) Network Cabling Category 5e/6/7 cable is commonly also referred to as CAT 5e or CAT 6 or CAT 7. This cabling is available in either solid or stranded twisted pair copper wire variants and as UTP (Unshielded Twisted Pair) or STP (Shielded Twisted Pair). -
Page 17: Specifications
Specifications Range Up to 100m (330ft) over Cat 5e/6/7 cable High-speed devices (480 Mbps) (USB 2.0) USB Device Support Full-speed devices (12 Mbps) (USB 1.1) Low-speed devices (1.5 Mbps) (USB 1.1) Maximum USB Devices 30 USB devices or 4 USB hubs with 26 USB devices. Supported 100-240 V AC input, 24V 1A DC output Power Supply... - Page 18 Icron Technologies Corporation 4664 Lougheed Highway, Suite 221 Burnaby, BC Canada V5C 5T5 Tel: +1 604 638 3920 Fax: +1 604 638 3930 www.icron.com...
Need help?
Do you have a question about the USB 2.0 Ranger 2312 and is the answer not in the manual?
Questions and answers