Table of Contents
Advertisement
Available languages
Available languages
Quick Links
Royal Appliance International GmbH
Itterpark 7-9
40724 Hilden
Germany
+49 - 2103 - 20 07 10
+49 - 2103 - 20 07 77
info@dirtdevil.de
Roya-
www.dirtdevil.de
20.08.2008
MAGNUM MPR
Bodenstaubsauger
Aspiradora rodante
DE
ES
Bedienungsanleitung
Manual de instrucciones
Cylinder vacuum cleaner
GB
RUS
Operating Manual
Aspirateur
FR
GR
Mode d'emploi
Vloerstofzuiger
Talni sesalec
NL
Sl
Bedieningshandleiding
Navodila za uporabo
Gulvstøvsuger
DK
Betjeningsvejledning
Golvdammsugare
SE
Bruksanvisning
Golvdammsugare
FI
Pölynimuri
Gulvstøvsuger
NO
Bruksanvisning
Advertisement
Chapters
Table of Contents

Related Manuals for Dirt Devil MAGNUM MPR


Summary of Contents for Dirt Devil MAGNUM MPR
- Page 1 MAGNUM MPR Bodenstaubsauger Gulvstøvsuger Aspiradora rodante Bedienungsanleitung Betjeningsvejledning Manual de instrucciones Cylinder vacuum cleaner Golvdammsugare Operating Manual Bruksanvisning Royal Appliance International GmbH Itterpark 7-9 Aspirateur Golvdammsugare 40724 Hilden Mode d‘emploi Pölynimuri Germany +49 - 2103 - 20 07 10 Vloerstofzuiger Gulvstøvsuger...
- Page 2 Bedienungsanleitung ................4 - 17 Operating Manual ..................18 - 31 Mode d'emploi ..................... 32 - 45 Bedieningshandleiding ................46 - 59 Manual de instrucciones ................60 - 73 ..............74 - 87 Navodila za uporabo................... 88 - 101 ............... 102 - 117 Omistajan Käsikirja..................
- Page 3 Abb. 1...
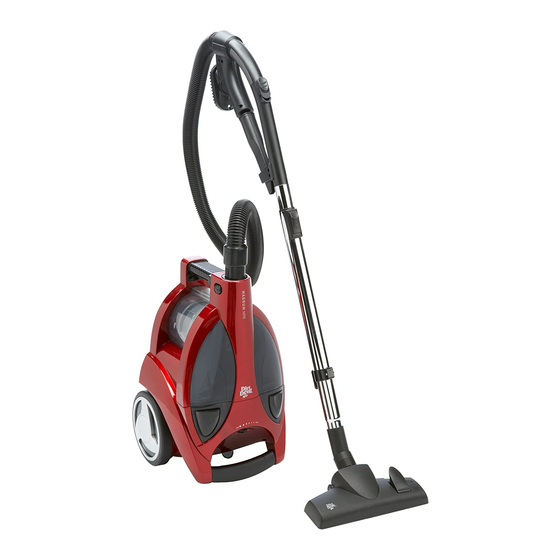
- Page 4 Übersicht über Ihren Magnum MPR Übersicht über Ihren Magnum MPR Vielen Dank! Es freut uns, dass Sie sich für den Bodenstaubsauger Magnum MPR entschieden haben! Wir wünschen Ihnen viel Freude mit dem Gerät und danken Ihnen für den Kauf! Geräteteile/Lieferumfang...
-
Page 5: Table Of Contents
Inhaltsverzeichnis 1 Sicherheitshinweise ..............6 zur Bedienungsanleitung ..................... zu den verwendeten Symbolen ................... zur Stromversorgung ....................zu Kindern ........................zur bestimmungsgemäßen Verwendung ..............falls das Gerät defekt ist ....................2 Auspacken und Anschließen........... 8 Auspacken........................Montieren........................Weitere Düsen (Zubehör) verwenden ................. 3 Bedienung ................. -
Page 6: Sicherheitshinweise
1 Sicherheitshinweise Sicherheitshinweise 1.1 zur Bedienungsanlei- Lesen Sie diese Bedienungsanleitung vollständig durch, tung bevor Sie mit dem Gerät arbeiten. Bewahren Sie die Anleitung gut auf. Falls Sie das Gerät an Dritte weitergeben, geben Sie auch die Bedienungsanlei- tung mit. Nichtbeachtung dieser Anleitung kann... -
Page 7: Zu Kindern
1 Sicherheitshinweise - Betreiben Sie das Gerät nur, wenn die auf dem Ty- penschild an der Unterseite des Gerätes angegebene elektrische Spannung mit der Spannung Ihrer Steck- dose übereinstimmt. Eine falsche Spannung kann das Gerät zerstören. „ 1.4 zu Kindern Lassen Sie das Gerät nicht unbeaufsichtigt und ver- wenden Sie es mit größter Vorsicht, wenn Kinder oder Per- sonen, die die Gefahren nicht einschätzen können, in der... -
Page 8: Falls Das Gerät Defekt Ist
Packen Sie das Gerät und alle Zubehörteile aus und über- prüfen Sie den Inhalt auf Vollständigkeit. Informationen zum Lieferumfang: ZSeite 4, „Übersicht über Ihren Magnum MPR“. ACHTUNG: Transportieren/versenden Sie das Gerät grundsätzlich immer in der Originalverpackung, damit es keinen Scha- den nimmt. -
Page 9: Weitere Düsen (Zubehör) Verwenden
2 Auspacken und Anschließen 4. Stellen Sie die Länge des Teleskoprohrs ein. Drücken Sie dazu die Teleskoprohr-Arretierung (Abb. 4/1) nach vorn (Abb. 4/a). Ziehen Sie dann das Teleskoprohr am Handgriff (Abb. 1/1) auf die gewünschte Länge (Abb. 4/ b). Zum Verriegeln lassen Sie die Teleskoprohr-Arretie- rung, während Sie ziehen, los. -
Page 10: Bedienung
3 Bedienung WARNUNG: Montieren Sie Düsen nur, wenn der Stecker aus der Steckdose ausgezogen ist. Der Bodenstaubsauger könnte versehentlich eingeschaltet werden. Zum Aufsetzen der Düsen gehen Sie wie folgt vor: 1. Schalten Sie das Gerät aus und ziehen Sie den Stecker aus der Steckdose. - Page 11 3 Bedienung 1. Stecken Sie die gewünschte Düse auf, ZKapitel 2.3, „Weitere Düsen (Zubehör) verwenden“. 2. Ziehen Sie das Kabel am Stecker (Abb. 1/16) bis zur gelben Markierung (Abb. 10/1) heraus. WARNUNG: Falls die rote Markierung (Abb. 10/2) sichtbar ist, ziehen Sie das Kabel wieder so weit ein, bis diese nicht mehr zu Abb.
-
Page 12: Ausschalten Und Stromkabel Aufrollen
3 Bedienung 3.2 Ausschalten und 1. Schalten Sie den Bodenstaubsauger am Ein-/Aus- Schalter (Abb. 14/1) aus und ziehen Sie den Stecker Stromkabel aufrollen aus der Steckdose. 2. Nehmen Sie den Stecker in die Hand und halten Sie ihn fest. WARNUNG: Beim Einziehen des Stromkabels kann dieses umher- schlingern, zur Stolperfalle werden oder Gegenstände umreißen. -
Page 13: Filter
4 Filter 1. Drücken Sie die Entriegelungstasten (Abb. 1/7) und öff- nen Sie den Gehäusedeckel (Abb. 1/10). 2. Heben Sie den Staubbehälter (Abb. 17/1) nach oben aus dem Bodenstaubsauger. 3. Zum Entleeren halten Sie den Staubbehälter tief über einen Mülleimer. 4. -
Page 14: Motorschutzfilter Prüfen
4 Filter 4.1 Lamellen-Zentralfilter 1. Schalten Sie das Gerät aus und beachten Sie die Hin- weise unter ZKapitel 3.2, „Ausschalten und Stromkabel reinigen aufrollen“. ZKapitel 2. Leeren Staubbehälter, 3.4, „Staubbehälter ausleeren“. 3. Entnehmen Sie den Lamellen-Zentralfilter (Abb. 20/1) nach oben aus dem Staubbehälter (Abb. 20/2). Abb. -
Page 15: Fehlerbehebung
5 Fehlerbehebung 4.3 Hygiene-Ausblasfilter 1. Schalten Sie das Gerät aus und beachten Sie die Hin- weise unter ZKapitel 3.2, „Ausschalten und Stromkabel austauschen aufrollen“. 2. Öffnen Sie die Ausblasfilter-Abdeckung (Abb. 24/1). Drücken Sie dazu die Verriegelung (Abb. 24/2) nach unten und ziehen Sie die Ausblasfilter-Abdeckung nach hinten. -
Page 16: Reinigung
6 Reinigung Reinigung WARNUNG: Bevor Sie das Gerät reinigen, schalten Sie das Gerät aus und ziehen Sie den Netzstecker. 6.1 Gehäuse reinigen Reinigen Sie das Gehäuse ausschließlich mit einem leicht angefeuchteten Tuch. Verwenden Sie keine Reinigungsmittel, Scheuermittel oder Alkohol, da diese das Gehäuse beschädigen können. 6.2 Filter reinigen Zum Reinigen der Filter: ZKapitel 4, „Filter“. -
Page 17: Garantie
9 Garantie Garantie 9.1 Garantiebedingungen Wir übernehmen für das von uns vertriebene Gerät eine Garantie von 24 Monaten ab Kaufda- tum. Innerhalb dieser Garantiezeit beseitigen wir nach unserer Wahl durch Reparatur oder Austausch des Gerätes oder des Zubehörs (Schäden an Zubehörteilen führen nicht automatisch zum Um- tausch des kompletten Gerätes) unentgeltlich alle Mängel, die auf Material- oder Herstellungsfehlern beruhen. - Page 18 An overview of your Magnum MPR Many thanks! We are pleased that you decided on the Magnum MPR cylinder vacuum cleaner! We hope you enjoy using your appliance and we would like to thank you for your purchase! Appliance parts/scope of delivery...
- Page 19 List of contents 1 Safety instructions..............20 Regarding the operating manual ................. 20 Regarding the symbols used ..................20 Regarding the power supply ..................20 Regarding children ..................... 21 Regarding intended use ....................21 If the appliance is defective ..................21 2 Unpacking and connecting ............
-
Page 20: Safety Instructions
1 Safety instructions Safety instructions 1.1 Regarding the Read this operating manual through completely before working with the appliance. operating manual Keep the operating manual safe. If you pass the appliance on to a third party, give them the operating manual as well. Non-compliance with these instructions can lead to serious injuries or damage to the appliance. -
Page 21: Regarding Children
1 Safety instructions „ 1.4 Regarding children People (including children) who are unable to safely operate the appliance on account of their physical, sensory or mental abilities or their lack of experience or knowledge should only use this appliance under surveillance or instruction by a responsible person. -
Page 22: Unpacking And Connecting
Unpack the appliance and all accessory parts and check that the contents are complete. Information regarding the scope of delivery, ZPage 18, "An overview of your Magnum MPR". ATTENTION: Always transport/send the appliance in its original packaging so that it does not become damaged. Keep the packing material for this purpose. -
Page 23: Using Other Nozzles (Accessories)
2 Unpacking and connecting 2.3 Using other nozzles Together with the floor nozzle just installed, you can expand the range of functions of your cyclinder vacuum (accessories) cleaner with other nozzles. „ The crevice nozzle and the furniture and upholstery brush are included as accessories in the scope of delivery. -
Page 24: Operating
3 Operating WARNING: Only assemble the nozzles if the plug has been removed from the socket. The cylinder vacuum cleaner could be switched on by accident. Proceed as follows to attach the nozzles: 1. Switch the appliance off and pull the plug out of the socket. - Page 25 3 Operating 1. Push on the desired nozzle, ZChapter 2.3, "Using other nozzles (accessories)". 2. Pull the cable holding the plug (Fig. 1/16) until the yellow mark (Fig. 10/1) is reached. WARNING: If the red mark (Fig. 10/2) is visible, then retract the cable again until it is no longer visible, ZChapter 3.2, Fig.10 "Switching off and retracting the power cable".
-
Page 26: Switching Off And Retracting The Power Cable
3 Operating 3.2 Switching off and 1. Switch off the cylinder vacuum cleaner using the on/off switch (Fig. 14/1) and pull the plug out of the socket. retracting the power cable 2. Take the plug in your hand and hold it firmly. WARNING: The power cable can whip around when being pulled in, it can also trip you or somebody else up or knock down... -
Page 27: Filters
4 Filters 1. Press the release buttons (Fig. 1/7) and open the housing cover (Fig. 1/10). 2. Lift the dust container (Fig. 17/1) up out of the cylinder vacuum cleaner. 3. When emptying the dust container, hold it low over a dustbin. -
Page 28: Cleaning The Central Laminar Filter
4 Filters 4.1 Cleaning the central 1. Switch the appliance off and observe the instructions under ZChapter 3.2, "Switching off and retracting the laminar filter power cable". 2. Empty the dust container, ZChapter 3.4, "Emptying the dust container". 3. Remove the central laminar filter (Fig. 20/1) by taking it up out of the dust container (Fig. -
Page 29: Replacing The Hygienic Blow-Out Filter
5 Correcting malfunctions 4.3 Replacing the hygienic 1. Switch the appliance off and observe the instructions under ZChapter 3.2, "Switching off and retracting the blow-out filter power cable". 2. Open the blow-out filter cover (Fig. 24/1). To do this, press the lock (Fig. 24/2) down and pull the blow-out filter cover back. -
Page 30: Cleaning
6 Cleaning Cleaning WARNING: Before you clean the appliance, switch off the appliance and remove the mains plug. 6.1 Cleaning the housing Only clean the housing with a slightly damp cloth. Do not use any cleaning agent, scouring agent or alcohol as these can damage the housing. -
Page 31: Warranty
9 Warranty Warranty 9.1 Warranty conditions We offer a warranty of 24 months from the date of purchase for the appliances we sell. Within this warranty period, we will remove all defects free of charge that are due to material or manufacturng faults, either by repair work or replacing the appliance or accessories, at our discretion (damage to accessory parts does not automatically lead to the entire appliance being replaced). - Page 32 Aperçu de votre Magnum MPR Aperçu de votre Magnum MPR Merci ! Nous sommes heureux de vous compter parmi les utilisateurs de l'aspirateur Magnum MPR ! Nous vous souhaitons beaucoup de plaisir à utiliser votre appareil et nous remercions de votre achat ! Parties de l'appareil / Contenu de la livraison 1 Poignée...
- Page 33 Sommaire 1 Consignes de sécurité.............. 34 relatives à ce mode d'emploi ..................34 Symboles utilisés......................34 Alimentation électrique ....................34 Remarques relatives aux enfants ................35 Utilisation conforme ..................... 35 Si l'appareil est défectueux..................36 2 Déballage et branchement ............36 Déballage ........................
-
Page 34: Consignes De Sécurité
1 Consignes de sécurité Consignes de sécurité 1.1 relatives à ce mode Veuillez lire attentivement et intégralement ce mode d'emploi d'emploi, avant de vous servir de l'appareil. Conservez précieusement ce mode d'emploi. Donnez toujours le mode d'emploi à toute personne se servant de l'appareil. -
Page 35: Remarques Relatives Aux Enfants
1 Consignes de sécurité „ 1.4 Remarques relatives Les personnes (y compris les enfants), qui ne sont pas en mesure de se servir de manière sûre de l'appareil, en aux enfants raison de leurs capacités physiques ou sensorielles, de leurs capacités mentales, de leur inexpérience ou d'un manque de connaissances, ne doivent pas utiliser cet appareil sans surveillance ou sans bénéficier des indications d'une personne responsable. -
Page 36: Si L'appareil Est Défectueux
Déballez l'appareil et tous ses accessoires, puis vérifiez que le contenu soit bien complet. Informations relatives au contenu de la livraison, ZPage 32, „Aperçu de votre Magnum MPR“. ATTENTION: Transportez et expédiez l'appareil uniquement dans son emballage d'origine afin d'éviter tout dommage. De ce fait, conservez précieusement l'emballage. -
Page 37: Utiliser Les Autres Suceurs (Accessoires)
2 Déballage et branchement 2.3 Utiliser les autres En plus du suceur universel, d'autres accessoires fournis vous permettent une plus large utilisation de votre suceurs (accessoires) aspirateur. „ Le suceur long et plat, ainsi que la brosse ronde sont fournis comme accessoires. Vous pouvez les ranger dans le compartiment accessoires (ill. -
Page 38: Emploi
3 Emploi Pour monter les accessoires, procédez comme suit : 1. Éteignez l'appareil et débranchez-le. 2. Retirez la brosse ou le suceur du manche télescopique (ill. 9/1). 3. Emboîtez la brosse ou le suceur voulu à l'extrémité basse du manche télescopique (ill. 9). 4. - Page 39 3 Emploi 1. Emboîtez le suceur voulu, ZChapitre 2.3, „Utiliser les autres suceurs (accessoires)“. 2. Tirez le cordon de l'enrouleur (ill. 1/16) jusqu'à voir la marque jaune (ill. 10/1). AVERTISSEMENT: Si vous voyez la marque rouge (ill. 10/2) , rentrez le cordon jusqu'à...
-
Page 40: Arrêt Et Rangement Du Cordon D'alimentation
3 Emploi 3.2 Arrêt et rangement du 1. Éteignez l'aspirateur grâce au bouton arrêt/marche (ill. 14/1), puis débranchez l'aspirateur. cordon d'alimentation 2. Prenez la fiche dans la main et tenez-la fermement. AVERTISSEMENT: En s'enroulant, le cordon d'alimentation peut faire trébucher des personnes ou arracher des objets. 3. -
Page 41: Filtre
4 Filtre 2. Retirez la poignée du bac à poussière (ill. 17/1) de l'aspirateur vers le haut. 3. Maintenez le bac à poussière à l'intérieur d'un sac poubelle afin de le vider. 4. Appuyez sur la touche de déverrouillage (ill. 18/1). Le fond (ill. -
Page 42: Vérifier Le Filtre De Protection Du Moteur
4 Filtre 4.1 Nettoyer le filtre 1. Éteignez l'appareil respectez consignes énoncées sous ZChapitre 3.2, „Arrêt et rangement du central à lames cordon d'alimentation“. 2. Videz le bac à poussière, ZChapitre 3.4, „Vider le bac à poussière“. 3. Retirez le filtre à lamelles central (ill. 20/1) du bac à poussière vers le haut (ill. -
Page 43: Remèdes En Cas D'anomalies
5 Remèdes en cas d'anomalies 4.3 Remplacer le filtre 1. Éteignez l'appareil respectez consignes énoncées sous ZChapitre 3.2, „Arrêt et rangement du HÉPA cordon d'alimentation“. 2. Ouvrez le couvercle du fitre HÉPA (ill. 24/1). Pour cela, poussez le verrouillage (ill. 24/2) vers le bas, puis retirez le couvercle du filtre HÉPA vers l'arrière. -
Page 44: Nettoyage
6 Nettoyage Nettoyage AVERTISSEMENT: Avant de nettoyer l'appareil, éteignez-le et débranchez-le. 6.1 Nettoyer le corps de l'aspirateur Nettoyer le corps de l'aspirateur uniquement avec un chiffon légèrement humide. N'utilisez en aucun cas des nettoyants, détergents ou de l'alcool car cela endommagerait le corps de l'aspirateur. 6.2 Nettoyer le filtre Pour nettoyer le filtre, cf. -
Page 45: Garantie
9 Garantie Garantie 9.1 Conditions de garantie Nous assurons une garantie de 24 mois sur votre appareil à compter de la date d'achat. Pendant la garantie, nous nous réservons le droit de réparer ou de remplacer l'appareil ou l'accessoire gratuitement (des accessoires endommagés n'impliquent pas forcément le remplacement de l'appareil) afin de remédier à... - Page 46 Royal Appliance Int. GmbH International Service Royal Appliance International Pièce de rechange service Royal Appliance Espana, SL GmbH OPM NANTÉS Enterprises Royal, Dirt Devil, Stellar Abt. Kundenservice 33 Rue du Bois Briand C/ Jazmin, 66 - 3° Itterpark 7-9 BP 61635...
- Page 47 Záruþní list Garancijski list Garantibevis Magnum MPR [M3889] Stempel und Unterschrift des Händlers / Stamp and sign of dealer / Cachet et signatur du vendeur / Stempel en handtekening van de handelaar / Sello y firma del distribuidor / / Stempel i podpis sprzedaj cego / Selgers stempel og underskrift / Razítko a podpis obchodníka / A keresked pecsétje és aláírása / Peþiatka a podpis predajcu / Žig i podpis trgovca / tampila úi semn tura /...
Need help?
Do you have a question about the MAGNUM MPR and is the answer not in the manual?
Questions and answers
how to open to reach the motor