Table of Contents
Advertisement
Quick Links
Advertisement
Table of Contents

Subscribe to Our Youtube Channel
Related Manuals for Allnet ALL2213

Summary of Contents for Allnet ALL2213
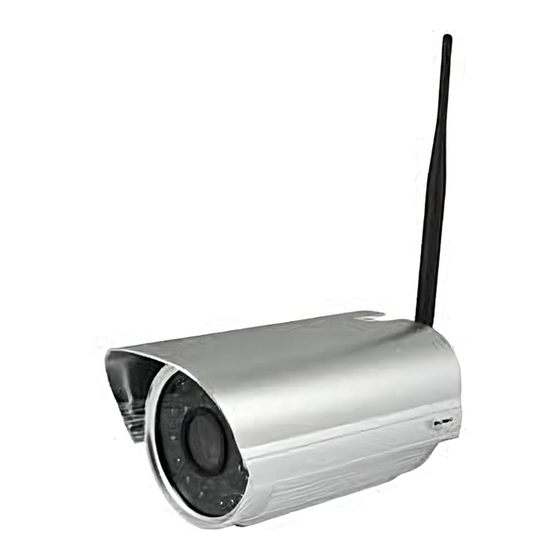
- Page 1 ALL2213 H.264 Outdoor IR WLAN P2P IP-Camera User´s Manual for other Browsers...
- Page 2 The content of this manual may be updated at irregular intervals without prior notice. © ALLNET GmbH München 2013 - Alle Rechte vorbehalten...
-
Page 3: General Description
The camera can be widely used such as product demonstrations, real-time monitoring, real-time recording and taking. It can also be at the scheduled time or event occurs, send pictures to the specified E-Mail, FTP server timely. © ALLNET GmbH München 2013 - Alle Rechte vorbehalten... -
Page 4: Specification
Environment Storage Temper. -20°C ~ 60° (-4°F ~ 140°F) Storage Humidity 0% ~ 90% non-condensing Windows,MAC OS Support Browser IE/Firefox/Safari/Google chrome or other standard browsers Phone iOS,Android Certification CE, FCC, RoHS © ALLNET GmbH München 2013 - Alle Rechte vorbehalten... -
Page 5: Installation And Settings
(2). IP camera connect to the Internet directly, if it’s a fixed IP which provided by ISP, just input it. If it’s a floating IP, then input the account and password which provided by ISP to dial-up connection. © ALLNET GmbH München 2013 - Alle Rechte vorbehalten... -
Page 6: Upnp Service
Step 1: Install from CD into computer,then generate a icon Step 2: Double click “Search IPCam”, camera IP & MAC list will be displayed. If you want to re-search, click “Refresh” again. © ALLNET GmbH München 2013 - Alle Rechte vorbehalten... - Page 7 3. SOFTWARE OPERATION (FOR CHROME FIREFOX SAFARI) Choose the suitable language, input correct user name and password, then click “Login” For example,if the factory default settings as below: IP Address:192.168.1.155 User name: admin Password: admin © ALLNET GmbH München 2013 - Alle Rechte vorbehalten...
- Page 8 VLC: If use VLC, should download the VLC player firstly. During the VLC installation, please must enable Mozilla plugin as the picture showes below: :Choose languages here :For mobile phone login :Click to login the other browsers interface as below: © ALLNET GmbH München 2013 - Alle Rechte vorbehalten...
-
Page 9: For Live Video
Capture: Clik to take snapshot, the picture be saved in the PC to it’s appointed path as JPG format, will pop-up the snapshot, right click the picture to save it. OSD Settings: Click it will pop-up the OSD settings interface, including OSD Color, Frequency, Image Mirror and Flip. © ALLNET GmbH München 2013 - Alle Rechte vorbehalten... - Page 10 Mirror and Flip Mirror: Select this icon to see the mirror image. Erase it, will back to normal. Flip: Select this icon to see the reversal image. Erase it, will back to normal. © ALLNET GmbH München 2013 - Alle Rechte vorbehalten...
- Page 11 OSD Settings: Click it will pop-up the OSD settings interface, including OSD Color, Frequency, Image Mirror and Flip. 3.2.3 Left Side Menu: There are some basic operation icons listed on the left side menu as below: PT Control: Not Applicable © ALLNET GmbH München 2013 - Alle Rechte vorbehalten...
-
Page 12: Params Settings
, select “Device”, it will show the basic information such as “Device ID”, “Device Client Version”, “Device Host Version”, “Description”, “IP Address”, “UPNP Status”, “DDNS Status” etc. Default device name is “IP Camera”, users can change the camera’s description here, picture as below: © ALLNET GmbH München 2013 - Alle Rechte vorbehalten... - Page 13 There are two option for stream, Main-Stream and Sub-Stream, users can set the stream based on the actual operation enviroument, for example, if the band width is good enough, set Main-Stream as Initial-Stream, or choose Sub-Stream will be better. Set the parameters of Main-Stream and Sub-Stream as below: © ALLNET GmbH München 2013 - Alle Rechte vorbehalten...
- Page 14 Image Quality: Better image quality, higher bit rate value, and it will take more bandwidth, the image quality parameters could be set as below: NOTE: When the device runs, only can select Bit Rate or Image Quality either. 4.3. Audio Click “Audio” to enter the interface: © ALLNET GmbH München 2013 - Alle Rechte vorbehalten...
-
Page 15: Motion Detection
Speaker Volume:Adjust the speaker volume 4.4. Motion Detection Click “Motion Detection” to enter the interface: ● Motion Detection: Set motion detection armed function ON/OFF. ● Sensitivity: Set detection sensitivity as Low, Middle, High, Higher, Highest. © ALLNET GmbH München 2013 - Alle Rechte vorbehalten... - Page 16 ● FTP Upload: Select it to enable FTP upload function, unselect to stop. (FTP details see 4.15) Click Save to save all the settings. Click Update to refresh the settings. Schedule:Select the day and time for motion detection © ALLNET GmbH München 2013 - Alle Rechte vorbehalten...
- Page 17 ● Alarm Input: Set alarm input ON/OFF, it supports NO/NC external alalrm device, choose the correct mode to make sure it works well, it refers to the I/O pin7(Input1). ● Action with Alarm These are actions optional for external alarm triggerred.. © ALLNET GmbH München 2013 - Alle Rechte vorbehalten...
- Page 18 Click Update to refresh the settings. 4.6. Network Click ”Network” to enter the interface: Network Type: There are three modes: Static Address, Dynamic Address, PPPoE. 4.6.1 Static Address Set network parameters manually © ALLNET GmbH München 2013 - Alle Rechte vorbehalten...
- Page 19 ● RTSP Port: Default is 554. NOTE: Please don’t change the Media Port, Web Port, phone Port, RTSP Port if no necessary. 4.6.3 PPPoE Set parameters here to enable PPPoE function. © ALLNET GmbH München 2013 - Alle Rechte vorbehalten...
- Page 20 1. Control Panel > Network Connections > Local Area Connections > Support > Details 2. Find the local connection icon from taskbar, left click it, choose Support > Details © ALLNET GmbH München 2013 - Alle Rechte vorbehalten...
-
Page 21: Wireless Lan
If you don’t know the DNS Server, you can set it the same as Gateway. 4.7. Wireless Lan Click ”Wireless Lan” to enter the interface: © ALLNET GmbH München 2013 - Alle Rechte vorbehalten... - Page 22 UPnP function of router is ON. ATTENTION: If your router doesn’t support UPNP function, it may show error information. So we recommend you do port forwarding manually in your router. © ALLNET GmbH München 2013 - Alle Rechte vorbehalten...
- Page 23 For the third party DDNS, you have to register an account firstly, keep the user, password, host, then input it. NOTE: Only one DDNS can be chosen, for example, if you use manufacturer’s DDNS, the 3rd one won’t work, if use the 3rd DDNS, the manufacturer’s one won’t work. © ALLNET GmbH München 2013 - Alle Rechte vorbehalten...
- Page 24 Every camera supports 16 users, and every user can be divided into three grades including Super Admin., Administrator, Operator, Visitor. Super Administrator:Every device has a super administrator, it has the highest permission, can set all the parameters. © ALLNET GmbH München 2013 - Alle Rechte vorbehalten...
-
Page 25: Date And Time
Visitor: The lowest permission, only can view live video, can’t control the pan/tilt, parameter settings etc. 4.13 Log Click “Log” to enter the interface: Record user information, including account, date, time, visitor IP address etc. 4.14. Date&Time Click “Date&Time” to enter the interface: © ALLNET GmbH München 2013 - Alle Rechte vorbehalten... - Page 26 Time Mode: Can choose PC Time or NTP Time. NTP Server: Choose the relevant NTP sever when set time mode as NTP Time. 4.15. E-mail(SMTP) Click “E-mail(SMTP)” to enter the interface: © ALLNET GmbH München 2013 - Alle Rechte vorbehalten...
- Page 27 SMTP Port: The sender’s SMTP Port, usually is 25, some SMTP server have its own port, such as the smtp port for Gmail is 465. Auth User: Verify the user settings SMTP User: Set sender’s user name. SMTP password: Set sender’s password. © ALLNET GmbH München 2013 - Alle Rechte vorbehalten...
- Page 28 Upload Folder: Set the path of remote FTP server. Make sure that the folder you plan to store images exists. For camera couldn’t create the folder itself. Also, the folder must be erasable. FTP Mode: It supports standard (POST) mode and passive (PASV) mode. © ALLNET GmbH München 2013 - Alle Rechte vorbehalten...
- Page 29 NOTE: Only alarmed, there will be 3 snapshots sent to the FTP server every 1 second. 4.17.P2P We strongly recommend to change the P2P-Password to secure the access to the camera. © ALLNET GmbH München 2013 - Alle Rechte vorbehalten...
- Page 30 Enable Pre-record: Set Pre-recording function(Record the video before alarm triggered). Pre-record Time: Set the Pre-recording time, could be from 1 to 6 seconds. Record Stream: Choose the stream here. Manual Rec:open or close Manual Record Pack Time:Choose the record time © ALLNET GmbH München 2013 - Alle Rechte vorbehalten...
- Page 31 ● Upgrade Device Web UI: Click “Choose File”, choose the correct Web UI file for upgrade, then click “Start”. NOTE: Please use the correct upgrade file, must keep the power on when upgrading, wired mode suggested, because wrong operation or incorrect upgrade file maybe damage the device. © ALLNET GmbH München 2013 - Alle Rechte vorbehalten...
-
Page 32: Frequently Asked Questions
Sometimes the IP camera images cannot be displayed properly because of different graphics cards, the images appears to be green or other colors, then you should run the programme “Config.exe” from the downloaded OCT files. © ALLNET GmbH München 2013 - Alle Rechte vorbehalten... - Page 33 Possible Reason 1: The PC or IP Camera can’t connect to the internet. Solution: Check the internet connection and settings. Possible Reason 2: Port forward is not set in router. Solution: Set the port forward of extranet in router correctly. © ALLNET GmbH München 2013 - Alle Rechte vorbehalten...
-
Page 34: Obtaining Technical Support
NOTE: Some old version cameras can’t be upgraded to the latest version, that’s not only the software difference, but also the hardware difference. If you can’t make sure of it, please contact with our technical support team directly. © ALLNET GmbH München 2013 - Alle Rechte vorbehalten... - Page 35 The safety advice in the documentation accompanying the products shall be obeyed. The conformity to the above directive is indicated by the CE sign on the device. The Allnet ALL2213 conforms to the Council Directives of 1999/5/EC. This equipment meets the following conformance standards:...
Need help?
Do you have a question about the ALL2213 and is the answer not in the manual?
Questions and answers