
Subscribe to Our Youtube Channel
Related Manuals for Joyner JNSZ650DL


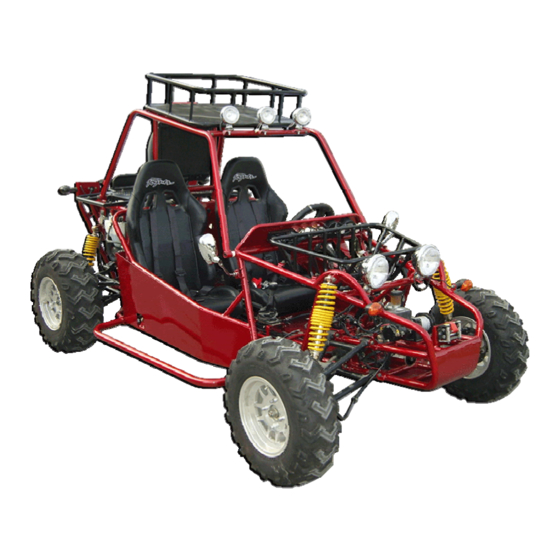
Summary of Contents for Joyner JNSZ650DL
- Page 1 Owner’s manual JNSZ650DL Parts manual READ THIS MANUAL CAREFULL Y IT CONTAINS IMPORTANT SAFETY INFORMATION. MINIMUM RECOMMENDED OPERATOR AGE...
- Page 2 Should warranty service be required on your JNSZ650DL during the 90 days warranty period, please contact your nearest authorized dealer for repairs. What is not covered under this warranty This warranty does not cover any seller vehicle that has been subjected to: a.
-
Page 3: Table Of Contents
Seller has the right to make changes without notice. CONTENTS OWNER’S MANUAL Page FOREWORD------------------------------------------------------------------------------------------------------------------------------------ 3 A FEW WORDS ABOUT SAFETY--------------------------------------------------------------------------------------------------------- 4 IMPORTANT SAFETY INFORMATION------------------------------------------------------------------------------------------------- 5 SAFETY LABELS------------------------------------------------------------------------------------------------------------------------------ 7 ARE YOU READY TO DRIVE? ------------------------------------------------------------------------------------------------------------ 8 IS YOUR VEHICLE READY TO DRIVE? --------------------------------------------------------------------------------------------- 10 SAFE DRIVING PRECAUTIONS -------------------------------------------------------------------------------------------------------- 12 SPECIFICATIONS ----------------------------------------------------------------------------------------------------------------------------14 OPERATIONS ------------------------------------------------------------------------------------------------------------------------------------15... -
Page 4: Foreword
FOREWORD Thank you for choosing JOYNER Go-kart. We hope you will have fun with it. Before you start to operate the Go-Kart, please read through this Owner’s Manual carefully as it contains important safety and maintenance information. Failure to follow the warnings contained in this manual can result in serious injuries. -
Page 5: A Few Words About Safety
A FORWORDS ABOUT SAFETY In order to keep everyone safe, you must take responsibility for the safe operation of your Go-Kart. To help you make informed decisions about safety, we have provided operating procedures and other information on labels and in this manual. This information alerts you to potential hazards that could hurt you or others. -
Page 6: Important Safety Information
IMPORTANT SAFETY INFORMATION Your Go-Kart will provide you with many years of service and pleasure. Providing you take responsibility for your own safety and understand the challenges you can meet while driving. There is a lot you can do to protect yourself when you drive. You’ll find many helpful recommendations throughout this manual. - Page 7 your personal abilities or faster than conditions warrant. Remember that alcohol, drugs, fatigue, and inattention can significantly reduce your ability to make good judgments and driver safely. Don’t Drink and drive Alcohol and driving don’t mix. Even one drink can reduce your ability to respond to changing conditions, and your reaction time gets worse with every additional drink.
-
Page 8: Safetylabels
SAFETYLABELS This section presents some of the most important information and recommendations to help you drive your Go-Kart safely, please take a few moments to read these pages. The labels are considered permanent parts of the Go-Kart. If a label comes off or becomes hard to read, contact your dealer for warning labels replacements. -
Page 9: Are You Ready To Drive
ARE YOU READY TO DRIVE? Before each drive, you need to make sure you and your Go-Kart are both ready to drive. To help get you prepared, this section discusses how to evaluate your driving readiness, what items you should check on your Go-Kart, and adjustments to make for your comfort, convenience, or safety. - Page 10 Make sure you understand all the safety messages. ■ Know how to operate all the controls. ■ Never drive this Go-kart if under 16 years old. ■ Before each drive, be sure: You feel well and are in good physical and mental condition. ■...
- Page 11 Drive Training Developing your driving skills is an on-going process. Even if you have driven other Go-Karts, take time to become familiar with how this Go-Kart works and handles. Practice driving the Go-Kart in a safe area to build your skills. Do not drive in rough terrain until you get accustomed to the Go-Kart’s controls, and feel comfortable with its size and weight.
-
Page 12: Is Your Vehicle Ready To Drive
Operating this Go-Kart after consuming alcohol or drugs can seriously affect your judgment, cause you to react more slowly, affect your balance and perception, and could result in serious injury or death. Never consume alcohol or drugs before or while operating this Go-Kart. IS YOUR VEHICLE READY TO DRIVE? Before each drive, it is important to inspect your Go-Kart and make sure any problems you find are corrected. -
Page 13: Safe Driving Precautions
Air Cleaner ■ Check the air filter. Replace it if needed. Leaks, Loose Parts ■ Walk around you Go-Kart and look for anything that appears unusual, such as a leak or loose cable. Lights ■ Make sure the headlight, brake light and tail light are working properly. Throttle ■... - Page 14 Operating this Go-Kart on paved surfaces may seriously affect handling and control of the Go-Kart, and may cause the vehicle to go out of control. Never operate the Go-Kart on any paved surfaces, including sidewalks, driveways, parking lots and streets. When driving off-road, also remember to always obey local off-road driving laws and regulations.
-
Page 15: Specifications
Operating this Go-Kart at excessive speeds increases your changes of losing control of the Go-Kart, which can result in an accident. Always drive at a speed that is proper for your Go-Kart, the terrain, visibility and other operating conditions, and your experience. Use Care on Unfamiliar or Rough Terrain Before driving in a new area, always check the terrain thoroughly. -
Page 16: Operations
Rear Track ---------------------------------------------------------------------------------------------51in. (1300mm) Ground Clearance ------------------------------------------------------------------------------------ 11in. (280mm) ENGINE Type --------------------------------------------------------------------------------- 2-Bore,4-Stroke, Liquid-cooled Bore x Stroke -------------------------------------------------------------------------------------------- 76mm×71mm Displacement ------------------------------------------------------------------------------------------------------ 644 cc Compression ratio ------------------------------------------------------------------------------------------------8.4:1 Carburetor ------------------------------------------------------------------------------------ BJH101E or CSH101E Max Power --------------------------------------------------------------------------------------------20.6kw/5300rpm Maximum Torque ---------------------------------------------------------------------------44/2700~3300Nm/r/min Starting ----------------------------------------------------------------------------------------------------------- Electric Ignition ------------------------------------------------------------------------------------------------------------- C.D.I Lubrication -------------------------------------------------------------------------------------------- Force &... - Page 17 The operator must know how to stop this machine before starting and driving it. a. Throttle The right foot pedal is the throttle that controls the Go-Kart speed. To disengage the clutch at any time, allow the throttle to return to the idle position. (See Fig. 1) Each time prior to starting the engine, check the throttle assembly to ensure that when pedal is pushed all the way forward the assembly is working smoothly and returns to idle when released.
- Page 18 put the shift lever in neutral 3. Insert the key into the ignition-switch If the engine is cold; 1. Pull the choke out fully Figure 2 2. Press down the clutch pedal 3. Turn the key clockwise to the “on” position. Release the key and the clutch pedal when the engine starts.
- Page 19 properly. With the engine running, turn the key counterclockwise to the “off” position for the engine to shut down. B. Pre-Drive Inspection Perform this pre-drive inspection everyday before driving vehicle. If not performed, serious damage to the vehicle or personal injury may result. 1.
- Page 20 and the passenger should not exceed 180kg or 400Ibs. Seat Adjustment The seat must always be securely fastened in the position which best allows the operator control of the foot pedals, steering wheel, and the remote stop key. Figure 4 Pull seat adjustment handle upward to disengage seat slide.
-
Page 21: Service Instructions
2. Press down the clutch pedal fully. 3. Operate the shift lever as to change gearshift from 1 to 4 and reverse smoothly. 4. First, tighten bolt 1 with thread glue. Then second, tighten bolt 2 with thread glue. (See Fig. 7) Figure 7 G. - Page 22 NOTE: Service more often under dusty conditions. Remove cleaner cover by bolt b. Remove air cleaner element 1 (See Fig. 9) Check the paper filter, if the filter is dusty, please replace with a new one. Figure 9 B. Engine Lubrication Engine oil replacement You must change the oil in the crankcase after the first 5 hours of operating of your new engine and after 10 hours of use thereafter.
- Page 23 engine oil as above. b. Check the engine oil level, change if necessary from d as above. C. Transmission lubrication You must change the oil in the transmission after the first 5 hours of operating of your new engine and after 10 hours of use thereafter. That will insure proper lubrication of internal parts and prevent costly repairs due to excessive wear.
- Page 24 into the radiator (approximately 4000 ml). The lack of coolant will cause the engine to overheat. This can cause engine damage. The coolant should always be topped up, since the coolant can evaporate. Figure 16 Figure 17 Put the vehicle on level ground. 1.
-
Page 25: Spark Plug
New and used coolant can be hazardous. Children and pets may be harmed by new or used coolant. Continuous or brief contact with coolant may be dangerous for your health. Keep new and used coolant away from the children and pets. To minimize your exposure to new and used coolant, wear a long sleeve shirt and moisture-proof gloves(such as dishwashing gloves) when you change coolant. -
Page 26: Repair
applications. It’s not necessary to disassemble the screw unless the carburetor needs to be replaced. Prepare a 50r/w tachometer before adjustment. a. Warm up the engine (5~10min) b. Tighten the air screw gently. Back out 2-3/8 turns counter clockwise (see Fig. 19). Connect the tachometer, adjust the throttle to limit the idle speed. - Page 27 (See Fig. 20) Tighten the nuts after replacing the wheels. Figure 20 B. Rear Wheel Replacement Do not disassemble the center castle nuts when you replace the front wheels. (See Fig. 21) Tighten the nuts after replacing the wheels. Figure 21 REPAIR C.
- Page 28 you’ll need to remove rear suspension, driven shaft, clutch cable, muffler, wires and rubber cushion that is in the middle of transmission and frame. 1. Remove bolt M14 (See Fig. 22) Figure 22 2. Remove two bolts (M12) on the starter (See Fig. 23), Remove the starter (See Fig. Figure 23 Figure 24 REPAIR...
- Page 29 Figure 25 Figure 26 5. Remove two bolts(M8) on the low mud plate of transmission (See Fig. 27, 28) Figure 27 Figure 28 6. Remove the mud plate (See Fig. 21). Figure 29 REPAIR 7. Remove the transmission (See Fig. 30, 31)
- Page 30 Figure 30 Figure 31 8. Remove upper mud plate (See Fig. 32) Figure 32 REPAIR 9. Insert a shaft into the hole (See Fig. 33). Remove six bolts on the pressing plate of...
- Page 31 clutch (See Fig. 34) Figure 33 Figure 34 10. Remove the pressure plate (See Fig. 35). Remove the friction disc of clutch (See Fig. 36, 37) Figure 35 Figure 36 Figure 37 REPAIR 10. Insert a special shaft into the hole, fix new friction plate on the flywheel of engine...
- Page 32 (See Fig. 38, 39). Figure 38 Figure 39 11. Fix pressure plate of clutch. Two bolts with “Y.G” mark must be inserted into two anchor hole (See Fig. 40) . Tighten six bolts with torque 30 N.m (See Fig. 41) Figure 40 Figure 41 12.
- Page 33 D. Timing chain 1. Fix the timing chain n the sprocket of crankshaft. Mark A on the sprocket of crankshaft must be in the middle of double white links of timing chain. 2. Fix the guide plate.。 3. Fix the tensional plate. 4.
- Page 34 E. Distributor replacement 1 turn around the crank shaft (See Fig. 44), direct the line on the pulley of crankshaft straight to the 0 degree line on the cover of engine (See Fig. 46) Figure 44 Figure 45 Figure 46 2.
- Page 35 REPAIR 3. Check the anchor hole, if it is not on the direction shown by Fig. Repeat above 1 as to obtain the hole direction shown by Fig. 3. Insert the screwdriver into the hole, turn the drive of oil pump shaft untill parallel to the crankshaft (See Fig.
- Page 36 REPAIR 5. Insert the distributor slowly to the hole (See Fig. 51). Confirm the direction of distributor is as per the figure (See Fig. 52, 53). Tighten the nut of distributor housing. Figure 51 Figure 52 Figure 53 6. Fix the cover of the distributor (See Fig. 44). Figure 42...
- Page 37 REPAIR 7. Check the spark timing. Adjust if need as followings 1. Loosen the nut of the distributor housing 2. Turn the distributor slowly. Increase the spark timing by counterclockwise turn. Decrease the spark timing by clockwise turn. F. Front Wheel Alignment a.
-
Page 38: Periodical Check And Service
PERIODICAL CHECK AND SERVICES The maintenance intervals in the following table are based upon average driving conditions. Driving in unusually dusty areas, require more frequent servicing. Time of service Initial Monthly Quarterly Yearly Item service Engine 1. Fan, driven belt 2. -
Page 39: Wiring Diagram
WIRING DIAGRAM...
Need help?
Do you have a question about the JNSZ650DL and is the answer not in the manual?
Questions and answers