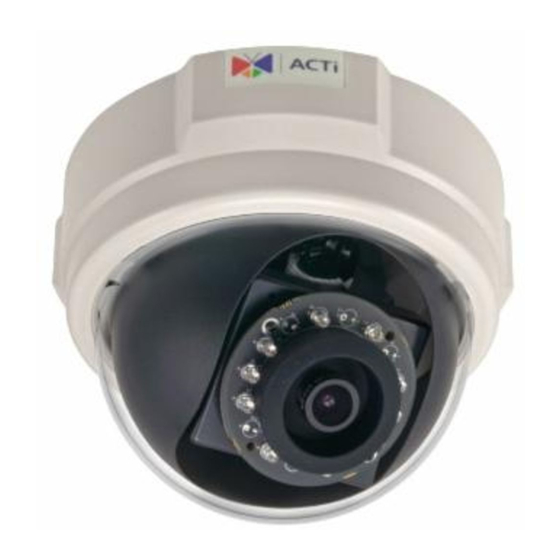
ACTi E54 Hardware User Manual
5mp indoor dome with d/n, ir, basic wdr,
fixed lens
Hide thumbs
Also See for E54:
- Hardware manual (16 pages) ,
- Hardware manual (31 pages) ,
- Installation manual (23 pages)

Subscribe to Our Youtube Channel
Related Manuals for ACTi E54


Summary of Contents for ACTi E54
- Page 1 5MP Indoor Dome with D/N, IR, Basic WDR, Fixed lens Hardware User’s Manual (PoE) Ver. 2012/12/12...
-
Page 2: Table Of Contents
E54 Hardware User’s Manual Table of Contents Precautions Introduction Package Contents ................4 Features and Benefits ..............5 Safety Instructions ................6 Physical description ................ 8 Installation Procedure ..............9 Ceiling Mount ................. 9 Wall Mount ................... 12 Adjust Viewing Angle and Focus ..........15 Basic Connections ................. -
Page 3: Precautions
E54 Hardware User’s Manual 0. Precautions Read these instructions You should read all the safety and operating instructions before using this product. Heed all warnings You must adhere to all the warnings on the product and in the instruction manual. Failure to follow the safety instruction given may directly endanger people, cause damage to the system or to other equipment. -
Page 4: Introduction
E54 Hardware User’s Manual 1. Introduction Package Contents Accessories Lens Focus Tuner Warranty Card Drill Template www.acti.com... -
Page 5: Features And Benefits
E54 Hardware User’s Manual Features and Benefits This is a cutting-edge digital video surveillance camera. It can compress and transmit real time images with outstanding image quality through a standard TCP/IP network. This camera is your best choice to build an intelligent IP surveillance system. -
Page 6: Safety Instructions
E54 Hardware User’s Manual Safety Instructions Don’t open the housing of the product Cleaning Disconnect this video product from the power supply before cleaning. Attachments Do not use attachments not recommended by the video product manufacturer as they may cause hazards. - Page 7 E54 Hardware User’s Manual Safety Check Upon completion of any service or repairs to this video product, ask the service technician to perform safety checks to determine if the video product is in proper operating condition. www.acti.com...
-
Page 8: Physical Description
E54 Hardware User’s Manual Physical description 1) Power LED LED light will light up while the power is on. LED light will light off after the unit has successfully completed the boot process. 2) Ethernet Port The IP device connects to the Ethernet via a standard RJ45 connector. Supporting NWAY, this IP device can auto detect the speed of local network segment (10Base-T/100Base-TX Ethernet). -
Page 9: Installation Procedure
E54 Hardware User’s Manual Installation Procedure Ceiling Mount Use the drill template, and drill a hole with φ35 on the ceiling Use the mounting plate and choose the correct three screw holes. Tighten the plate to ceiling with T4*20 screws (not to use screws other than flat heads) - Page 10 E54 Hardware User’s Manual Please make sure the screw is flat on the plate, protruding is incorrect. Connect cables through the hole on the ceiling and plate, or on the side of casing Fasten the camera to ceiling by turning clockwise direction...
- Page 11 E54 Hardware User’s Manual Insert the cables (Network) through the mounting plate and connect to the camera. Then use the little strap in bundled accessory to fasten the network cable. Done www.acti.com...
-
Page 12: Wall Mount
E54 Hardware User’s Manual Wall Mount Tighten wall mount bracket to the wall by 3 PAN Head Tapping screws Use the mounting plate and choose the correct three screw holes. Tighten the plate to wall mount bracket with M4*6 screws (not to use screws other than flat heads), and connect all necessary cables through the hole on the plate and wall mount kit www.acti.com... - Page 13 E54 Hardware User’s Manual Please make sure the screw is flat on the plate, protruding is incorrect. Insert the cables (power/Network/audio) through the mounting plate and connect to the camera. Then use the little strap in bundled accessory to fasten the network cable.
- Page 14 E54 Hardware User’s Manual Fasten the camera to wall mount kit by turning clockwise direction and done www.acti.com...
-
Page 15: Adjust Viewing Angle And Focus
E54 Hardware User’s Manual Adjust Viewing Angle and Focus Remove the front cover with counterclockwise direction. Based on the live view from the camera, adjust the viewing angle with pan and tilt direction. www.acti.com... - Page 16 E54 Hardware User’s Manual Attach the focus tuner on lens to adjust the focus of lens. Remove the lens focus tuner. Attach the dome cover to the camera and push it into the groove until it clicks. www.acti.com...
-
Page 17: Basic Connections
E54 Hardware User’s Manual Basic Connections Follow the procedures below to connect the IP device to the respective apparatuses. Please use a PoE (Power over Ethernet) supported switch or injector: 1) Connect your IP Camera to the PoE Switch / Injector by CAT5 or CAT6 cables with RJ45 connector. -
Page 18: Product Specification
E54 Hardware User’s Manual Product Specification • Device Device Type Fixed Indoor Dome Camera Image Sensor Progressive Scan CMOS Day / Night Minimum Illumination Color: 0.1 lux at F1.8 (30 IRE, 2400°K); B/W: 0 lux (IR LED on) Color to B/W switch... -
Page 19: Accessing Camera
E54 Hardware User’s Manual 2. Accessing Camera If you have DHCP server / router in your network: Many network server / routers are able to automatically provide IP addresses through DHCP. If you are using such a network, just plug in your computer and IP Camera into the network and your IP device will acquire network address by itself. - Page 20 E54 Hardware User’s Manual Please set the settings as below. IP address: 192.168. 0.xxx Subnet mask: 255.255.255. (NOTE: xxx should be a number from 1 to 254 except 100, which is used by the IP device. Please also...
- Page 21 E54 Hardware User’s Manual 6. After logging in, you will see the video from camera. To go to the main menu, click the “Setup” button on the top left. If you are using a single camera, this is enough to access the device.
- Page 22 E54 Hardware User’s Manual 10. Click “Apply” 11. Please go to System -> Save & Reboot, and click “Apply”. Internet Explorer will close after a few seconds. This is normal. 12. Wait for 30 seconds, and open IE again to connect to the IP.
Need help?
Do you have a question about the E54 and is the answer not in the manual?
Questions and answers