Table of Contents
Advertisement
Available languages
Available languages
Quick Links
Advertisement
Table of Contents

Related Manuals for Jensen JTA-325


Summary of Contents for Jensen JTA-325
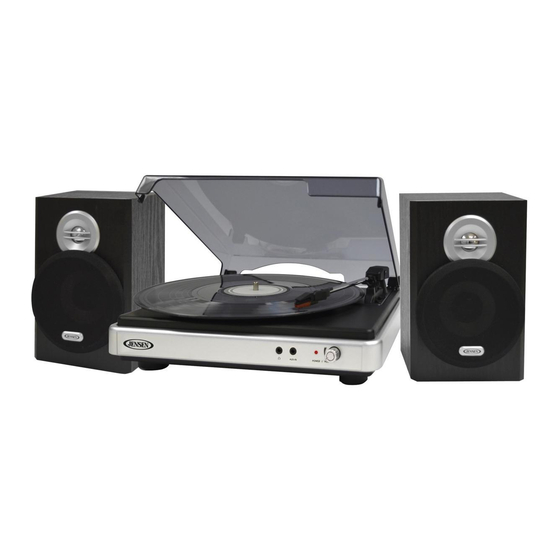
- Page 1 3-SPEED STEREO TURNTABLE WITH STEREO SPEAKERS AND SPEED ADJUSTMENT MODEL: JTA-325 USER MANUAL PLEASE READ THIS USER MANUAL COMPLETELY BEFORE OPERATING THIS UNIT AND RETAIN THIS BOOKLET FOR FUTURE REFERENCE.
-
Page 2: Important Safety Instructions
WARNING TO PREVENT FIRE OR SHOCK HAZARD, DO NOT USE THIS PLUG WITH AN EXTENSION CORD, RECEPTACLE OR OTHER OUTLET UNLESS THE BLADES CAN BE FULLY INSERTED TO PREVENT BLADE EXPOSURE. TO PREVENT FIRE OR SHOCK HAZARD, DO NOT EXPOSE THIS APPLIANCE TO RAIN OR MOISTURE. IMPORTANT SAFETY INSTRUCTIONS 1. - Page 3 from tip-over. 13. Unplug this apparatus during lightning storms or when unused for a long periods of time. 14. Power Sources - The appliance should be connected to a power supply only of the type described in the operating instructions or as marked on the appliance. Do not overload wall outlet.
-
Page 4: Compliance With Fcc Regulations
IMPORTANT NOTES Avoid installing the unit in locations described below: Places exposed to direct sunlight or close to heat radiating appliances such as electric heaters. Places subject to constant vibration. Dusty, humid or moist places. COMPLIANCE WITH FCC REGULATIONS This device complies with Part 15 of the FCC Rules. -
Page 5: Dear Jensen® Customer
The serial number of this product is found on its bottom cover. You should note the serial number of this unit in the space provided as a permanent record of your purchase to aid in identification in the event of theft of loss. Model Number: JTA-325 Serial Number: ____________________... -
Page 6: Accessories Included
ACCESSORIES INCLUDED Application CD USB cable User Manual 45 RPM Record Adapter GETTING STARTED SPEAKER CONNECTION 1. Plug the RCA plug of left speaker into the left speaker RCA socket with the “L” mark locates at back of the unit. 2. -
Page 7: Location Of Controls
LOCATION OF CONTROLS 1. 3.5mm Headphone Jack 2. 3.5mm AUX-IN jack 3. Power LED Indicator 4. Power On/Off / Volume Control Knob 5. Anti Shock Lock Down Screw 6. 45 RPM Record Adaptor 7. 33/45/78RPM Speed Selector 8. Auto Stop Switch 9. -
Page 8: Auxiliary Input
5. Lift the tone arm from the rest and slowly move it over the record. The turntable platter will begin spinning. 6. Place the tone arm down onto the record at the location that you want to play. 7. Adjust the volume to the desired level. 8. -
Page 9: Using Headphones (Not Included)
(3.)Rotate the POWER/VOLUME knob to turn off the system when you finish listening. Don't forget to switch off the power on your external device as well. USING HEADPHONES (NOT INCLUDED) Inserting the plug of your headphones into the Headphone jack will enable you to listen in private. - Page 10 3. Select “Edit” and then click “Audio Properties“ towards the bottom of the menu to select “Audio properties” interface. 4. In the Sound Recording field, click the pull down menu to select “ USB PnP Audio Device ” as Default device of sound recording.
- Page 11 5. Click the Volume button under the Sound recording tab to open ”Recording Control“ interface; 6. Adjust the line in volume to a level without distortion. You can play a record on the turntable and use the Sound Recorder to record a short clip of music for testing. The sound wave will show on the interface screen when recording.
- Page 12 3. Click “Preferences” at the bottom of the Edit menu, you can set the Devices, Quality, and various settings here. 4. Adjust the input and output volume by sliding the Input and Output Volume bars. Output Volume Input Volume...
- Page 13 5. Click the record button to start recording, left and right tracks will show on your computer screen. If you cannot see the sound waves appear on the Interface when recording, adjust the Input volume bar. 6. Use the Audacity control panel to record or listen the music you have recorded - Click button to start recording.
-
Page 14: Care And Maintenance
Note: Normally, Audacity will automatically locate the Lame file that you installed. However, if you change default directory of Lame program, you may need to manually locate it by using AudacityEditPreferenceLibraries and the click “Locate” button on computer screen to browse “lame_enc.dll” file where the directory you have installed. - Page 15 If the front panel becomes dirty or smudged with fingerprints it may be cleaned with a soft cloth slightly dampened with a mild soap and water solution. Never use abrasive cloths or polishes as these will damage the finish of your unit. CAUTION: Never allow any water or other liquids to get inside the unit while cleaning.
-
Page 16: Troubleshooting Guide
TROUBLESHOOTING GUIDE SHOULD YOU EXPERIENCE DIFFICULTIES IN THE USE OF THIS PLAYER PLEASE REFER TO THE FOLLOWING CHART OR CALL 1-800-777-5331 FOR CUSTOMER SERVICE. PROBLEM POSSIBLE CAUSE SOLUTION AC power cord is not plugged into a Plug the AC power cord into a wall wall outlet or the connector is not outlet and plug the connector into the plugged into the power supply jack... - Page 17 90 DAY LIMITED WARRANTY AND SERVICE VALID IN THE U.S.A. ONLY SPECTRA MERCHANDISING INTERNATIONAL, INC. warrants this unit to be free from defective materials or factory workmanship for a period of 90 days from the date of original customer purchase and provided the product is utilized within the U.S.A.
- Page 18 TORNAMESA ESTÉREO DE 3 VELOCIDADES CON ALTAVOCES Y AJUSTE DE VELOCIDAD MODEL: JTA-325 MANUAL DEL PROPIETARIO Por favor lea y observe cuidadosamente este manual de Instrucciones cuidadosamente antes de utilizar la unidad y reténgalo para futura referencia...
- Page 19 ADVERTENCIA PARA REDUCIR EL RIESGO DE INCENDIO O CHOQUE ELÉCTRICO, NO EXPONGA ESTE EQUIPO A LA LLUVIA O HUMEDAD. EXISTE ALTO VOLTAJE PELIGROSO PARA LA SALUD EN LA PARTE INTERIOR. NO ABRA EL GABINETE, REALICE EL MANTENIMIENTO SOLAMENTE CON LA AYUDA DE PERSONAL CALIFICADO PRECAUCIÓN RIESGO DE CHOQUE ELÉCTRICO...
- Page 20 suministrado no encaja en su tomacorrientes, consulte a un electricista para reemplazar el tomacorrientes obsoleto. 10. Proteja el cable eléctrico para que no sea pisado o pellizcado particularmente en los enchufes, en los receptáculos utilitarios, y en el lugar donde los enchufes salen del aparato. 11.
-
Page 21: Notas Importantes
NOTAS IMPORTANTES Evite instalar la unidad en los lugares siguientes: Lugares expuestos a la luz directa del sol o cerca de aparatos generadores de calor, por ejemplo, calentadores eléctricos. Lugares que reciben vibración constante. Lugares con mucho polvo o humedad. CUMPLIMIENTO CON LAS REGULACIONES DE LA COMISIÓN FEDERAL DE COMUNICACIONES (FCC POR SUS SIGLAS EN INGLÉS) Este dispositivo se conforma con la parte 15 de las reglas de la FCC. - Page 22 El número de serie de este producto se encuentra en la parte inferior de la unidad. Es recomendable anotar el número de serie en el espacio proporcionado para ese propósito como un registro permanente de compra y para identificación en caso de robo o pérdida. Número de Modelo: JTA-325 Número de Serie:...
-
Page 23: Accesorios Incluidos
ACCESORIOS INCLUIDOS CD de aplicación Cable USB Manual del usuario Adaptador para discos de 45 RPM PARA COMENZAR CONEXIÓN DE LOS ALTAVOCES 1. Enchufe el conector RCA del altavoz izquierdo en la toma RCA altavoz izquierdo con la marca "L" se localiza en la parte posterior de la unidad. 2. - Page 24 UBICACION DE LOS CONTROLES 1. Enchufe de 3.5mm para audífonos 2. Conector de 3.5mm entrada auxiliar 3. Indicador LED de encendido 4. Encendido Perilla de control / apagado / volumen. 5. Antichoque de bloqueo hacia abajo del tornillo. 6. Adaptador para discos de 45 rpm 7.
-
Page 25: Entrada Auxiliar
5. Levante el brazo del descansador y lentamente muévalo colocándolo encima del disco. Comenzará a girar el plato de la tornamesa 6. Coloque el brazo de tono encima del disco en la posición que usted quiera reproducir. 7. Ajuste el volumen al nivel deseado. 8. - Page 26 (2). La tornamesa no puede utilizarse mientras esté conectado el cable de entrada auxiliar, de modo que asegúrese de desconectar el cable de entrada auxiliar antes de utilizar la tornamesa. (3). Deslice el interruptor POWER ON / OFF para apagar el sistema cuando haya terminado de escuchar.
- Page 27 Seleccione "Editar" y luego haga clic en "Propiedades de audio" hacia la parte inferior del menú para seleccionar la interfaz "Propiedades de audio". En el campo Grabación de sonidos, haga clic en el menú desplegable para seleccionar "Controlador de Audio USB" como dispositivo predeterminado de grabación de sonido.
- Page 28 5. Haga clic en el botón de volumen en la pestaña de grabación de sonido para abrir la interfaz "Control de grabación". 6. Ajuste la línea de volumen a un nivel sin distorsión. Puede reproducir un disco en la tornamesa y utilizar la grabadora de sonidos para grabar un clip breve de música como prueba.
- Page 29 3. Haga clic en "Preferencias" en la parte inferior del menú Editar, aquí puede hacer varios ajustes como Dispositivos, Calidad y varios. 4. Ajuste el volumen de entrada y salida deslizando las barras de volumen de entrada y salida. Output Volume Input Volume...
- Page 30 5. Haga clic en el botón de grabación para iniciar la grabación, en la pantalla de su computadora aparecerán las pistas a la izquierda y derecha Si no aparecen las ondas de sonido en la Interfaz cuando esté grabando, ajuste la barra de volumen de Entrada.
- Page 31 3. Haga doble clic en "Lame_v3.99.3_for_windows.exe" archivo bajo la carpeta de "Plug-ins" para empezar a instalar el programa. Nota: Normalmente, Audacity localizará automáticamente el archivo Lame que usted instaló. Sin embargo, si cambia el directorio predeterminado del programa Lame, puede que tenga que buscarlo manualmente mediante el uso de Audacity Edit Preference Libraries y el clic en "Buscar"...
- Page 32 Limpieza de la unidad Para prevenir incendios, fuego o descarga eléctrica, desconecte la unidad de la fuente de emergía AC cuando la limpie. El acabado de la unidad puede limpiarse con un paño de limpieza, al igual que otros muebles.
-
Page 33: Solucionador De Problemas
También puede usar un jabón suave y agua tibia para lavar sus discos y quitar el exceso de polvo y suciedad que se acumulan con el paso del tiempo. Use un paño de microfibras cuando lave y seque el agua de los discos después de lavarlos. NOTA: Recuerde: la mejor limpieza del mundo solo quita el polvo y la suciedad. - Page 34 En Spectra, la responsabilidad ambiental y social es uno de los valores fundamentales de nuestra empresa. Nos dedicamos a la continua implementación de iniciativas responsables con el objeto de conservar y mantener el medio ambiente a través del reciclaje responsable. Por favor visítenos en http://www.spectraintl.com/green.htm para mayor información sobre las iniciativas de...
- Page 35 EXHIBIDO arriba, por favor incluya una prueba de compra (recibo de caja registradora con fecha), para que podamos determinar su elegibilidad para el servicio de garantía y reparación de la unidad sin costo. También incluya una nota con una descripción explicando en qué forma la unidad es defectuosa. Un representante de atención al cliente tal vez deba contactarlo en relación al estado de su reparación, por lo tanto incluya su nombre, dirección, número de teléfono y dirección de correo electrónico para acelerar el proceso.
Need help?
Do you have a question about the JTA-325 and is the answer not in the manual?
Questions and answers