Table of Contents
Advertisement
Quick Links
Gourmet Outdoor Grilling
WARNING
For Outdoor Use Only (outside any enclosure)
WARNING
WARNING
Before visiting your local retailer, call our customer service department at 1-866-994-6390 from 9:00
DO NOT RETURN YOUR GRIDDLE TO THE STORE
am to 5:00 pm Eastern time, Monday through Friday.
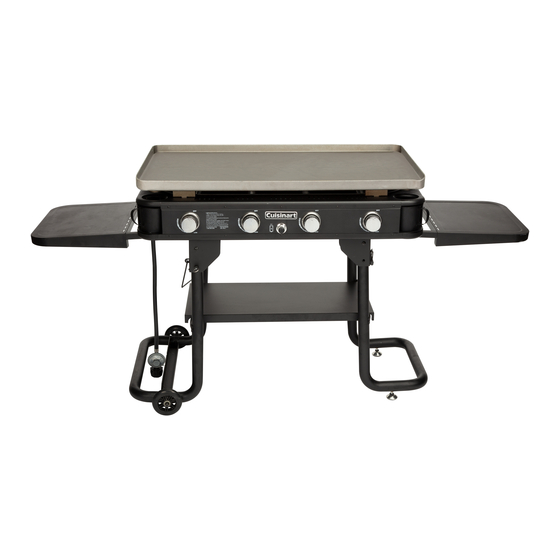
36" Four Burner Gas Griddle
Model NO: CGG-0036
DANGER
Never operate this appliance unattended.
WARNING
Check for leaks every time prior to lighting the griddle, even
if purchased fully assembled. Gas leaks may cause a fire or
explosion. Please read the instructions on Page 19.
Advertisement
Table of Contents

Related Manuals for Cuisinart CGG-0036


Summary of Contents for Cuisinart CGG-0036
-
Page 1: Cover
36" Four Burner Gas Griddle Gourmet Outdoor Grilling Model NO: CGG-0036 WARNING For Outdoor Use Only (outside any enclosure) WARNING DANGER Never operate this appliance unattended. WARNING Check for leaks every time prior to lighting the griddle, even if purchased fully assembled. Gas leaks may cause a fire or explosion. -
Page 2: Table Of Contents
TABLE OF CONTENTS Cover …………….…………………………………….………...….………….………….….…………………..……..1 Table of Contents……………………………………….………...….………….………………..……….…….…..2 Safety Information…………………………………….………...….………….….………….……………..……..3 What’s in the Box……………….……………………………………….….......……….………..6 Assembly Preparation and Instructions………………………………………………….….….…..…..8 Folding Instructions…......……………………………………………….….….…..…17 Connecting Regulator to the Liquid Propane Tank…………………..…………………….…..18 Check for Leaks…………….…………………………………….……………...….….……………………...…...19 Liquid Propane Tank Information…………….…………………………………….……...….….…...…..20 Lighting Instructions………….…………………………………….……...….….…………………..…..…...21 Care and Maintenance……………………………….………………………………………..………….……...22 Troubleshooting …………………………………………………………………..….…………………..………...25 Parts List….……………..…..….……...…....……………..………………......26 Exploded View……………….……………………………………………….......……….………...27 Warranty………………………………………………………………………………………………………..………..28... -
Page 3: Safety Information
Please call 1-866-994-6390 for any assistance SAFETY INFORMATION IMPORTANT: ALL INSTRUCTIONS AND SAFEGUARDS ON THIS SECTION MUST BE FOLLOWED TO PREVENT FIRE, DAMAGE AND/OR INJURY. This griddle is for outdoor use only, and shall not be used in a building, garage, or any other enclosed area. Do NOT operate, light or use this appliance within 8 feet of walls, structures or buildings. - Page 4 SAFETY INFORMATION The LP gas cylinder used with this appliance must be: (a) Constructed and marked in accordance with the Specifications for LP-Gas Cylinders of the U.S. Department of Transportation (D.O.T.) or the National Standard of Canada, CAN/CSA-B339, Cylinders, Spheres and Tubes for Transportation of Dangerous Goods; and Commission, as applicable;...
- Page 5 SAFETY INFORMATION WARNING: This product can expose you to chemicals including Carbon Monoxide, which are known to the State of California to cause cancer and birth defects or other reproductive harm. For more information, go to www.P65Warnings.ca.gov. WARNING: We urge you to read this manual carefully and follow the recommendations enclosed. This will ensure you receive the most enjoyable and trouble-free operation of your new gas griddle.
-
Page 6: What's In The Box
Firebox Assembly Left Front Cart Leg Fixing Bracket Left Back Cart Leg Fixing Bracket Right Back Cart Leg Fixing Bracket Right Front Cart Leg Fixing Bracket Left Cart Leg Assembly Right Cart Leg Assembly Wheels Stationary Feet Cart Bottom Panel Side Table Assembly Propane Tank Bracket Griddle... - Page 7 HARDWARE PART DESCRIPTION PART DESCRIPTION Phillips Head Wheel Fixing Screw Nuts Feet Fixing Cart Leg Pin Nuts Cotter Pin Handle Screws M6 Flat Washer ASSEMBLY PREPARATION Some parts may contain sharp edges. Wear protective gloves if necessary. Read and follow all safety statements, warnings, assembly instructions and use and care instructions before attempting to assemble and use.
-
Page 8: Assembly Preparation And Instructions
ASSEMBLY INSTRUCTIONS Flip the firebox assembly upside down, with the knobs facing away. Attach the leg fixing brackets by screwing them in with the screws, as shown below. - Page 9 ASSEMBLY INSTRUCTIONS Slide the left cart leg assembly into the two leg fixing brackets. Align the holes, and slide the cart leg pins through the holes. Insert the cotter pins through the holes at the ends of the leg pins to secure. Rotate and stand the left leg up.
- Page 10 ASSEMBLY INSTRUCTIONS Rotate and stand the right leg up. Attach the wheels on the left leg assembly using the flat washers and the wheel fixing nuts.
- Page 11 ASSEMBLY INSTRUCTIONS Screw on the feet fixing nuts to the stationary feet, then twist those into place on the right leg. Tighten with a wrench to secure. Note: If your griddle feels wobbly or uneven, adjust the stationary feet until they are level on the ground, then use a wrench on the fixing nuts to secure in place.
- Page 12 ASSEMBLY INSTRUCTIONS Install the cart bottom panel by lining up the notches with the left side of the griddle first, and then let the right side fall in place. Use the handle screw to secure the shelf. Note: Use 2 people to flip the griddle body over.
- Page 13 ASSEMBLY INSTRUCTIONS Slide the side table assemblies into the corresponding slots on the left and right side of the griddle. Use the handle screws to secure the side tables.
- Page 14 ASSEMBLY INSTRUCTIONS Take the propane tank bracket and mount it to the tabs on the left side of the griddle. Insert the right side first, then the left side. THIS SIDE THIS SIDE SECOND FIRST Place the griddle plate on the firebox - line up the holes on the front of the griddle plate with the holes on the...
- Page 15 ASSEMBLY INSTRUCTIONS Place control knobs onto valve stems. Slide the grease cups into the openings on the front of the griddle, lining them up under the hole. Hook the cups onto the loops inside the openings.
- Page 16 ASSEMBLY INSTRUCTIONS Unscrew the starter button from the control panel and insert the included battery with negative side going in first. Your griddle is now fully assembled.
-
Page 17: Folding Instructions
FOLDING INSTRUCTIONS To collapse your griddle, begin by removing the griddle plate, side tables, and the cart bottom panel. Then flip the griddle body upside down. On the right back cart leg fixing bracket, pull the the silver ring to release pin and guide the right leg down. -
Page 18: Connecting Regulator To The Liquid Propane Tank
CONNECTING REGULATOR TO THE LP TANK 1. Check the tank valve to ensure it has proper external mating threads to fit the hose and regulator assembly provided (Type 1 connection per ANSI Z21.58b-2002). Fig. 1 2. Make sure all burner knobs are in the OFF position. 3. -
Page 19: Check For Leaks
CHECKING FOR LEAKS DANGER WARNING FOR YOUR SAFETY WHEN TO PERFORM A LEAK TEST: Ù Always perform leak tests outdoors Ù Every time prior to lighting the griddle, ONLY in a well-ventilated area. even if purchased fully assembled. Ù DO NOT smoke during leak test. Ù... -
Page 20: Liquid Propane Tank Information
L.P. TANK INFORMATION Never use a dented or rusted L.P. tank or cylinder with a damaged valve. L.P. cylinders are equipped with an O.P.D. (Overfilling Prevention Device). The device shuts off the flow of gas to a cylinder after 80% capacity is reached. This limits the potential for release of gas when the cylinder is heated, averting a fire or possible injury. -
Page 21: Lighting Instructions
LIGHTING INSTRUCTIONS WARNING: 1. Read all instructions before lighting. 2. Make sure the gas control knob is in “OFF” position. 3. Press and turn the knobs counterclockwise to the "HIGH" position. Press the ignition button. The ignition will click repeatedly while the button is pressed and light the burners. -
Page 22: Care And Maintenance
CARE AND MAINTENANCE Always check that the outdoor cooking appliance area is clear and free from combustible material, gasoline and other flammable vapors and liquids before lighting. Regularly check and clean the burner/venturi tubes for insects and insect nests. A clogged tube can lead to a fire beneath the griddle. - Page 23 CARE AND MAINTENANCE IGNITER In order to prevent cracking of the burner's ceramic igniter surfaces, never allow hard objects to the strike ceramic igniter. This will cause the burners to malfunction. Care should be taken when inserting or removing the griddle plate and accessories into or from the griddle.
- Page 24 CARE AND MAINTENANCE Cleaning Main Burner To prevent flash backs and good performance of burner, the procedure below should be followed at least once a month in late summer or early fall when spiders are most active or when your griddle has not been used for a period of time: 1.
-
Page 25: Troubleshooting
TROUBLE SHOOTING Many solutions given here can make your griddling experience safer and more enjoyable. You can also call consumer care department at 1-866-994-6390 from 9:00 am to 5:00 pm Eastern time, Monday through Friday for assistance. PROBLEM POSSIBLE CAUSE CORRECTIVE ACTION 1. -
Page 26: Parts List
REPLACEMENT PARTS PART DESCRIPTION PART NO Griddle Griddle Support Burner Assembly Burner Igniter Wire A Burner Igniter Wire B LP Tank Heat Shield Match Holder Burner Support Grease Cups Side Table Assembly Firebox Assembly Handle Screws Heat Shield Igniter Module Battery Cart Leg Pin Left Back Cart Leg Fixing Bracket... -
Page 27: Exploded View
REPLACEMENT PARTS... -
Page 28: Warranty
For FAQ’s and replacement parts, please contact us at grilling@thefulhamgroup.com. For our consumer care department, please contact us at grilling@thefulhamgroup.com or call 1-866-994-6390. Model # CGG-0036 North American Distributor: The Fulham Group Newton, MA 02466...
Need help?
Do you have a question about the CGG-0036 and is the answer not in the manual?
Questions and answers