Table of Contents
Advertisement
Assembly Instructions
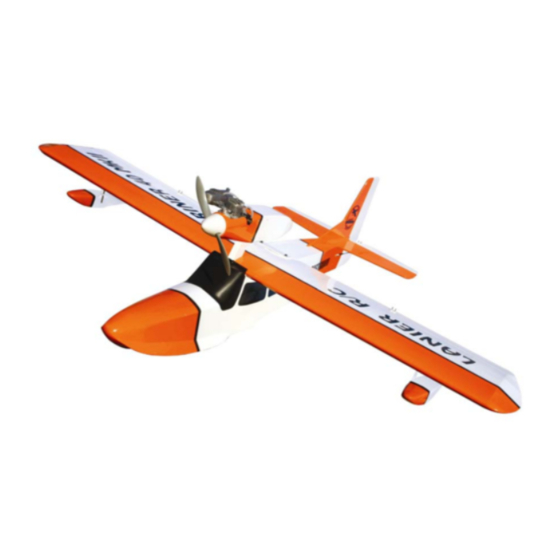
MARINER
.120
LANIER R/C
Wingspan....
Wing Loading...
80"
24 - 28 oz./sq. ft.
Fuselage Length...
Wing Area...
65"
1140 sq. in.
Engine Required ...
2-Stroke .91 to .120
Four stroke .120 to .180
Weight........
12 - 14 lbs.
WARRANTY .................. Lanier R/C is proud of the care and attention that goes into the manufacture of parts for
its model kits. The company warrants that for a period of 30 days, it will replace, at the buyers request, any parts or
material shown to the company's satisfaction to have been defective in workmanship or material at the time of
purchase.
No other warranty of any kind, expressed or implied, is made with respect to the merchandise sold by the company.
The buyer acknowledges and understands that he is purchasing only a component kit from which the buyer will
himself construct a finished flying model airplane. The company is neither the manufacturer of such a flying model
airplane, nor a seller of it. The buyer hereby assumes the risk and all liability for personal or property damage or
injury arising out of the buyers use of the components or the finished flying model airplane, whenever any such
damage or injury shall occur.
Any action brought forth against the company, based on the breach of the contract of sale to the buyer, or on any
alleged warranty there under, must be brought within/ year of the date of such sale, or there after be barred. This
one year limitation is imposed by agreement of the parties as permitted by the laws of the state of Georgia.
1
LANIER R/C, INC.- P O Box 458 - Oakwood, GA 30566 - Ph 770-532-6401
!
Copyright 2002 Lanier R/C, Inc.
Advertisement
Table of Contents

Related Manuals for Lanier R/C MARINER .120


Summary of Contents for Lanier R/C MARINER .120
- Page 1 12 - 14 lbs. WARRANTY ……………… Lanier R/C is proud of the care and attention that goes into the manufacture of parts for its model kits. The company warrants that for a period of 30 days, it will replace, at the buyers request, any parts or material shown to the company's satisfaction to have been defective in workmanship or material at the time of purchase.
-
Page 2: Wing Assembly
Do not use any type of accelerator to speed up the curing process; this will make the hinge brittle. LANIER R/C, INC.- P O Box 458 - Oakwood, GA 30566 - Ph 770-532-6401 Copyright 2002 Lanier R/C, Inc. - Page 3 Now push it up through the hole in the bottom of the wing. Tape the end of the lead to the LANIER R/C, INC.- P O Box 458 - Oakwood, GA 30566 - Ph 770-532-6401 Copyright 2002 Lanier R/C, Inc.
- Page 4 12. Locate a 4-40 x 5-1/2” wire pushrod threaded on both ends. Install the metal clevis, LANIER R/C, INC.- P O Box 458 - Oakwood, GA 30566 - Ph 770-532-6401 Copyright 2002 Lanier R/C, Inc.
- Page 5 18. Now mount the float assembly on the other wing panel as stated in the above steps. LANIER R/C, INC.- P O Box 458 - Oakwood, GA 30566 - Ph 770-532-6401 Copyright 2002 Lanier R/C, Inc.
- Page 6 21. Lay it on the wing. Trace around it and remove the covering inside the line. Remove ink LANIER R/C, INC.- P O Box 458 - Oakwood, GA 30566 - Ph 770-532-6401 Copyright 2002 Lanier R/C, Inc.
-
Page 7: Tail Assembly
1. Draw two parallel lines with a felt tip pen using the slot as a guide. LANIER R/C, INC.- P O Box 458 - Oakwood, GA 30566 - Ph 770-532-6401 Copyright 2002 Lanier R/C, Inc. - Page 8 Note: Do not glue on bottom dorsal fin yet. LANIER R/C, INC.- P O Box 458 - Oakwood, GA 30566 - Ph 770-532-6401 Copyright 2002 Lanier R/C, Inc.
-
Page 9: Tail Strut Installation
Bend the tabs at a slight angle to Now install the struts on the top side facilitate connecting the strut. LANIER R/C, INC.- P O Box 458 - Oakwood, GA 30566 - Ph 770-532-6401 Copyright 2002 Lanier R/C, Inc. -
Page 10: Hinging The Elevator And Rudder
Locate rudder control horn 4-1/4” from bottom edge of rudder. Make sure rudder and elevator control horns are on opposite sides. LANIER R/C, INC.- P O Box 458 - Oakwood, GA 30566 - Ph 770-532-6401 Copyright 2002 Lanier R/C, Inc. - Page 11 Use a servo to get the up to control horns on rudder and elevator. proper spacing required. Place a hex nut and clevis on each. LANIER R/C, INC.- P O Box 458 - Oakwood, GA 30566 - Ph 770-532-6401 Copyright 2002 Lanier R/C, Inc.
-
Page 12: Engine Mounting
Now strike a horizontal and vertical line. The engine mount will be centered on the firewall. LANIER R/C, INC.- P O Box 458 - Oakwood, GA 30566 - Ph 770-532-6401 Copyright 2002 Lanier R/C, Inc. -
Page 13: Cowl Installation
Use a Dremel drum sander to remove the fiberglass for the engine access hole. LANIER R/C, INC.- P O Box 458 - Oakwood, GA 30566 - Ph 770-532-6401 Copyright 2002 Lanier R/C, Inc. - Page 14 Adjust the cowl so that you have 3/32” clearance between it and the back plate. Now tape the cowl to the pod. LANIER R/C, INC.- P O Box 458 - Oakwood, GA 30566 - Ph 770-532-6401 Copyright 2002 Lanier R/C, Inc.
- Page 15 Mark front edge of tighten up the mounting bolts. engine mount on tape. LANIER R/C, INC.- P O Box 458 - Oakwood, GA 30566 - Ph 770-532-6401 Copyright 2002 Lanier R/C, Inc.
-
Page 16: Fuel Tank Assembly
Tape the connector lead to the mast. LANIER R/C, INC.- P O Box 458 - Oakwood, GA 30566 - Ph 770-532-6401 Copyright 2002 Lanier R/C, Inc. - Page 17 1. Locate the mast support. Notch off the forward lower edge of the mast to miss possible glue gob at the bulkhead/keel joint. LANIER R/C, INC.- P O Box 458 - Oakwood, GA 30566 - Ph 770-532-6401 Copyright 2002 Lanier R/C, Inc.
- Page 18 Make sure you have a good fillet removed to allow it to fit. of epoxy all around the edges to seal them. The LANIER R/C, INC.- P O Box 458 - Oakwood, GA 30566 - Ph 770-532-6401 Copyright 2002 Lanier R/C, Inc.
-
Page 19: Installing The Windshield
Vaseline to keep the water out. LANIER R/C, INC.- P O Box 458 - Oakwood, GA 30566 - Ph 770-532-6401 Copyright 2002 Lanier R/C, Inc. -
Page 20: Getting Ready To Fly
GETTING READY TO FLY The model should hang with the nose down at a LANIER R/C, INC.- P O Box 458 - Oakwood, GA 30566 - Ph 770-532-6401 Copyright 2002 Lanier R/C, Inc. -
Page 21: Charge The Batteries
RANGE CHECK THE RADIO 1. Ground check the range of your radio before the first flight of the day. Make this a practice. LANIER R/C, INC.- P O Box 458 - Oakwood, GA 30566 - Ph 770-532-6401 Copyright 2002 Lanier R/C, Inc. - Page 22 Adhesives Thin CA (cyanoacrylate) glue Medium CA (cyanoacrylate) glue Thick CA (cyanoacrylate) glue CA remover/debonder 6-minute epoxy 30-minute epoxy Z-42 Threadlock LANIER R/C, INC.- P O Box 458 - Oakwood, GA 30566 - Ph 770-532-6401 Copyright 2002 Lanier R/C, Inc.
- Page 23 Paper towels Wax paper Rubbing alcohol Felt tipped pen/pencil T-pins Toothpicks (optional) Moto-tool with cut-off wheel Tube: GE Silicone Sealer Lead weight LANIER R/C, INC.- P O Box 458 - Oakwood, GA 30566 - Ph 770-532-6401 Copyright 2002 Lanier R/C, Inc.
Need help?
Do you have a question about the MARINER .120 and is the answer not in the manual?
Questions and answers