Advertisement
Quick Links
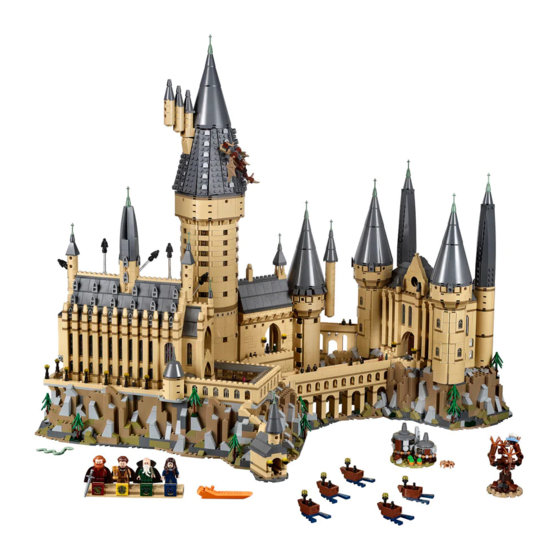
Light My Bricks: LEGO Hogwarts Castle 71043
Lighting Kit
The following page is the instructions for the
Light My Bricks LEGO Hogwarts
Castle (71043) LED light kit.
If you run into any issues, please refer to the
online troubleshooting guide.
To ensure a trouble-free installation of your light kit, please read and follow
each step carefully.
Please note: This page lists instructions for the LED light kit only. If you are
wishing to purchase the Light My Bricks LEGO Hogwarts Castle (71043) LED
Advertisement

Subscribe to Our Youtube Channel
Related Manuals for LIGHT MY BRICKS LEGO Hogwarts Castle 71043 Lighting Kit


Summary of Contents for LIGHT MY BRICKS LEGO Hogwarts Castle 71043 Lighting Kit
- Page 1 To ensure a trouble-free installation of your light kit, please read and follow each step carefully. Please note: This page lists instructions for the LED light kit only. If you are wishing to purchase the Light My Bricks LEGO Hogwarts Castle (71043) LED...
-
Page 2: Package Contents
light kit , please click here to view the product page Package Contents: 30x White 30cm Bit Lights 20x White 15cm Bit Lights 5x White Strip Lights 1x Green Strip Light 5x 6-Port Expansion Boards 3x 8-Port Expansion Boards 3x 12-Port Expansion Board 2x Flicker Effects Boards 6x 5cm Connecting Cables 5x 15cm Connecting Cables... - Page 3 6x Pearl Gold Round Plate 1×1 with open stud Spot Light LEGO Pieces 8x Black Plate 1×6 5x Black Plate 1×2 modified w Handle on End 5x Black Tile 1×1 w Clip 5x Black Plate 1×2 modified with stud jumper 2x Black Dish Inverted 3×3 Important things to note: Laying cables in between and underneath bricks...
- Page 4 CAUTION: Forcing LEGO® to connect over a cable can result in damaging the cable and light. Connecting cable connectors to Expansion Boards Take extra care when inserting connectors to ports of Expansion Boards. Connectors can be inserted only one way. With the expansion board facing up, look for the soldered “=”...
- Page 5 fit easily into a port connector, don’t force it. Doing so will damage the plug and the connector. Installing Bit Lights under LEGO® bricks and plates. When installing Bit Lights under LEGO® pieces, ensure they are placed the correct way up (Yellow LED component exposed). You can either place them directly on top of LEGO®...
- Page 6 OK, Let’s Begin! 1.) We will start by installing lights to the left section of the castle. Split the two sections and then disconnect the boat house entrance at the very front of the set.
- Page 7 Disconnect the two torch pieces from the front of the boat house then disconnect the two round plates from each side: Take out the following 2x Provided Black Round Plate 1×1 with open stud and 2x White 30cm Bit Lights. 2.) Carefully bend the bit light component from each light up on a 90 degree angle as shown below:...
- Page 8 Place the Bit Light facing up inside the bottom of one of the provided Black Round Plates. Secure the light in place by reconnecting the two round plates from one of the torch pieces over the top as shown below. Reconnect the torch section back to the brick with clip ensuring the cable is facing the back.
- Page 9 3.) Reconnect the boat house back to the front of the set ensuring the cables are laid behind and in between studs of the rear wall. 4.) Follow the below images to disconnect pieces around the entrance courtyard side wall...
- Page 10 Lay the two Bit Light cables from the boat house across and then up the wall through to the inside of the court yard. Hide the cables behind the tree pieces and stone pieces. Lay the cables in between studs before reconnecting pieces we removed earlier to close up the wall.
- Page 11 5.) Disconnect the following section to allow us to remove the two side window sections near the great hall clock then disconnect the 1×1 plates from the bottom of each section.
- Page 12 Take a White 30cm Bit Light and place it over the stud of the 1×1 plate. Secure it in place by reconnecting the section over the top. Repeat this step to install another White 30cm Bit Light to the other side. 6.) Reconnect the left section and then thread the cable through the space of...
- Page 13 the right window as shown below: Take the right section and thread the cable through the space of the right window before reconnecting this, followed by middle section we removed earlier...
- Page 14 7.) Take a 6-Port Expansion Board and connect the bit lights from the front of the boat house as well as from either side of the clock to it. Test the lights we have installed so far by connecting the USB Power Cable to a spare port on the expansion board.
- Page 15 Disconnect the USB Power Cable and proceed to the next step. 8.) Remove the following pieces along the rear wall of the courtyard. Take a 30cm Connecting Cable and a 50cm Connecting Cable and connect one end of each cable to spare ports on the 6-port expansion board.
- Page 16 Take both connecting cables and thread them over to the other side of the castle as shown below. Turn the set over and pull them out from the other side and ensure they are both slipped down the following space in between walls.
- Page 17 Lay both cables down in between studs before reconnecting pieces we removed earlier surrounding the rear wall. Ensure the components and cables are all neatly tucked into the sides so they are not obviously seen from above.
- Page 18 9.) We will now light up the lamps running along the left side of the castle. Starting with the first three, disconnect the following section which they sit on then disconnect the black lamp posts as well as trans yellow round plates. Take 2x White 30cm Bit Lights and install them to the first two lamps by placing the bit light directly over the black lamp post and securing it in pace by reconnecting the trans yellow round plate over the top.
- Page 19 help conceal the wiring. Reconnect the two lamps to the base. Take a White 15cm Bit Light and install it to the third lamp post then reconnect this back to the base. Reconnect this whole section back to the outside of the great hall then lay the...
- Page 20 three cables down toward the left side as shown below: 10.) Disconnect the next section along where the next three lamp posts are connected to. Take 3x White 15cm Bit Lights and install these to the lamps, following the same method used in previous step.
- Page 21 11.) Disconnect the two sections which the remaining three lamp posts are connected to then install another 3x White 15cm Bit Lights to them as per below except this time, ensure the cables are facing directly behind rather than toward the left...
- Page 22 12.) Take a 12-Port Expansion Board and connect all nine light cables to it starting with the first ones we installed to the first ports on the right of the board.
- Page 23 Take a 15cm Connecting Cable and connect it to the far left port on the expansion board. Take your USB Power Cable and connect it to the next port along. 13.) Disconnect the three lamps on left side then neaten up cabling by first grouping the first six bit light cables together closest to the expansion board and then folding and twisting them around each other a few times so they bunch up nicely together.
- Page 24 Reconnect the three left lamp posts then group the cables closest to the expansion board and then fold and twist them around each other a few times then flatten the cables. Secure the cables underneath the plate section below...
- Page 25 then tuck the cables inside the following space underneath. Tuck in any remaining excess cables to prevent them from being too obviously seen from the outside. Hide the USB Power Cable and 15cm Connecting Cable underneath the...
- Page 26 following plate: Test all lights are working OK by connecting the USB Power Cable to the USB Power Bank again.
- Page 27 14.) Take a 6-Port Expansion Board and connect the other end of the 15cm connecting cable to the far right port. 15.) We will now install lights to the four torches inside the great hall. First disconnect the four torch pieces and then disconnect the flame pieces from the pearl gold bases.
- Page 28 Take out the following provided 4x Pearl Gold Round Plate 1×1 with open stud Take a White 30cm Bit Light and then slightly bend it up on a 90 degree angle as shown below.
- Page 29 Place the Bit Light (facing up) inside the pearl gold base. Secure the Bit Light in place by reconnecting one of the provided Pearl Gold Round Plate with open stud over the top (upside down). The Bit Light’s LED should be showing through the hole of the round plate as shown below: Take one of the flame pieces and using a pair of scissors, cut the tip off the bottom of it then reconnect the flame piece to the torch base.
- Page 30 16.) Repeat the previous step to install another 3x White 30cm Bit Lights to the remaining three torches then reconnect each one back to the great hall ensuring the cable is facing behind and in between clips.
- Page 31 17.) Take a new 6-Port Expansion Board and connect all four bit light cables from the torches to it. Take a 5cm Connecting Cable and connect it a spare port on the expansion board.
- Page 32 Connect the other end of the 5cm Connecting Cable to one of the OUT ports on a Flicker Effects Board. Take another 5cm Connecting Cable and connect it to the IN port on the Flicker Effects Board.
- Page 33 Take the other end of the 5cm Connecting Cable and connect it to a spare port on the 6-port Expansion board from the right side of the hall. Test the Fire torch lights by connecting up the USB Power Bank again and verifying all is working OK.
- Page 34 18.) Take a Green Strip Light and using it’s adhesive backing, stick it to the base of a provided LEGO Plate 1×6...
- Page 35 Take a 5cm Connecting Cable and connect it to one side of the strip light, then connect the other end of the cable to the 6-port Expansion board on the far right side of the set (expansion board without the fire torch cables connected to it).
- Page 36 Using it’s LEGO plate, mount the strip light to the ceiling of the chamber of secrets as shown below: 20.) We now need to hide the wires from the four torches in the great hall. First disconnect the following sections on the right of the hall.
- Page 37 Lay the two right cables across and then down the right side in between studs. Lay the two left cables across and then down in between the next studs to the left of the right cables. Secure them down by reconnecting sections over the top.
- Page 38 Neatly tuck all the components into the space on the right side of the chamber of secrets then hide the connecting cable on the right side underneath rock pieces. Turn On the USB Power Bank to verify all is working OK...
- Page 39 21.) We will now move onto lighting the inside of the main tower. Disconnect the large wall sections from each side of the tower by pushing them out from the inside at the top and bottom using your finger, then pulling the entire section out.
- Page 40 Disconnect the right side of the roof and then pull up the other end of the 50cm Connecting Cable from the bottom of the tower. Secure the cable in place underneath the following dark grey piece on top of the tower.
- Page 41 22.) Take an 8-Port Expansion Board and connect the other end of the 50cm Connecting Cable to it then disconnect the left side of the roof. Take another 50cm Connecting Cable and connect one end to the expansion board. Thread the other end of the 50cm Connecting Cable through the right side of the tower and then pull it all the way out from the left side.
- Page 42 23.) Take a White 30cm Bit Light and a provided Trans Clear Plate w Rounded Bottom 2×2. Place the Bit Light facing down in the centre of the trans clear plate then connect it underneath the roof of the first staircase room (at the bottom of the tower) ensuring the cable is laid toward the right.
- Page 43 Bring the other end of the bit light all the way up to the top of the tower and connect it to the 8-port expansion board then tuck the cable underneath bricks in between floors (slightly disconnect and reconnect section over the top of the cable)
- Page 44 Take another White 30cm Bit Light and a provided Trans Clear Plate w Rounded Bottom 2×2. Place the Bit Light facing down in the centre of the trans clear plate then connect it underneath the roof of the second staircase room ensuring the cable is laid toward the right.
- Page 45 24.) Take a White 15cm Bit Light and a provided Trans Clear Plate w Rounded Bottom 2×2 and connect them underneath the roof of the top staircase level ensuring the cable is laid toward the right. Connect the other end of the white 15cm bit light to the 8-port expansion board then tuck the cable underneath bricks in between floors (slightly disconnect and reconnect section over the top of the cable)
- Page 46 25.) Take another White 15cm Bit Light and a provided Trans Clear Plate w Rounded Bottom 2×2 and connect them underneath the roof of the very top floor ensuring the cable is laid toward the right. Connect the other end of the bit light cable to the expansion board then turn ON the USB Power Bank to verify all lights in the tower are working OK 26.) We will now install lights to the two torches.
- Page 47 for the Left torch. Carefully bend the bit light component from each light up on a 90 degree angle as shown below: Place the Bit Light facing up inside the bottom of one of the provided Black Round Plates. Secure the light in place by reconnecting the two round plates from one of the torch pieces over the top as shown below.
- Page 48 section back to the brick with clip ensuring the cable is facing the back. 27.) Reconnect both torches to the tower then take the right torch cable (White 15cm Bit Light) and connect it to the 8-port expansion board Use the LEGO Removal tool to slightly disconnect the the top section of the...
- Page 49 tower to create a small gap. Slip both of the cables underneath (in between studs). Pull the left torch cable out the right side before securely reconnecting the top section of the tower then connect the left bit light cable to the expansion board. 28.) Eliminate excess cable by pulling up all six cables and grouping them together close the expansion board .
- Page 50 Neatly tuck the components inside the space on the right side of the roof then reconnect the main right wall section ensuring there are no visible cables hanging out on the sides. Reconnect the right roof section then use some tape to tape down the cables along the right side of the tower.
- Page 51 29.) Before we reconnect the main left wall section we are going to install some lights for the tower windows. First disconnect the following sections of the tower.
- Page 52 30.) Take one of the thinner upper and lower wall sections and disconnect the following trans black plates only. Take a White 30cm Bit Light and with the cable facing to the right, place it directly over one of the studs where the trans black plate was disconnected from.
- Page 53 Repeat this step to install another 4x White 30cm Bit Lights to these two sections ensuring the cables are all facing toward the right side. 31.) Reconnect both of these sections back to the tower starting from the left side, then reconnect the larger centre wall section ensuring the five cables are pulled out.
- Page 54 Connect the five Bit Light cables as well as the other end of the 50cm Connecting Cable from the bottom of the tower to a new 12-port Expansion Board then turn the USB Power Bank ON to verify all the lights installed in the tower so far are working OK.
- Page 55 32.) Take the remaining upper and lower wall section of the tower and install 5x White 30cm Bit Lights underneath the following trans black plates (same as we did for the other wall section of the tower)
- Page 56 Reconnect these two sections back to the tower then connect the five Bit Light cables to the 12-port Expansion Board. Turn ON the power bank to confirm all the lights in the tower are working OK. 33.) Take a 30cm Connecting Cable and connect one end to the remaining port on the 12-port Expansion Board then pull all the cables down the edge of the tower and secure in place with your index finger.
- Page 57 While still holding down the cables with a finger, group the cables together and twist and fold them around each other to eliminate excess cable then push the cables into the space at the bottom of the tower in between walls. Push the expansion board inside this space to completely hide the component and wiring.
- Page 58 34.) Reconnect the left roof section then ensure all cables are tucked in neatly in between walls before reconnecting the main left wall section. This completes installation of lights to the left side of the Hogwarts Castle. Turn ON the power bank to ensure all lights we have installed so far are working OK.
- Page 59 35.) We will now install lights to the right side of the castle. Take this section and disconnect two lamps (round black and trans yellow plates) on the left side of this side, behind this side, and from the outside of the viaduct hall entrance (6 in total).
- Page 60 36.) Take 6x White 30cm Bit Lights and follow the same method used in step 2 to install them to each lamp section using provided 6x Black Round Plate 1×1 with open stud Carefully bend the bit light component from each light up on a 90 degree angle as shown below: Place the Bit Light facing up inside the bottom of one of the provided Black Round Plates.
- Page 61 37.) Reconnect two lit torches to the left side as well to the outside of the Viaduct hall entrance. Turn the set over and remove the two pillars before reconnecting the two torches to this wall.
- Page 62 Using a LEGO Removal tool, create a gap underneath the torches in the following position then tuck each cable underneath to lead to the other side of the wall. Reconnect the two pillars then reconnect and close up the gaps ensuring the cables are neatly laid in between studs.
- Page 63 38.) Disconnect the following brick and then group the two cables from each side together and lay them down along the floor in between studs before reconnecting the brick we just removed over the top. Continue to lay the two sets of cables underneath rock pieces to secure them down the edges of the castle.
- Page 64 39.) Remove the following pieces from the left side of the Viaduct Hall entrance. Lay the cable from the left lamp down in between the following studs before reconnecting the 1×2 brick over the top.
- Page 65 Disconnect more pieces from the outside of the entrance then lay the cable from the right lamp down and across the ground in between studs before reconnecting pieces over the top.
- Page 66 Bring both cables down the edges of the set and hide them underneath the following rock pieces. Be careful doing this to ensure you do not pinch the cables (which will result in Bit Lights not light up) 40.) Take a 12-Port Expansion Board and connect all six Bit Light cables to it. Bring the left side of the castle over and connect the other end of 30cm Connecting Cable from this side to the 12-port expansion board on the right side of the castle.
- Page 67 Note: If you find that any of the lamps are not lighting up, check the cabling where we laid them underneath rock pieces on the front edges of the set (disconnect the rock pieces that are connected over the top of cables). Disconnect the 30cm Connecting Cable to allow us to maneuverer the right side of the set more easily.
- Page 68 41.) Take a new 30cm Connecting Cable and connect one end of the cable to the 12-Port Expansion Board.
- Page 69 Disconnect the following brick again then use your LEGO removal tool to disconnect the dark tan plate from underneath as well as to create a gap underneath the light grey plate as shown below...
- Page 71 42.) Take the other end of the 30cm Connecting Cable we connected to 12-port expansion board and thread it through the gap we just created. Turn the set around and from inside the chess board room, pull the cable out from the top right.
- Page 72 provide LEGO Plate 1×6. Connect the cable from the top of the chess board room to the right port on the Strip Light then take a 15cm Connecting Cable and connect it to the left of the strip light. Mount the strip light to the ceiling of the chess board room in the following position.
- Page 73 Pull the other end of the 15cm Connecting Cable over to the left side of the chess board room through to the mirror of erised room. 43.) Turn the set back over to the front and pull the 30cm Connecting Cable all the way out before reconnecting the grey plate and closing up the gap.
- Page 74 brick. 44.) Turn the set back over to the back side and then connect the other end of the 15cm Connecting Cable to a new 6-Port Expansion Board.
- Page 75 Disconnect the following sections that sit above the mirror of erised room then tuck the cable underneath the following section as shown below:...
- Page 76 45.) Disconnect the whole section of Umbridge’s office as shown below then disconnect the pink dish as well as the round plates inside.
- Page 77 Discard the White round plate and replace it with a provided LEGO Trans Yellow Round Plate 1×1. Take a White 30cm Bit Light and place it over the top of one of the trans yellow round plates. Secure the light in place by reconnecting the other trans yellow round plate over the top.
- Page 78 Disconnect the roof section and thread the bit light cable through the back and then out the right side in between the following bricks as shown below then reconnect the roof section. Reconnect the whole Umbridge’s Office section to the castle. Pull the Bit Light cable from Umbridge’s office down and connect it to the 6- port expansion board below.
- Page 79 46.) Disconnected all sections in the mirror of erised room then disassemble all four fire sections.
- Page 80 Using a pair of scissors, snip off the tips at the bottom of each flame piece.
- Page 81 Take a White 15cm Bit Light and place it over the top of a provided Trans Orange Round Plate 1×1. Secure the light in place by reconnecting the trans orange round plate with open stud over the top then reconnect a flame piece on top.
- Page 82 Using the same method used for the right fire section, install another White 15cm Bit Light to the left fire section using another provided Trans Orange Round Plate 1×1 then reconnect this to the mirror of erised room. 48.) Follow the same method used for the fire torches in the great hall in step 15 to install another 2x White 15cm Bit Lights to fire torches in this room using another provided 2x Pearl Gold Round Plate 1×1 with open stud.
- Page 83 Place the Bit Light (facing up) inside the pearl gold base. Secure the Bit Light in place by reconnecting one of the provided Pearl Gold Round Plate with open stud over the top (upside down). The Bit Light’s LED should be showing through the hole of the round plate as shown below: Take one of the flame pieces and using a pair of scissors, cut the tip off the bottom of it then reconnect the flame piece to the torch base.
- Page 84 Reconnect both fire torches to the room ensuring both cables are pulled up underneath the 2×8 plate. 49.) Group the four cables together and twist them around each other so they all come together forming a larger cable then connect them to a new 6-Port Expansion Board...
- Page 85 Take a 5cm Connecting Cable and connect it to the 6-port expansion board. Connect the other end of the cable to one of the OUT ports on a new Flicker Effects Board. Take another 5cm Connecting Cable and connect it to the IN port on the Flicker Effects Board.
- Page 86 Reconnect the 30cm Connecting Cable from the left side of the castle and then turn ON the power bank to verify all lights and effects installed to the right side of the castle are working OK. 50.) Neatly tuck in the cables, effects board and two expansion boards inside the back left side of the mirror of erised room.
- Page 87 Before completely tucking in the right expansion board (where the light from Umbridge’s Office is connected to), take a 30cm Connecting Cable and connect it to a spare port on this expansion board. Once done, tuck in the expansion board along with any other remaining cables as shown below. Use a bit of tape to secure down the Bit Light cable from Umbridge’s office coming down the wall then reconnect all sections on top of the mirror of erised room.
- Page 88 51.) Take 2x White Strip Lights and stick them to 2x provided LEGO Plates 1×6. Take one of the strip lights and connect a 15cm Connecting Cable to it’s left port then take the other end of the 30cm Connecting Cable from the mirror of erised room and connect it to the strip light’s right port.
- Page 89 Hide the connecting cable between the mirror of erised room and the potions classroom behind bricks and tree pieces as shown below: 52.) Take a 30cm Connecting Cable and connect it to the left port on the Strip Light from previous step then mount the strip light to the ceiling of the Room of Requirement in the following position:...
- Page 90 Eliminate excess cable from the 15cm connecting cable in between strip lights by looping it underneath this strip light as shown below: Bring the other end of the 30cm connecting cable over to the left and hide it behind the tree on the left side.
- Page 91 53.) Using your hand gently push up the roof of the Viaduct Entrance Hall to create a small gap at the bottom in between levels then thread the 30cm connecting cable through to the inside of the hall. Pull the cable all the way out from the inside then reconnect the roof down to close up the gap ensuring the cable is in between studs in the corner.
- Page 92 54.) Take another White Strip Light and stick it to a provided LEGO Plate 1×6. Connect the other end of the 30cm connecting cable to the left port on the strip light then take a new 15cm Connecting Cable and connect it to the strip light’s right port.
- Page 93 above the library as shown below: You can also pull up and hide excess cable from the 30cm connecting cable by looping it underneath the strip light and tucking it into the spaces above.
- Page 94 Thread the other end of the 15cm Connecting Cable through and over the next brick on the ceiling then pull it out from the other side and connect it to left port on the remaining White Strip Light stuck onto a provided LEGO Plate 1×6.
- Page 95 55.) Turn the set around then disconnect the left section surrounding the front of the circular opening above the viaduct entrance then take a new 15cm Connecting Cable and thread it through the space that leads down to the inside of the hall. Turn the set back around and pull the cable down to connect the strip light’s right port.
- Page 96 Mount the strip light to the ceiling above the Gryffindor Common room area as shown below. Ensure the 15cm connecting cable we threaded through from above is on the left side. Turn ON your USB Power Bank to test all the strip lights we have installed so far are working OK...
- Page 97 56.) Turn the set around to the front again and disconnect the following sections surrounding the top of the viaduct entrance hall to allow us to remove the section with the four trans coloured round plates connected to it.
- Page 98 Take this section and disconnect the trans coloured round plates then take a White 15cm Bit Light and place it over one of the top studs. Ensuring the cable is facing down and in between studs, secure the light in place by reconnecting a trans coloured stud over the top.
- Page 99 Repeat this process to install another 3x White 15cm Bit Lights to the remaining studs ensuring the cables are all facing down and laid down the middle. 57.) Group the cables together and twist them around each other so they come together to form one larger cable.
- Page 100 58.) We will now install some lights to shine through the windows of the towers on each side of the viaduct entrance hall. First disconnect the top sections of each tower as shown below:...
- Page 102 Use your LEGO Removal Tool to disconnect the following section and pieces from the right tower to allow us to remove the two windows sections.
- Page 103 59.) Remove the dark grey bricks from each window section then reconnect the window sections to the tower (without the dark grey bricks). Take a White 15cm Bit Light and place it (facing down) over the top of the tower. Lay the cable down across to the left and then hold it in place with a finger.
- Page 104 60.) Disconnect more sections from the right side of the roof then bring the Bit Light cable over and connect it to the 8-Port Expansion Board. Lay the cable down in between studs then reconnect roof pieces over the top...
- Page 105 as well as the remaining sections that make up the roof of this tower. 61.) Repeat previous steps to disconnect sections off the top of the left tower and to install another White 15cm Bit Light to this side.
- Page 107 Turn ON the USB Power Bank to verify all lights installed so far are working OK.
- Page 108 62.) Fold the larger group of Bit Light cables in half and then thread the folded end down through the space that leads to the inside of the Hall. Neatly hide the rest of the cables and expansion board down underneath the trans coloured plates before reconnecting all roof and surrounding pieces over the top.
- Page 109 63.) Neaten up cabling on the outside of the set by grouping all cables together (except for the 30cm connecting cable in between the two sides of the set) and folding and twisting them around each other so they bunch up together neatly.
- Page 110 This finally completes installation of all the main lights for the Hogwarts Castle. Reconnect both sides together and then turn the power bank ON to verify all lights are working OK. 64.) We will now install spot lights on the outside of the set to project onto the castle.
- Page 111 2x Black Plate 1×2 modified w Handle on End 2x Black Tile 1×1 w Clip 2x Black Plate 1×2 modified with stud jumper 2x Black Dish Inverted 3×3...
- Page 112 Take out 2x RGB Strip Lights and using it’s adhesive backing, stick them each ground spotlight (to the base of the black 1×6 plates) 66.) Take out the following pieces and following the below images to assemble three upper spot lights...
- Page 113 6x Black Plate 1×6 3x Black Plate 1×2 modified w Handle on End 3x Black Tile 1×1 w Clip 3x Black Plate 1×2 modified with stud jumper Take out 3x RGB Strip Lights and using it’s adhesive backing, stick them to the three upper spot lights (to the base of the black 1×6 plates)
- Page 114 67.) Take a RGB 30cm Connecting Cable and connect one end to the left port on one of the ground spot lights. Connect the other end of the cable to the left port on one of the upper spot lights. Place the ground spot light on the left of the set to project up onto the outside...
- Page 115 of the great hall then connect the upper spot light toward the right of the set to up onto the other side. Hide the RGB cable underneath the base of project the boat house entrance.
- Page 116 68.) Take a RGB 15cm Connecting Cable and connect one end to the right side of the upper spot light we just installed then connect the other side of the cable to the other ground spot light. Place the ground spot light outside the front of the Viaduct bridge to project up onto the front of the Viaduct Entrance Hall...
- Page 117 69.) Take a RGB 30cm Connecting Cable and connect one end to the ground spot light then thread the other end of the cable under the viaduct bridge through the following space. Pull the cable through and then connect it to the left port on another upper spot light.
- Page 118 70.)Take another RGB 15cm Connecting Cable and connect one end to the upper spot light we just installed then connect the other side of the cable to the left port on the remaining upper spot light.
- Page 119 Connect the spot light to the below position to allow it to project up onto the large main tower of the castle. 71.) Take the remaining RGB 15cm Connecting Cable and connect it to the right port on the upper spot light we just installed then connect the other side of the cable to one of the OUT ports on the RGB Board.
- Page 120 Lastly, ensure the RGB Board is facing the correct way up so that the IR sensor is visible and in line of sight to the remote control we will use to control it. Controlling the RGB Spot Lights Use the provided RGB Remote Control to control the RGB Spot Lights at the front of the Hogwarts Castle.
- Page 121 Fade – Will cycle through all the colours 3 seconds at each colour Smooth – Will cycle through all the colours 7 seconds at each colour This finally completes installation of your Light My Bricks Hogwarts Castle Light Kit. We hope you enjoy and we thank you for purchasing this product.
- Page 122 # Franchise ∠ PREVIOUS Light My Bricks: LEGO Aston Martin DB5 10262 Lighting Kit Search ... & CATEGORIES...
- Page 123 Select Category Copyright © 2018 Light My Bricks . All Rights Reserved. | Catch Foodmania by Catch Themes...
Need help?
Do you have a question about the LEGO Hogwarts Castle 71043 Lighting Kit and is the answer not in the manual?
Questions and answers