
Related Manuals for JUKI HZL-E71


Summary of Contents for JUKI HZL-E71
- Page 1 COMPUTER SEWING MACHINE MACHINE A COUDRE ELECTRONIQUE MAQUINA DE COSER ELECTRONICA MACCHINA PER CUCIRE ELETTRONICA HZL-E71 INSTRUCTION MANUAL MANUEL D’INSTRUCTIONS MANUAL DE INSTRUCCIONES MANUALE DI ISTRUZIONI...
- Page 2 FOR USA AND CANADA ONLY This appliance has a polarized plug (one blade wider than the other). To reduce the risk of electric shock, this plug is intended to fit in a polarized outlet only one way. If the plug does not fit fully in the outlet, reverse the plug.
- Page 3 15. “Do not unplug by pulling on cord. To unplug, grasp the plug, not the cord.” “SAVE THESE INSTRUCTIONS” “This sewing machine is intended for household use only.” Use only foot controller YC-485 with your HZL-E71. When not in use, be sure to turn power switch Be sure to turn power switch OFF and disconnect the plug from the wall outlet before replacing the OFF and unplug the machine.
- Page 4 “NOTES DE SECURITE IMPORTANTES” “Lorsque vous utilisez un appareil électrique, des précautions élémentaires doivent toujours être suivies, comme celles-ci.” “Lisez attentivement ces instructions avant d’utiliser cette machine à coudre.” “DANGER _____Pour réduire le risque d’électrocution.” 1. “Un appareil ne doit jamais être laissé sans surveillance lorsqu’il est branché. Toujours débrancher cet appareil du secteur immédiatement après utilisation et avant de le nettoyer.”...
- Page 5 “NORMAS DE SEGURIDAD” Cuando utilice la máquina deberá observar todas las normas de seguridad, especialmente las que se detallan a continuación. Antes de utilizar la máquina, lea las instrucciones. PELIGRO ____Para reducir el riesgo de descarga eléctrica. 1. Nunca deje desatendida la máquina cuando esté enchufada. Desconéctela de la red eléctrica cuando haya finalizado su trabajo.
- Page 6 15. Non staccare la spina tirando il filo. Per togliere la spina dalla presa, tirare verso di se la spina e non il filo. “CONSERVARE QUESTE ISTRUZIONI” “ Questa macchina è prevista solo per l'uso domestico. ” Usare solo il pedale di comando per la HZL-E71. Tenere la macchina staccata dalla corrente Non dimenticare di staccare la spina dalla presa di corrente prima di sostituire l'ago o lubrificare la quando non è...
- Page 7 CONTENTS / TABLE DES MATIERES CONTENTS Important safety instructions ........1 How to adjust stitch width (manually) ..... 36,37 Principal parts ............. 7,8 Overcasting ..............38 Accessories ..............9 Reinforced stretch stitch ..........39 Major functions ............ 10-14 Automatic buttonholes ......... 40-43 Winding bobbin ............
- Page 8 ÍNDICE / INDICE ÍNDICE Normas de seguridad ..........3 Modo de ajustar la anchura de puntada Principales piezas ............7,8 (manualmente) ........... 36,37 Sobrehilado ..............38 Accesorios ..............9 Funciones principales .......... 10-14 Puntada de refuerzo en tejido tipo punto ....39 Hacer canilla ............
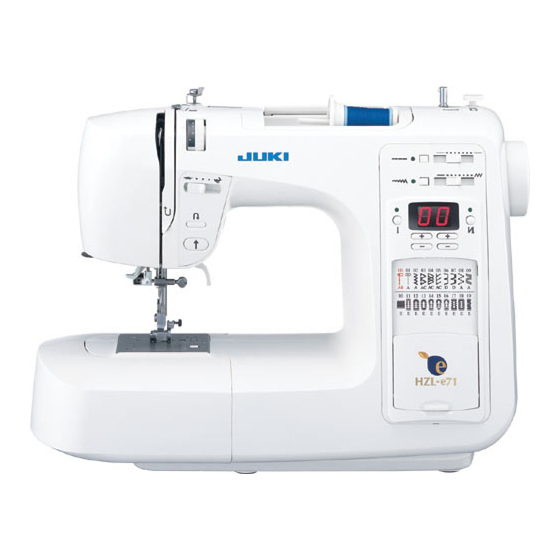
- Page 9 Principal Parts / Principaux éléments / Principales piezas / Parti principali 1. Spool pin 12. Drop feed lever 13. Automatic lock stitch 2. Bobbin thread guide 3. Thread tension dial button 4. Thread spool cap 14. Stitch selection panel 5. Bobbin winding regulator 15.
- Page 10 1. Thread Cutter 8. Bobbin case 2. Needle threader 9. Needle clamp 3. Buttonholing lever 10. Needle 4. Presser foot release 11. Presser foot lever 12. Hook cover release 5. Presser foot shank button 6. Feed dog 13. Hook cover 7.
- Page 11 · You can keep instruction manual at hard case. · Vous pouvez ranger votre manuel d’instructions dans le capot rigide. · Le sugerimos guardar el manual de instrucciones en la maleta rígida. · Il Manuale di Istruzioni si trova infilato nella custodia copri macchina. Accessories / Accessoires Accesorios / Accesssori A91330080A0...
- Page 12 Major functions / Fonctions principales Funciones principales / Funzioni principali Type of Stitch patterns and operation (Operation / indication panel) Types de point et sélection (touches de sélection) Tipos de puntada y funciones (panel indicativo / operativo) Modelli di cucitura e selezione (Pannello operativo) Stitch length adjusting lever Curseur de réglage de la longueur du point...
- Page 13 When stitch pattern has selected, with pressing the reverse button the machine will sew in reverse. When you release the reverse stitch button, the machine will return to run forward. To stop machine, remove your foot from controller. Sur les programmes en pressant le bouton de marche arrière la machine coud en marche arrière.
- Page 14 Major functions / Fonctions principales Funciones principales / Funzioni principali Speed controller To run the machine, press foot speed controller. The Push speed controller plug harder you press, the faster into lower receptacle at right machine will sew. To stop end of machine.
- Page 15 Start / Stop button Speed controller Slower Faster Press the button for start. You can adjust Maximum Lent Rapide Push it again to stop sew- sewing speed. Más lento Más rápido ing. Needle will stop at its Lento Veloce lowest position. Curseur de vitesse Vous pouvez régler la vitesse Touche marche/arrêt...
- Page 16 Stitch length adjustment Free arm Adjusting lever In order to change stitch Draw the auxiliary bed to the Touche manuelle length of each stitch pattern: left side. Palanca de ajuste Push manual button (light Leva di regolazione Bras-libre will be on) and move the le- Manual button ver to the desired position.
- Page 17 Winding Bobbin / Embobinage Hacer canilla / Avvolgimento bobina Winding a bobbin * When you turn on the power to the machine under the bobbin winding state, the machine will peep. Enfilage pour le remplissage de canette * Lorsque vous allumez la machine en mode de Enhebrar para hacer canilla remplissage de canette, eile émet un bip sonore.
- Page 18 Set the bobbin on the bobbin winder. Small spool Petite coiffe Press the bobbin against Bobina de hilo the bobbin winding regula- Thread spool cap (small) Rocchetto filato piccolo Petite bobine tor. Tapa de la bobina (pequeña) Fermo per rocchetto piccola Placez la canette sur l’axe du dévidoir.
- Page 19 Put the bobbin in the Thread the bobbin case. bobbin case. Put the thread [1], place thread on groove [2] and Place the bobbin so that draw the thread to rear of thread winds counterclock- machine. wise. Enfilez le boîtier à Placez la canette dans canette.
- Page 20 Threading the machine / Enfilage Enhebrar la máquina / Infilatura della macchina CAUTION: Be sure to turn off the machine before * Be sure to raise the presser foot before threading the machine head. threading. ATTENTION: Assurez-vous d’avoir éteint la machine * Le pied presseur doit toujours être relevé...
Need help?
Do you have a question about the HZL-E71 and is the answer not in the manual?
Questions and answers