
Related Manuals for Vivid Matrix MX-370P


Summary of Contents for Vivid Matrix MX-370P
- Page 1 Product instruction manual Matrix MX-370/530P, MX-370/530DP & MX-370MP Laminating Systems. Page | 1...
- Page 2 Contents Page 3 – Introduction Page 4 – Specifications Page 5 – Safety instructions and Environmental requirements Page 6 – Control panel display screen for single sided laminating Page 7 – Control panel display screen for foiling mode on models Pneumatic and Metallic. Page 8 –...
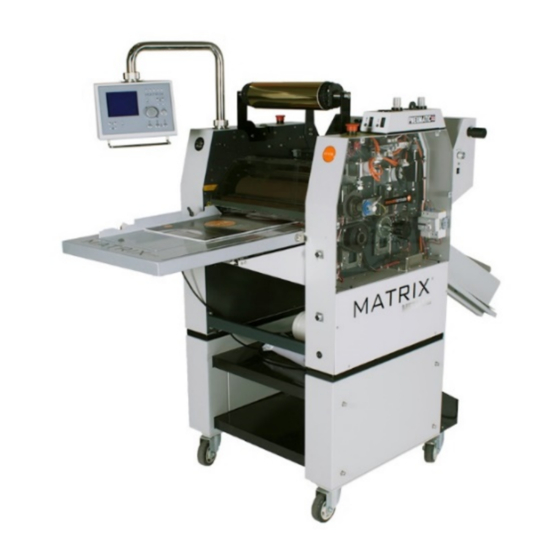
- Page 3 Please read these instructions carefully before starting to use the system to ensure you get the best results and are competent at operation. Should you experience any issues with your system please contact us and we will be happy to help. Telephone Number:0345 130 4050 Email: Sales@vivid-online.com Swing out multilingual control panel Pneumatic control unit Film/Foil mandrel Steel laminating roller...
-
Page 4: Specifications
Specifications MX-370P & Specifications MX-370MP MX-530P Max. Mechanical Speed (m/ft/min) 10m/33ft 10m/33ft Max. Lamination Film Width (mm/inches) 340mm/13” 500mm/20” Minimum Paper Thickness (gsm/lbs) 135gsm/90lbs 135gsm/90lbs Maximum Sheet Width (mm/inches) 420mm/17” 550mm/22” Warm-up Time (mins) Temperature Range (ºC/ ºF) 0-140 /32-284ºF 0-140ºC/32-284ºF Power Supply (V) 220/240... -
Page 5: Safety Instructions
Safety Instructions v Please ensure that the voltages and phase of the power supply you are using match with the rated working voltages before operating the system. v The power supply should be close to the system for convenient use. v The power supply should provide a reliable protective earthing connection. -
Page 6: The Control Panel
Single-sided Lamination The Control Panel - Display Screen Function/Settings Key 5 Memory Keys Temperature Settings Paper Length Settings Screen Brightness Speed Dial Stop Key Fine Tuning Key for Cutting/ Anti-Curl Setting Forward Key Foot Pedal Forward Foot Pedal Reverse Splitting Position Temperature Running Speed Sheet... - Page 7 Foiling Mode for Pneumatic & Metallic Models The Control Panel– Press the function/settings key Use the temperature buttons to select mode Press stop to enter mode This symbol appears when in the foiling mode Page | 7...
-
Page 8: Duplex Models
Duplex Models The Control Panel – Single sided mode As explained on previous page press the function/settings key to enter screen, use the temperature buttons to select mode and press stop to enter. Double sided mode Encapsulating/foiling mode Ensure for foiling the bottom temperature is set to zero (off). Page | 8... - Page 9 Single-sided Laminating Duplex Pneumatic/Metallic 1. Turn the power on. 2. Set paper length (exclude the desired overlap i.e. 450gsm = 445mm) and set temperature to 80 3. Remove film mandrel off the system and loosen the core collar using the blue 5mm Allen key provided (3.3) 4.
- Page 10 6. Place a plain thick (i.e.300gsm) card into the back of the machine (6.1) taking care to go the middle of every roller (6.2) until reaching the feed gate (6.3), then place another plain card and cover the top laminating roller (6.4). 7.
- Page 11 8. Drape the film over the chrome roller and feed table (8.1). Push a plain thick card in-between the chrome roller and feed roller (8.2), while pushing the card through turn the film clockwise to release the tension (8.3). Push the card until the back edge is inline with the feed gate (See below figure 9.1).
- Page 12 11.1 11.2 11.3 11. Set the desired anti-curl setting – suggested starting position 2 or 3, if the print curls up increase the number and if the print curls down decrease the number. Gape the pull roller (11.1), pull the anti-curl handle out (11.2) and select number. Lower pull roller (11.3).
- Page 13 Foiling 1. Enter the foiling mode (1.1) (for display navigation on page 7), put the express idle bars on the machine (1.4) and turn the take up on to setting one (1.2). Put on the express foil kit idle bars on the front and rear of the system (1.3). 2.
- Page 14 4. Thread the foil in-between the angle wheels and perforator support bars (4.2), under and around the rear express kit idle bar (4.3) and attach the take up unit as shown below (4.4). Select the temperature and pressure required, lower the laminating roller pressure and put the safety guard on.
- Page 15 Double Sided Laminating To do double side laminating load the top side first as shown in single side laminating on page 9-12 excluding the use of any of the anti-curl settings. 1. Ensure the display anti-curl setting is set to zero (1.1), enter the display double sided mode (1.2) (page 7-8 for display navigation) and turn on the bottom roller temperature (set at minimum of 10 degrees higher than the top roller).
- Page 16 4. Push the feed card down in between the bottom laminating roller and grey support plate (4.2 & 4.3). Ensure the Matrix Duplex writing is facing the feed table (see below 5.1 & 5.2). 5. Push the feed sheet down until it reaches the bottom foam idle bar and thread around the back (5.3).
- Page 17 7. Pull the feed sheet up onto the feed table (7.1) and remove. Cut the film to leave a clean edge (7.2) and stick it to the top laminating film (7.3). Manually push the feed roller down and insert a thick 300gsm plain card (7.4). 8.
- Page 18 10.1 10.3 10.2 10. Turn the bottom perforator anti-clockwise until loose (10.1). Depending on the media and material being used you might require both angle wheels (10.2) and more pressure on the pneumatic splitting (10.3). If the second angle wheel is needed ensure the angle wheel on the left is angled more than the one directly next to the perforator.
- Page 19 Encapsulating Enter the display encapsulating/foiling mode (page 7-8 for display navigation) and turn on the bottom roller temperature (set at minimum of 10 degrees higher than the top roller). Load the films as normal. You do not need the perforator or angle wheels. Increase the pull roller pressure to between 04-0.6psi.
-
Page 20: Troubleshooting
Troubleshooting Anti-curl If your sheet is curling upwards you need to increase the anti-curl and decrease if curling down. Too change the anti-curl setting release the pressure on the pull roller, change setting and put the roller back down. Ensure the anti-curl mechanical setting matches the display setting. -
Page 21: Speed & Temperature Control
Timing is very important for the splitting process. The splitter/separator roller must come down after the sheet has finished perforating and come up before the next sheet comes. For speeds of 0.5-2mmpm the display separator/cutting adjustment should be set to 0. See below for guide. •... - Page 22 Foiling If there is any exposed toner in the foiled area you need to either decrease the speed and increase the temperature and/or pressure. If there is foil in places where there shouldn’t be increase the speed and decrease the temperature and/or pressure. For Duplex and Pneumatic models: Foiling onto paper = high pressure and high temperature Foiling onto laminate = lower pressure and lower temperature...
- Page 23 Handy Hints for Foiling PLEASE NOTE THIS IS A GUIDE ONLY • Using a coated paper will be far easier to foil than uncoated. • If foiling onto laminating stocks, please ensure you have used a corona treated printable film. •...
-
Page 24: Warranty & Incorrect Use
Your warranty will be void if the system has been modified by a third party not approved by the manufacturer (Vivid Laminating Technologies Ltd) to carry out any alterations. E&O.E Vivid Laminating Technologies LTD...
Need help?
Do you have a question about the Matrix MX-370P and is the answer not in the manual?
Questions and answers