Table of Contents
Advertisement
Quick Links
Advertisement
Table of Contents

Subscribe to Our Youtube Channel
Related Manuals for Hiwin RA610-GC


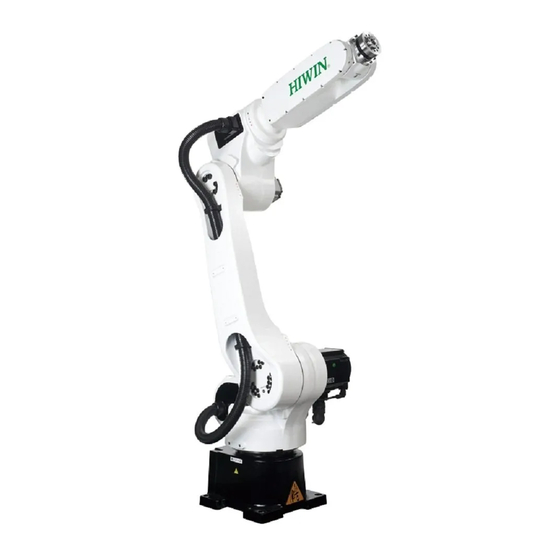
Summary of Contents for Hiwin RA610-GC
- Page 1 Articulated Robot RA610-GC User Manual Original Instruction www.hiwin.tw...
- Page 2 INDUSTRIE 4.0 Best Partner Multi-Axis Robot Pick-and-Place / Assembly / Array and Packaging / Semiconductor / Electro-Optical Industry / Automotive Industry / Food Industry • Articulated Robot • Delta Robot • SCARA Robot • Wafer Robot • Electric Gripper • Integrated Electric Gripper •...
-
Page 3: Table Of Contents
C23UE004-2109 Content TRANSPORTATION AND INSTALLATION ........... 2 ........................ 15 RANSPORTATION ........................25 NSTALLATION ..................27 ONNECTION WITH THE ONTROLLER ........................29 ROUNDING ....................30 NVIRONMENTAL ONDITIONS ................31 TANDARD AND PTIONAL QUIPMENT BASIC SPECIFICATIONS ................34 ....................34 ESCRIPTION OF ODEL .......................... - Page 4 C23UE004-2109 Warranty Terms and Conditions The period of warranty shall commence at the received date of HIWIN product (hereafter called “product”) and shall cover a period of 12 months. The warranty does not cover any of the damage and failure resulting from: The damage caused by using with the production line or the peripheral equipment not ...
- Page 5 Please contact the technician for special modification coming from production line set up. For the safety reason, any modification for HIWIN product is strictly prohibited.
- Page 6 This chapter explains how to use the robot safely. Be sure to read this chapter carefully before using the robot. The user of the HIWIN industrial robot has responsibility to design and install the safety device meeting the industrial safety regulations in order to ensure personal safety.
- Page 7 C23UE004-2109 Operates the robot Teaches robot inside the safety fence Maintenance engineer: Operates the robot Teaches robot inside the safety fence Does maintenance, adjustment, replacement Programmer and the maintenance engineer must be trained for proper robot operation ...
- Page 8 C23UE004-2109 III. Robotic Arm Working Range Definition Working area The working area of the robot is defined as the area of motion under motion constraints, and the working area must be limited to the minimum required. Protective area Operation must be carried out outside the protected area.
- Page 9 C23UE004-2109 It must use EMO-Emergency stop (EN 60947-5-1 positive opening) with safety module to meet ISO 13849-1 performance level (PL)= d Interlock...
- Page 10 C23UE004-2109 IV. Precautions Common Safety Issues All operating procedures should be assessed by professional and in compliance with related industrial safety regulations. When operating robot, operator needs to wear safety equipment, such as smock for working environment, safety shoes and helmets.
- Page 11 voltage or machines that generate electromagnetic fields to prevent interference that could cause the robot to deviation or malfunction. Using non-HIWIN repair components may cause robot damage or malfunction. Beware of the heat generated by the controller and ...
- Page 12 C23UE004-2109 Do not block the vent or put foreign objects into the controller. Please ensure the controller is fixed on the base. Do not pull the connector violently or twist the electric wires excessively. Do not frequently switch ON/OFF the power switch ...
- Page 13 HIWIN is needed. Please contact us if the replacement of the component not specified by HIWIN is needed. Be sure to carry out regular maintenance, otherwise it will affect the service life of the robot or other unexpected danger.
- Page 14 C23UE004-2109 End Effector The end effector can be classified as two types: Gripper: Used to load and unload, such as pneumatic gripper, electric gripper and vacuum sucker. Tool: Used to process, such as welding, cutting and surface treatment. More attention must be paid to the design of the ...
- Page 15 The emergency stop switch is used for emergency stop only. The HIWIN robot is equipped with two emergency stop switches, where one is installed on the teach pendant and the other is directly connected to the controller via a cable.
- Page 16 Use in potentially explosive environments Use without performing risk assessments Transportation of people and animals Operation outside the allowed operating parameters VI. Disposal The disposal of HIWIN robot shall be in accordance with the local environmental regulations...
-
Page 17: Transportation And Installation
C23UE003-2107 1. Transportation and Installation 1.1 Transportation Sling, crane or forklift truck can be used to transport the robot. The transportation procedure is as follows: Transport by forklift truck: Step1. Move the robot into its transport position and the angle of each joint is shown in the Figure 1-1 and Table 1-1. - Page 18 C23UE004-2109 Table 1-1 The transport posture angle with each axis about each model of RA610-GC Transport position RA610-1355-GC RA610-1476-GC RA610-1672-GC RA610-1869-GC RA610-1151-GC 0˚ 0˚ 0˚ 0˚ 0˚ 45˚ 55˚ 45˚ 35˚ 70˚ -75˚ -75˚ -80˚ -80˚ -70˚ 0˚ 0˚ 0˚...
- Page 19 C23UE004-2109 Center of gravity Center of gravity Figure 1-2 (a) RA610-1355-GC Transport dimensions Center of gravity Center of gravity Figure 1-2 (b) RA610-1476-GC Transport dimensions...
- Page 20 C23UE004-2109 Center of gravity Center of gravity Figure 1-2 (c) RA610-1672-GC Transport dimensions Center of gravity Center of gravity Figure 1-2 (d) RA610-1869-GC Transport dimensions...
- Page 21 C23UE004-2109 Center of gravity Center of gravity Figure 1-2 (e) RA610-1151-GC Transport dimensions Direction for forklift Suspension plate Screw: 4-M8x1.25Px20L Washer: 4-M8 Figure 1-3 (a) RA610-1355-GC Transport by forklift truck...
- Page 22 C23UE004-2109 Direction for forklift Suspension plate Screw: 4-M8x1.25Px20L Washer: 4-M8 Figure 1-3 (b) RA610-1476-GC Transport by forklift truck Direction for forklift Suspension plate Screw: 4-M8x1.25Px20L Washer: 4-M8 Figure 1-3 (c) RA610-1672-GC Transport by forklift truck...
- Page 23 C23UE004-2109 Direction for forklift Suspension plate Screw: 4-M8x1.25Px20L Washer: 4-M8 Figure 1-3 (d) RA610-1869-GC Transport by forklift truck Figure 1-3 (e) RA610-151-GC Transport by forklift truck...
- Page 24 C23UE004-2109 Center of gravity Figure 1-4 (a) RA610-1355-GC Transport by sling Center of gravity Figure 1-4 (b) RA610-1476-GC Transport by sling...
- Page 25 C23UE004-2109 Center of gravity Figure 1-4 (c) RA610-1672-GC Transport by sling Center of gravity Figure 1-4 (d) RA610-1869-GC Transport by sling...
- Page 26 C23UE004-2109 Figure 1-4 (e) RA610-1151-GC Transport by sling Sling installation position 2-M12 Eyebolt Figure 1-4 (f) Eye bolt securement...
-
Page 27: Installation
C23UE004-2109 1.2 Installation Figure 1-5 shows the installation dimensions of the robot. According to the dimensions, fix the robot with M14 installation bolt on the installation surface. Figure 1-6, Table 1-2 and Table 1-3 show the forces and moments acting on the installation surface of 610 series. The installation surface must have sufficient strength to withstand the dynamic movement of the robot when operating at maximum speed. - Page 28 C23UE004-2109 Table 1-2 Value of forces and moments acting on the installation surface Horizontal Vertical moment Vertical force Horizontal force moment (Nm) (Nm) Stop 1422 Acceleration 2201 2308 1021 /Deceleration Power cuts Stop 12129 6903 6985 5433 Applicable models: RA610-1355、1476、1672、1869-GC Table 1-3 Value of forces and moments acting on the installation surface Horizontal Vertical moment...
-
Page 29: Connection With The Controller
C23UE004-2109 1.3 Connection with the Controller Figure 1-7 shows the structure drawing of the robot. Figure 1-8 shows overview of the robot system which comprises the robot, the controller, CN2 connecting cable, and the teach pendant. The J1 interface and the pin assignment of the power supply and signal connector are shown in Figure 1-9 and Figure 1-10. - Page 30 C23UE004-2109 Code RA610-GC Air in/out socket Air in/out socket Battery box Power/Signal socket Figure 1-9 Interface at the rear of J1 Figure 1-10 Pin assignment of the Power/Signal socket When connecting the cable, be sure to turn off power ...
-
Page 31: Grounding
C23UE004-2109 1.4 Grounding Figure 1-11 shows the grounding connection of the robot with the screw (M5×0.8P×12L). Grounding wire Washer Screw Figure 1-11 Grounding method The diameter of a grounding cable should not be larger than 14AWG. The grounding cable of the robot should be connected ... -
Page 32: Environmental Conditions
C23UE004-2109 1.5 Environmental Conditions Environment condition is shown in Table 1-4. Table 1-4 Environmental conditions Installation/Storage/Transportation Environment 0~45 ℃ [Note 1] Ambient temperature Under 75% R.H. Ambient relative humidity No condensation permissible Allowable altitude Up to 1000 m above mean sea level [Note 2] Allowable vibration Under 0.5G Do not use under corrosive environment... -
Page 33: Standard And Optional Equipment List
C23UE004-2109 1.6 Standard and Optional Equipment List Standard and optional equipment list is shown in Table 1-5. Table 1-5 Standard and optional equipment list HIWIN Item Standard Optional Remark Part No. Contains suspension plate Robot accessory kit RA610Z231-1 set, calibration tool set ●... - Page 34 CH 3.10 *Note 1: Include Expansion card and wiring set. Maximum Expansion: 16 Input and 16 Output. Table 1: GC Controller accessory kit contents Item HIWIN Part No. Quantity Note Refer to RCA-GC User D-Sub Connector 15P RC600Z001-13 manual CH 2.6...
- Page 35 C23UE004-2109 Table 2: External I/O Expansion Module contents Item HIWIN Part No. Quantity Note Refer to RCA-GC User External I/O Extension card RC600Z001-23 manual CH 3.4 Refer to RCA-GC User 37P Terminal Block RC600Z001-24 manual CH 3.4 Refer to RCA-GC User...
-
Page 36: Basic Specifications
C23UE004-2109 2. Basic Specifications 2.1 Description of Model Name There is a model name on the specification label of RA610-GC. The explanation of model name is shown Figure 2-1. Figure 2-1 Model Diagram... -
Page 37: Labels
C23UE004-2109 2.2 Labels The labels on the robot are shown in Table 2-1. Table 2-1 Labels description Labels Name Description Keep safety distance from robot system, and Collision prevent colliding to operator during operation. Make sure grounding is Grounding completed, or it will cause electric shock. - Page 38 C23UE004-2109 Robot specification and Specification serial number The connection port of Air in/out air tube for air input and output. Grease in The hole for grease in. Grease out The hole for grease out. CN2 power & signal socket R-I/O R-I/O connector...
-
Page 39: Robot Specifications
C23UE004-2109 2.3 Robot Specifications The robot specifications are as shown in Table 2-2. Table 2-2 Robot specifications Model name RA610-GC Maximum reach radius(mm) 1151 1355 1476 1672 1869 Degrees of freedom Floor、slope、wall mounting、ceiling mounting Installation [Note 1] Nominal Load Capacity(kg) - Page 40 [Note 1]: Compared to mounting on the ground, the performance of the robot may be different when mounting on the wall or ceiling. Please contact HIWIN if there’s any demand for this application. [Note 2]: For details about load capacity, please refer to section 2.5.
-
Page 41: Outer Dimensions And Motion Range
C23UE004-2109 2.4 Outer Dimensions and Motion Range The outer dimensions and motion range are shown in Figure 2-3 (a)~(e). Figure 2-3 (a) RA610-1151-GC Outer dimension and motion range... - Page 42 C23UE004-2109 Figure 2-3 (b) RA610-1355-GC Outer dimension and motion range...
- Page 43 C23UE004-2109 Figure 2-3 (c) RA610-1476-GC Outer dimension and motion range...
- Page 44 C23UE004-2109 Figure 2-3 (d) RA610-1672-GC Outer dimension and motion range...
- Page 45 C23UE004-2109 Figure 2-3 (e) RA610-1869-GC Outer dimension and motion range...
-
Page 46: Wrist Load Conditions
C23UE004-2109 2.5 Wrist Load Conditions The load capacity of the robot is not only limited by the weight of the load, but also limited by the position of load’s center of gravity. Figure 2-4 (a)~(e) shows the allowable position of load’s center of gravity when the robot is loaded. - Page 47 C23UE004-2109 Figure 2-4 (b) RA610-1476-GC Wrist moment diagram...
- Page 48 C23UE004-2109 Figure 2-4 (c) RA610-1672-GC Wrist moment diagram...
- Page 49 C23UE004-2109 Figure 2-4 (d) RA610-1869-GC Wrist moment diagram...
- Page 50 C23UE004-2109 (mm) (mm) Figure 2-4 (e) RA610-1151-GC Wrist moment diagram...
-
Page 51: Equipment Mounting Interface
C23UE004-2109 3. Equipment Mounting Interface 3.1 End-effector Interface The end-effector interface is shown in Figure 3-1 (for RA610-1355、1476、1672、1869-GC) and Figure 3-2 (for RA610-1151-GC). Figure 3-1 End-effector interface for RA610-1355、1476、1672、1869-GC Figure 3-2 End-effector interface for RA610-1151-GC... -
Page 52: Mounting Surface On The Robot
C23UE004-2109 3.2 Mounting Surface on the Robot Mounting surfaces for the peripheral equipment are shown in Figure 3-3 (a)~(f). J2 rotation center 2-M8×1.25P×15DP(Two sides) J1 rotation center Figure 3-3 (a) Mounting surfaces on the robot J2 rotation center J5 rotation center J3 rotation center Figure 3-3 (b) RA610-1355-GC Mounting surfaces on the robot... - Page 53 C23UE004-2109 J2 rotation center J5 rotation center J3 rotation center Figure 3-3 (c) RA610-1476-GC Mounting surfaces on the robot J2 rotation center J5 rotation center J3 rotation center Figure 3-3 (d) RA610-1672-GC Mounting surfaces on the robot...
- Page 54 C23UE004-2109 J2 rotation center J5 rotation center J3 rotation center Figure 3-3 (e) RA610-1869-GC Mounting surfaces on the robot J5 rotation center J1 rotation center J3 rotation center Figure 3-3 (f) RA610-1151-GC Mounting surfaces on the robot When other equipment is installed on the robot, be ...
-
Page 55: Pneumatic Interface
C23UE004-2109 3.3 Pneumatic Interface Pneumatic holes (AIR IN & AIR OUT) of RA610-1355、1476、1672、1869-GC are installed on the rear of J1 as shown in Figure 3-4, and the outer diameter of the air tube in the robot is ψ4mm. The secure holes for the nozzle are M5×0.8P×8DP. - Page 56 C23UE004-2109 Pneumatic holes (AIR IN & AIR OUT) of RA610-1151-GC are installed on the rear of J1 as shown in Figure 3-5, and the outer diameter of the air tube in the robot is ψ6mm. There are two 5/2 way solenoid power valves on the upper side of the 5th arm;...
-
Page 57: R-I/O Interface
C23UE004-2109 3.4 R-I/O Interface R-I/O interface for end effector on J5 and the pin assignment of I/O connector are shown in Figure 3-7. Figure 3-8 to Figure 3-11 show the wiring diagram of I/O interface. Figure 3-12 show the two-wire proximity switches connecting method for customers. - Page 58 C23UE004-2109 Figure 3-8 Wiring diagram of input (Standard: Sinking type) Figure 3-9 Wiring diagram of input (Optional: Sourcing type)
- Page 59 C23UE004-2109 Figure 3-10 Wiring diagram of output (Standard: Sinking type) Figure 3-11 Wiring diagram of output (Optional: Sourcing type)
- Page 60 C23UE004-2109 2-wire proximity switch Negative input Internal circuit 2-wire proximity switch Positive input Internal circuit Figure 3-12 Two-wire proximity switch circuit diagram Pin 1 and pin 9 are used for signal (24V/1A), not for power input of end effector. The maximum output current at each pin is 100mA.
-
Page 61: Calibration
4. Calibration Zero-Position Setting The calibration tools (HIWIN part No.: RA610Z231-3) for setting Zero-position are shown in Figure 4-1. The robot should be adjusted to the minimum speed during the calibration, and aligns the pinhole with the calibration tool to set up the Zero-position. The procedure of resetting Zero-position with the calibration tools is shown in Figure 4-2 to Figure 4-7 below. - Page 62 C23UE004-2109 J2-axis Zero-position setting (please refer to the Figure 4-3) Step1. Operate J2 at low speed to align the pinhole of J3 with the pinhole of J2. Step2. Insert the calibration tool(A) to the pinhole to calibrate Zero-position. Step3. Finish calibration and remove the calibration tool(A). Step4.
- Page 63 C23UE004-2109 J4-axis Zero-position setting (please refer to the Figure 4-5) Step1. Operate J4 at low speed to align the keyway of J5 with the keyway of J4. Step2. Insert the calibration tool(B) to the keyway to calibrate Zero-position. (The hexagon socket screw can be secured to the calibration tool(B) in advance.) Step3.
- Page 64 C23UE004-2109 J6-axis Zero-position setting (please refer to the Figure 4-7) Step1. Operate J6 at low speed to align the calibration mark with the keyway. Step2. Insert the calibration tool(B) to the keyway to calibrate Zero-position. (The hexagon socket screw can be secured to the calibration tool(B) in advance.) Step3.
- Page 65 C23UE004-2109 Figure 4-8 Clear encoder by HRSS...
-
Page 66: Manual Brake Release Device (Optional)
C23UE004-2109 5. Manual Brake Release Device (optional) Safety Precautions Description: In accordance with ISO 10218-1, the manual brake release device is a user-safety equipment for changing robot posture temporarily. This device can only be executed by trained staff. When the manual brake release device is executed, ... - Page 67 C23UE004-2109 Table 5-1 Specifications of HIWIN manual brake release device Item with HIWIN Manual Brake Release Device Specification Model name RA610-XXX-GC Input voltage (VAC) Single phase, 100-240 Output voltage (VDC) Power Voltage frequency (Hz) 50/60 Max. rated current (A) Dimension...
-
Page 68: Operation
C23UE004-2109 Operation Name descriptions of the manual brake release device and their functions (refer to Figure 5-2 & Table 5-2). Figure 5-2 the manual brake release device... - Page 69 C23UE004-2109 Table 5-2 the definition of functional keys with manual brake release device Item Description Green-light indicator Power ON/OFF. Three-stage revertible Toggle upward and downward of any switch and the toggle switch robot will release the brake of corresponding axis. When (Note 1) the switch is released to the middle position, the brake will be executed.
-
Page 70: Maintenance And Inspection
C23UE004-2109 6. Maintenance and Inspection This chapter presents the maintenance and periodical inspection procedures to maintain the robot for a reasonable service life. It includes the cover removal and installation, inspection and replacement of the timing belt, lubrication position, the procedures for replacing the battery, and other notes. [Note] The operating time of the robot is defined as 3840 hours per year. - Page 71 (Refer to section 6.2.3) 8. If the bearing or the reducer has been damaged by the rolling surface or the gear tooth surface. Please contact HIWIN directly. 1. The Zero-position of the robot might be rewritten. Please set the Zero-position.
- Page 72 Replace the backup battery. Refer to section 6.2.1 robot. Inspection item E (3years/11520hours) Change the lubrication grease of J1~J3 Please contact HIWIN directly. reducers. Change the cables inside the robot. Please contact HIWIN directly. It is normal that the belt produces debris during ...
- Page 73 C23UE004-2109 Table 6-3 Inspection schedule...
-
Page 74: Maintenance Methods
C23UE004-2109 Maintenance Methods 6.2.1 Backup Batteries Replacement The absolute encoder of the motor is used to record the position of the robot. When the controller power is turned off, the position data of each -axis is preserved by the backup batteries. The batteries are installed when the robot is delivered from the factory. -
Page 75: Timing Belt Replacement
C23UE004-2109 6.2.2 Timing Belt Replacement The timing belt is used in the robot for the driver system of the J5 and J6 -axis. Although the belt tension has been adjusted before the robot delivery, the timing belt will wear depending on the working conditions. The belt tension might be lower than the standard after operating for a long time. - Page 76 C23UE004-2109 Sonic tension meter Figure 6-2 Measure belt tension Table 6-4 The belt specifications Span Robot Type Axis Belt type Width (mm) Tension (N) (mm) RA610-1355、1476、 396-3GT-6 152.5 29~32 1672、1869-GC 396-3GT-6 152.5 29~32 540-5GT-9 188.6 55±10 RA605-1151-GC 540-5GT-9 188.6 55±10 Removing the cover ...
- Page 77 C23UE004-2109 Figure 6-3 Removing the cover Inspection, maintenance and replacement of timing belt in J5-axis. Figure 6-4 shows the structure of J5-axis. Screws for motor flange Belt pulley Belt Tension adjusting screw Belt pulley Figure 6-4 J5-axis structure diagram ...
- Page 78 C23UE004-2109 Adjust J5 -axis timing belt Step1. Loose the two fixing screws on motor flange, so that the motor can be moved. (No need to remove the screws) Step2. Refer to Table 6-4, loosen or tighten the adjusting screw to adjust the tension of the belt. Step3.
-
Page 79: Grease Replacement
C23UE004-2109 Step1. Loosen the two fixing screws on motor flange, so that the motor can be moved. (No need to remove the screws) Step2. Refer to Table 6-4, loosen or tighten the adjusting screw to adjust the tension of the belt. Step3. - Page 80 3Year/ J2 reduction gear VIGOGREASE REO 468 ml 11520Hr J3 reduction gear VIGOGREASE REO 241 ml [Note1]:If the robot is not used for 2 years, replace the grease of J1~J3 axis. [Note2]:Please contact HIWIN directly for the grease replacement method.
-
Page 81: Safety Certification
C23UE004-2109 7. Safety Certification RA610-GC have CE marking and it fulfill related Directive and ISO standards (Table 7-1). Table 7-1 the corresponding directives and ISO standards of RA610-GC series CE Compliance 2006/42/EC Safety of machinery — General principles for design — Risk... - Page 82 C23UE004-2109 8. Robot/Controller Requirements Questionnaire Table 8-1 Requirements questionnaire table Customer Name: Address: Customer Contact Person: Phone No.: Information Department/Title: E-mail: □ Assembly □ Machine Tool □ Polish & Grinding *Note2 □ Electronics □ Material Handling □ Tray Loading Application □...
- Page 83 Model Model □ RA605-________-GC Specification (by HIWIN or Remark: distributor) *Note 1 For palletizing application, need to provide pallet type and space planning *Note 2 For polish & grinding application, need to provide work part or 3D model and photo of...
- Page 84 3. HIWIN website for patented product directory: http://www.hiwin.tw/Products/Products_patents.aspx 4. HIWIN will not sell or export products or processes restricted under the "Foreign Trade Act" or related regulations. Export of restricted products should be approved by proper authorities in accordance with relevant laws and shall not be used to manufacture or develop nuclear, biochemical, missiles or other weapons.
- Page 85 HAIFA, ISRAEL www.hiwin.us www.hiwin.fr www.mega-fabs.com info@hiwin.com info@hiwin.de info@mega-fabs.com HIWIN Srl HIWIN SINGAPORE BRUGHERIO, ITALY SINGAPORE www.hiwin.it www.hiwin.sg info@hiwin.it info@hiwin.sg Copyright © HIWIN Technologies Corp. ©2021 FORM C23UE004-2109 The specifications in this catalog are subject to change without notification. (PRINTED IN TAIWAN)
Need help?
Do you have a question about the RA610-GC and is the answer not in the manual?
Questions and answers